User Authorization
- User Authorization
- Web Authorization
- Authorization by IP and MAC address
- Authorization by IP address
- Authorization by MAC address
User Authorization
General Information
There are several authorization methods that you can find in this subsection.
The user is automatically logged out when inactive (no internet connections) for 15 minutes (except connections via VPN).
Keep in mind, that the operating system itself can also generate traffic (for example Windows telemetry) without user intervention. Because of this, the timeout for the user will be constantly reset and will not be able to function correctly.
You can change the time of automatic logout using the settings Disconnection timeout by going to Users -> Authorization: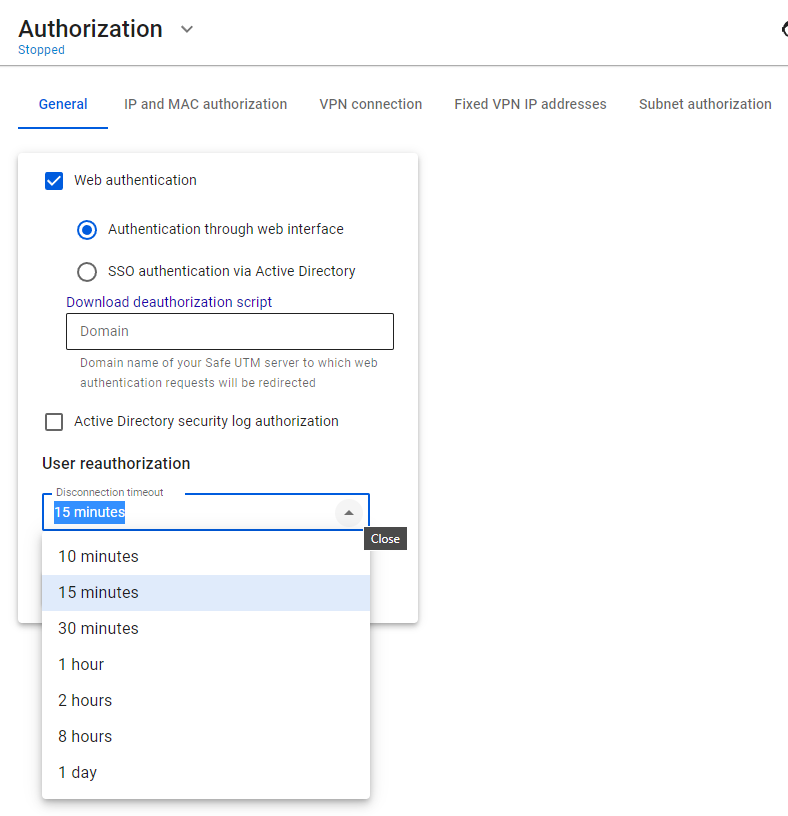
For the new timeout to be applied, you need to reboot SafeUTM.
You can also authenticate users connecting via VPN using IPSec IKEv2, SSTP, L2TP IPSec, PPTP, and PowerShell scripts.
Web Authorization
Supported browsers:
- Google Chrome, version >= 76
- Firefox, version >= 71
- Safari, version >= 13
In this type of authorization, any request from an unauthenticated user sent via a web browser will be redirected to a special authorization page of SafeUTM. After successful authorization, you will be redirected to the specified request.
For this type of authorization, the user must have the IP address of the SafeUTM local network interface specified on the network card as a gateway (chained into a gateway chain) or for direct connections to a proxy. Also, before connecting to the Internet, the DNS resolution of addresses must work, otherwise, the browser request to the example.com address will not be redirected to the gateway and the username and password request will not appear in the browser.
You can check name resolution in Windows using the command: nslookup google.com. The output of this command must contain IP addresses.
To configure authorization via the web interface, go to Users -> Authorization and select Web authentication and Authentication through web Interface, as shown in the screenshot below: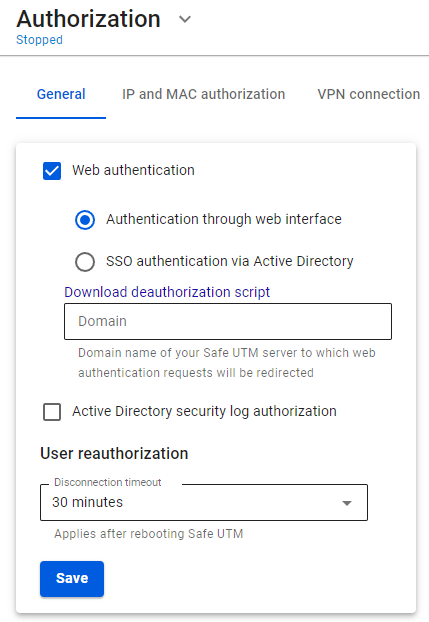
After filling in the Domain name field and saving the settings, a Let’s Encrypt certificate will be issued and the user will be redirected to the authorization window, bypassing the security exception page: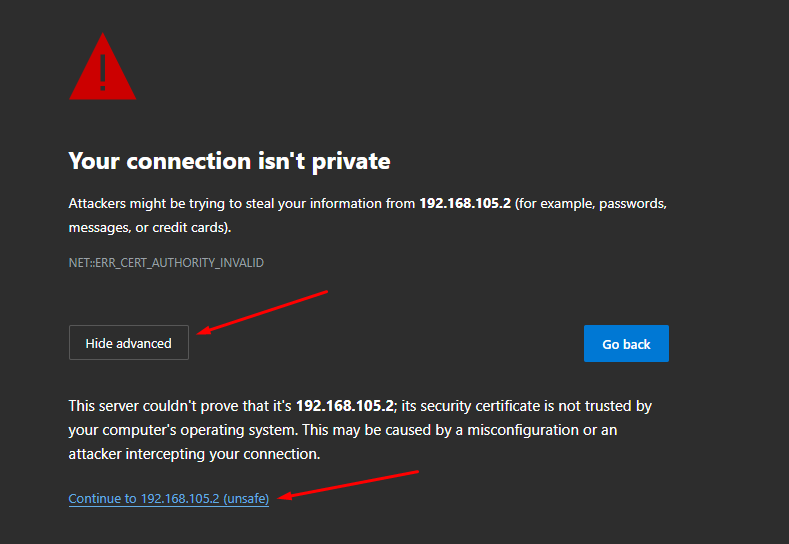
If a certificate for such a domain has already been loaded in the Certificates section, then it will be used and a new certificate will not be issued.
Next, try to access the internet via a web browser. An authorization window should appear where you need to type in the account’s login and password of the user created on SafeUTM. The authorization window can be seen in the screenshot below: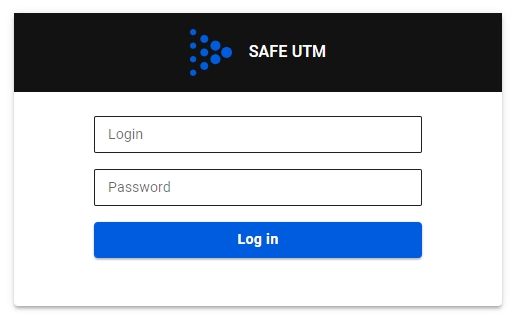 When the user is authenticated via the web, access to the internet will be provided until the authorization is forcibly canceled or terminated due to the user’s inactivity.
When logging into an HTTPS website, the user must confirm the trust of the SafeUTM certificate. Alternatively, the certificate can be added to trusted root certification centers on the device (for example, through domain policies).
It is recommended to specify the IP address of the local SafeUTM as a DNS server on the LAN computers and devices.
You can learn more about the authorization of Active Directory (SSO-authentication) users by clicking on this link.
Authorization by IP and MAC address
General Information
The IP and MAC authorization rules also create a similar binding in the SafeUTM DHCP server. However, if the same IP and MAC addresses will be used in the enabled rules of the DHCP server, then the DHCP server rules will be executed first.
To configure IP and MAC authorization, you must:
- In section Authorization -> IP and MAC authorization click Add.
- Create an IP and MAC authorization binding rule:

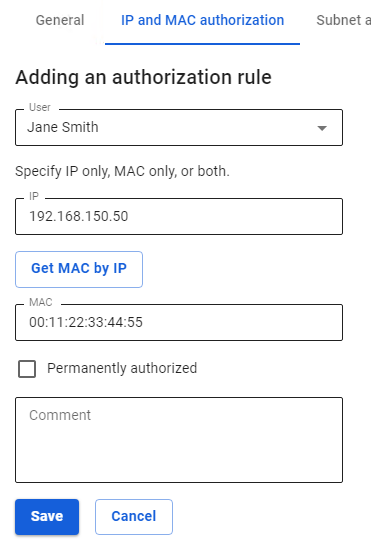
Set the flag Permanently authorized to provide unlimited internet connection even if the user is not active.
The rules created in this section are reflected in the user card.
Find out more about user authorization only by IP address or MAC address in the articles Authorization by IP address and Authorization by MAC address
Authorization by IP address
Configuring Authorization by IP
If the device is a router and SNAT is enabled on it, then when its external IP is authorized in UTM, all users behind this router will gain Internet access.
Users who are behind the router in the local UTM network cannot be authorized using the IP address - MAC address bind, since the router does not handle L2-level traffic.
If authorization by IP address is configured, this IP will not be issued by DHCP.
1. Create a user that will be authorized by IP in SafeUTM or import a user from Active Directory.
2. Go to Users -> Authorization -> IP and MAC authorization.
3. Create a binding rule IP address <--> User, as shown in the screenshot.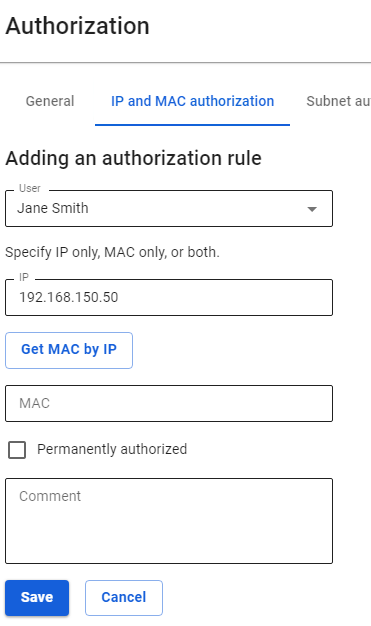
The user's IP address is to be used when creating a session. The computer/device's IP address must match the one specified in the rule.
If the user is network equipment (video cameras, servers, etc.), it is recommended to select Permanently Authorized, in which case the user session will be created after the UTM is turned on, and the network equipment does not need to make a web request. For such equipment, it is recommended to configure a static IP address or DHCP with an IP address binding.
This is required, for example, for resources published via DNAT.
After the user makes a web request, a session with the IP authorization type will automatically be created on UTM in Monitoring -> Authorized Users.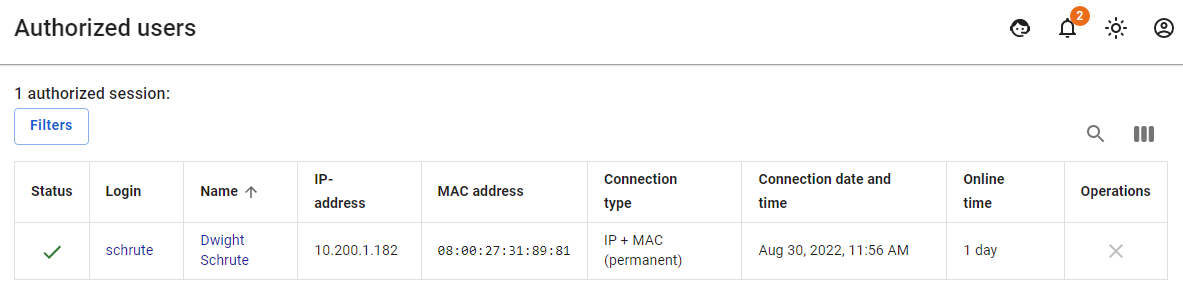
For sessions with an IP authorization type, the MAC address field is not filled in, because, with this type of authorization, there is already an IP address required to create an authorization session.
You can use device search to automatically create users when they try to access the Internet. To do this, see the Netscan article.
Only one device can be authorized under one user by IP address (simultaneously with this type of authorization, two more devices can be authorized under one user by any other authorization method).
Adding Group of Devices with Authorization by IP
You can add users from a range of IP addresses (for example, a network distributed by access points to wireless devices over Wi-Fi). To do this, you need to follow these steps:
- Create a new group in the user tree.
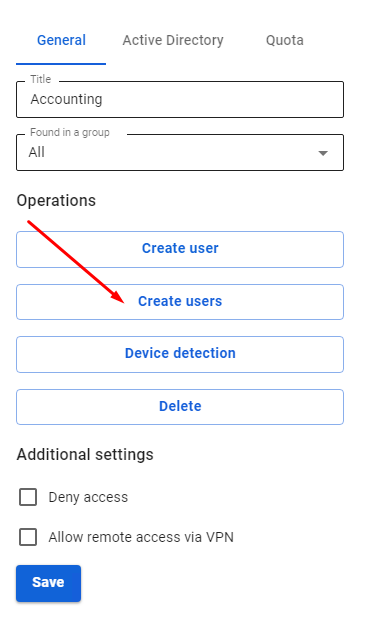
- Select a group from the user tree to which you want to add devices.
- In the General tab, click Create Users.
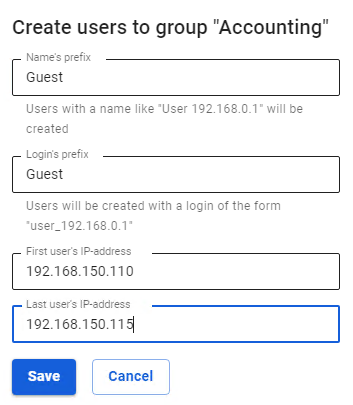
A window opens with the settings of the users created. Fill in the following fields:
- Name Prefix. Users will be created with names of the type "User IP address ".
- Login prefix. Users will be created with logins of the type "user_ip-address ".
- IP addresses of the first and last users.


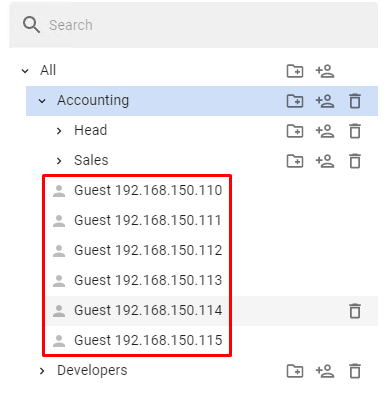
If some IP addresses from the range are already used by other SafeUTM users, they will be skipped during creation, and as a result, fewer users will be created than addresses in the range.
Users will be created with the settings of the created group and an IP address from the range. In addition to the user tree, in the section Users -> Authorization -> IP and MAC authorization for each user, a binding rule IP address <--> User will be created automatically, as shown in the screenshot:
Authorization by MAC address
In order for a device to be authorized on UTM by MAC address, they must both be in the same broadcast domain, and UTM serves as the gateway for the devices.
Users who are behind the router in the local UTM network cannot authorize by MAC address, since the router breaks broadcast domains and does not process L2-level traffic. Such users can authorize only by IP address.
Configuring MAC Authorization
1. You need to find out the MAC address of the device. To do this, in the Windows command prompt, type the command: ipconfig /all | findstr Address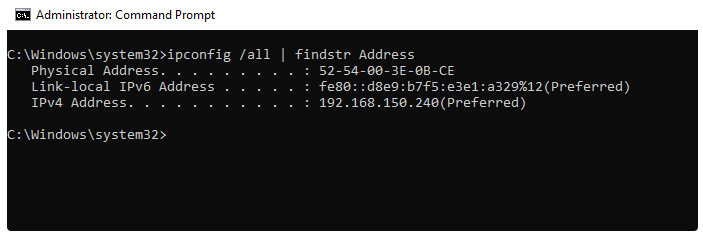
2. Make sure that the computer and UTM are in the same broadcast domain.
To do this, on UTM in Server Management -> Terminal section, enter the command: ip neigh
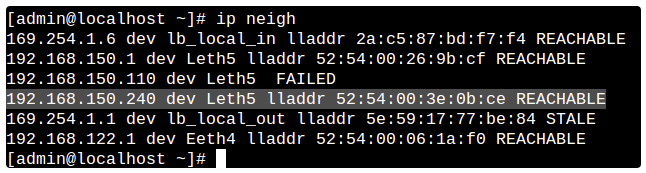
This command outputs the UTM's ARP table, and the presence of an entry with the device MAC address and REACHABLE status indicates L2 availability between UTM and the device.
3. Create a binding rule User <--> MAC address in Users -> Authorization -> IP and MAC authorization:
It is not possible to set up permanent authorization for MAC authorization.
This is technically impossible because an IP address is required to create an authorized session. Therefore, it is recommended to use MAC authorization in combination with a DHCP server.
The result can be viewed in Monitoring -> Authorized users, where a session with the MAC authorization type will be displayed.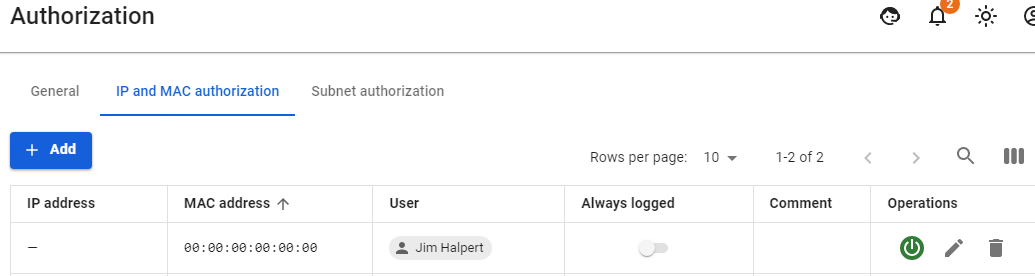
MAC authorization behavior when moving a device between local networks
In organizations, there is often a situation when it is necessary to move between local networks with a laptop and at the same time always stay online. In such cases, authorization by MAC address works perfectly well.
You must have your own DHCP server configured or on SafeUTM. In the distributed credentials, the gateway should be the local SafeUTM interface.
Let's take as an example a situation where a user Dwight Schrute needed to move with a laptop between local networks:
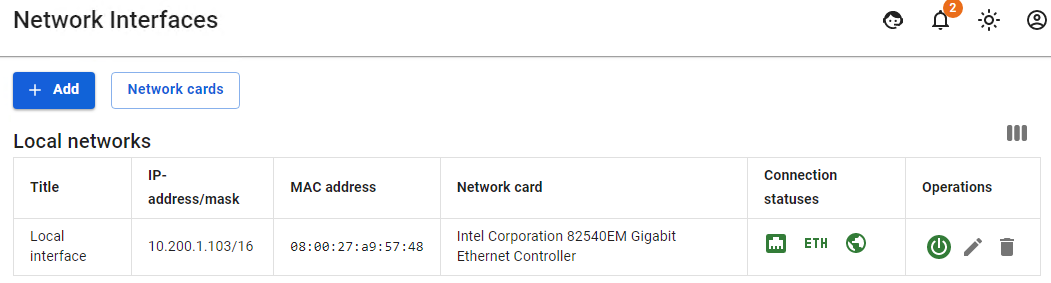
- There are local interfaces configured on UTM as follows:

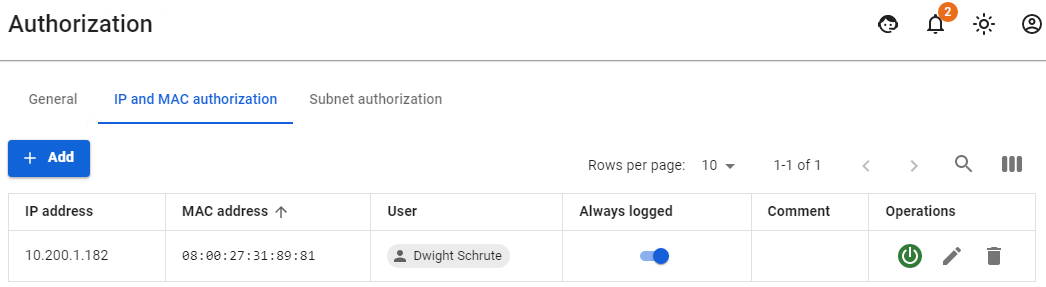
- This user has a MAC address authorization rule configured:

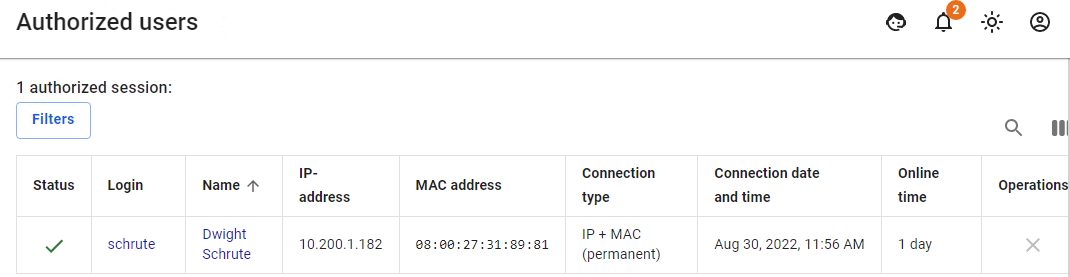
- He also has one active session in the Authorized Users section:

- Then the user moves from one local network to another. He is given other network credentials from the DHCP server, in which UTM is specified by the gateway, and if any activity on the part of the user is detected, the second session with authorization by MAC address will appear.
If the user does not have access and can’t see the second session with authorization by MAC address, then most likely this could have happened due to the fact that the user's network credentials were not updated.
Reset the old network credentials from the DHCP server and get new ones using the command:ipconfig /release && ipconfig /renew.
Configuring MAC Address Authorization for Network Printer and Other Network Devices
Network printers and other network devices that need access to the internet must be authorized on UTM. Such devices can be called static and authorization by MAC address is perfect for them.
In order to authorize a network printer, you need to create a user for this printer manually or through Netscan.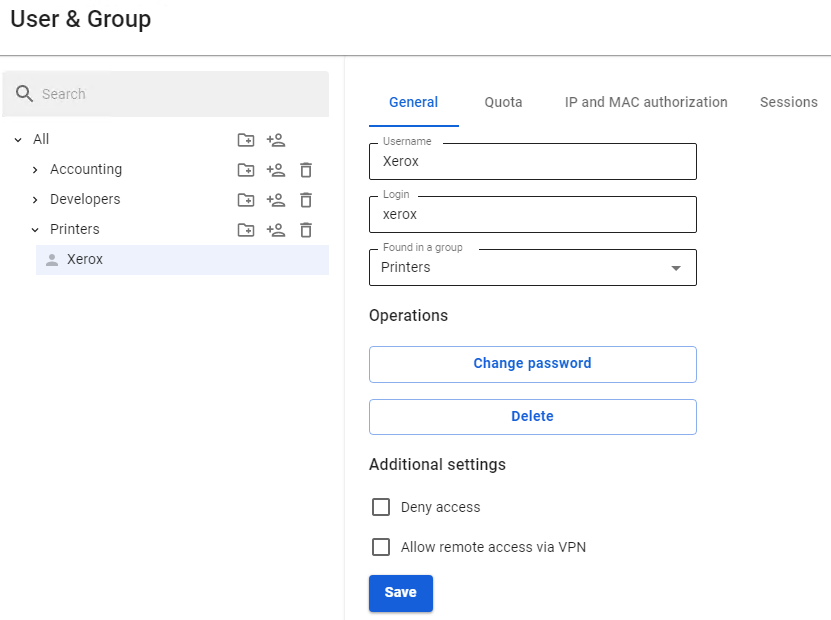
For a network printer, in Users -> Authorization -> IP and MAC authorization you need to create a rule User <--> MAC address.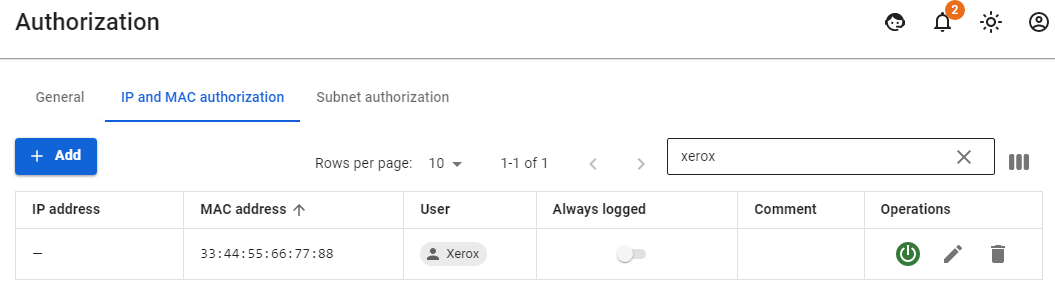
When detecting activity from a network printer or other device, its user will immediately appear in Monitoring -> Authorized users.
In modern phones, there is an option for MAC Randomization. This option will interfere with phone authorization by MAC address. It is recommended to disable this option or use other types of authorization (for example, web authorization)