General Settings
General Settings
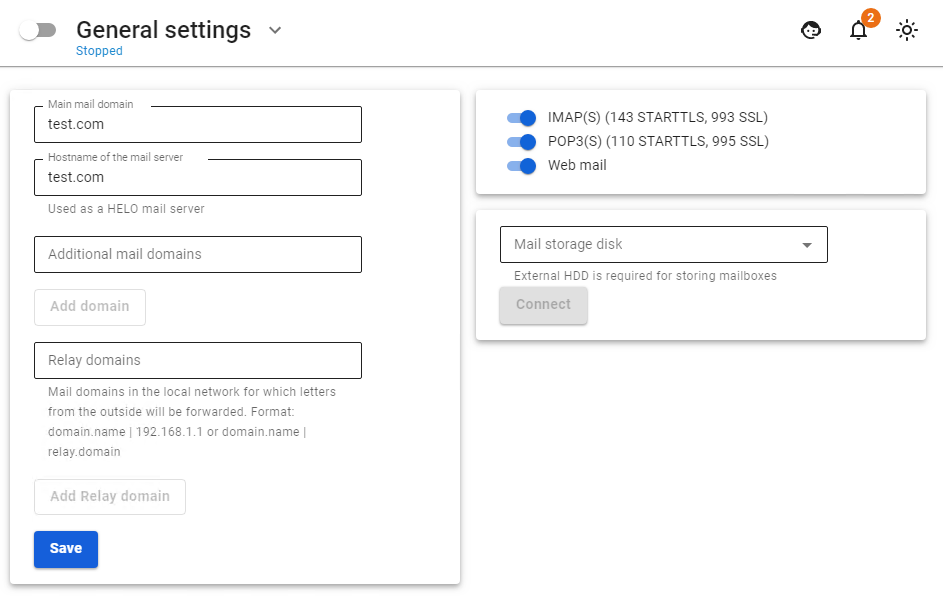
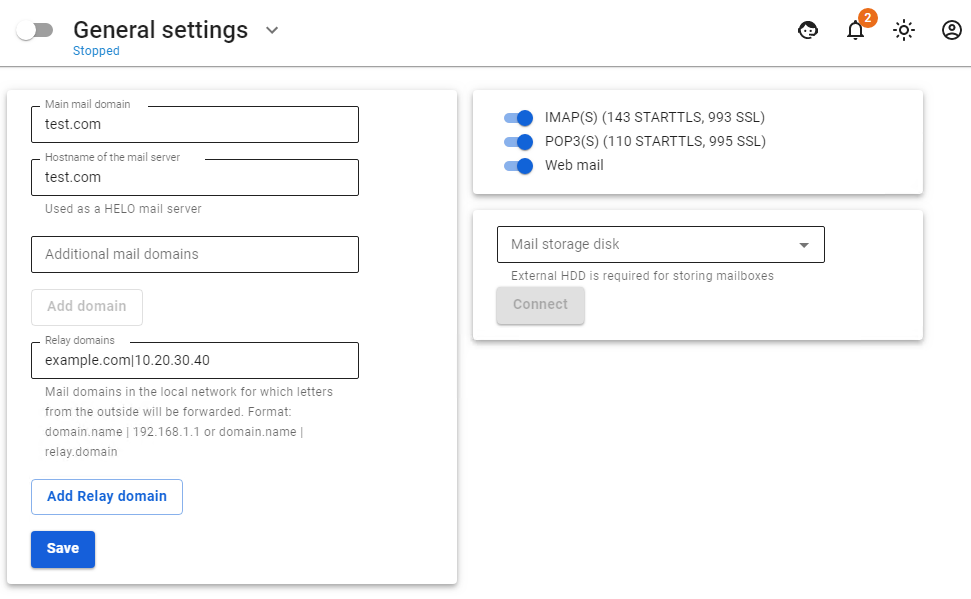
The basic settings section includes many basic parameters necessary for the operation of a mail server on the Internet.
- Main mail domain. Points the server to its mail domain for which it should receive and process emails. All user mailboxes will belong to this domain. On behalf of this domain, you will correspond with correspondents.
- Hostname of the mail server. As a rule, it matches the MX record for your domain. This name must be resolved from the Internet to an external UTM IP address. It is used by the mail server in the dialog when transporting mail between other mail servers as a unique identifier. It is necessary for the correct operation of the mail server on the Internet.
- Additional mail domains. Additional domains that the mail server will consider it's own. Correspondence sent from mailboxes in these mail domains will also be processed by the server, provided that MX records are installed correctly.
- Relay domains. Mail domains in the local network for which emails will be forwarded from the outside.
- Mail storage disk. If you use the SafeUTM mail server as a full-fledged server with mail storage, then it is mandatory to store mail on an additional HDD/SSD disk. Only SATA/SAS drives are supported. Before connecting the disk, fill in the fields Main mail domain and Hostname of the mail server, and enable mail.
- If you have connected a disk, but it is not displayed, please contact technical support: by phone at +1 (800) 820-25-30 (US), +1 (571) 421-29-90 (outside the US), via chat inside the UTM web interface, or by mail support@safedns.com.
- IMAP(S) (143 STARTTLS, 993 SSL). Enabling work with server mailboxes via IMAP protocol (with STARTTLS encryption) from the local network and the Internet.
- POP3(S) (110 STARTTLS, 995 SSL). Enabling work with server mailboxes via POP3 protocol (with STARTTLS encryption) from the local network and the Internet.
- Webmail. Enabling the web interface of the mail client to access mail on the server from the local network.
SSL Certificate for Mail Domain
After saving the settings of the main mail domain and the hostname of the mail server, SafeUTM creates a local certificate signed by the root (self-signed) certificate. Simultaneously with the creation of a local certificate, a request is sent to issue a Let's Encrypt certificate.
- If the Let's Encrypt certificate has been successfully issued, it will replace the local certificate.
- If the Let's Encrypt certificate issue fails, then the local certificate will be used.
Work with certificates is carried out in the section Services -> TLS Certificates.
If you want to replace an automatically issued certificate with your own, then when uploading your own certificate chain, the CN (Common name) of the last certificate must match the domain for which the certificate is being downloaded.
To upload your certificate to the server, you can use the instructions.
Webmail
Configuring the mail web interface to work on the local and external interface of SafeUTM.
1. In order for webmail to work on the local interface, you need to activate the Webmail setting in Mail Relay -> General settings.
2. To work on the external interface, you need to create a rule in the section Services -> Reverse proxy:
Example of a rule for the domain name and IP address access: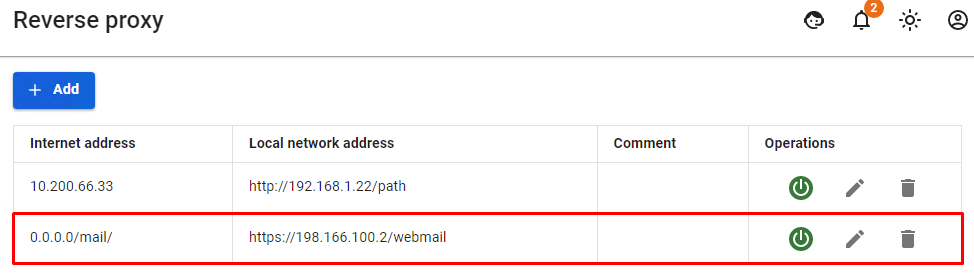
After creating a rule from the local network in the browser, type this in the browser: https:// x.x.x.x:8443/webmail/, where x.x.x.x is the local interface address.
From the Internet, type in the browser: https://[domain name]:8443/webmail/. For example: https://test.com:8443/webmail/
A less prioritized alternative option: from the Internet, type in the browser: https://x.x.x.x/webmail/, where x.x.x.x is the external interface address.
For example: https://66.77.88.99/webmail/
You must use HTTPS to connect.
- In the mailbox login form that opens, specify the username from the user account as the login.
- The password for the user account is always specified as the password. It is impossible to set up a separate password for mail.

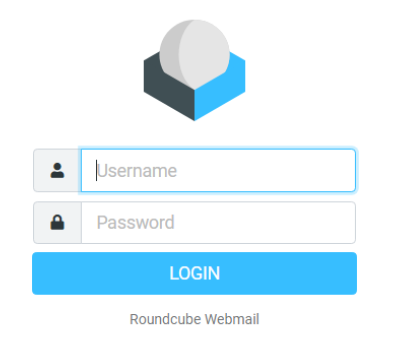
Upon successful login, the web interface of the user's mailbox will open in the browser.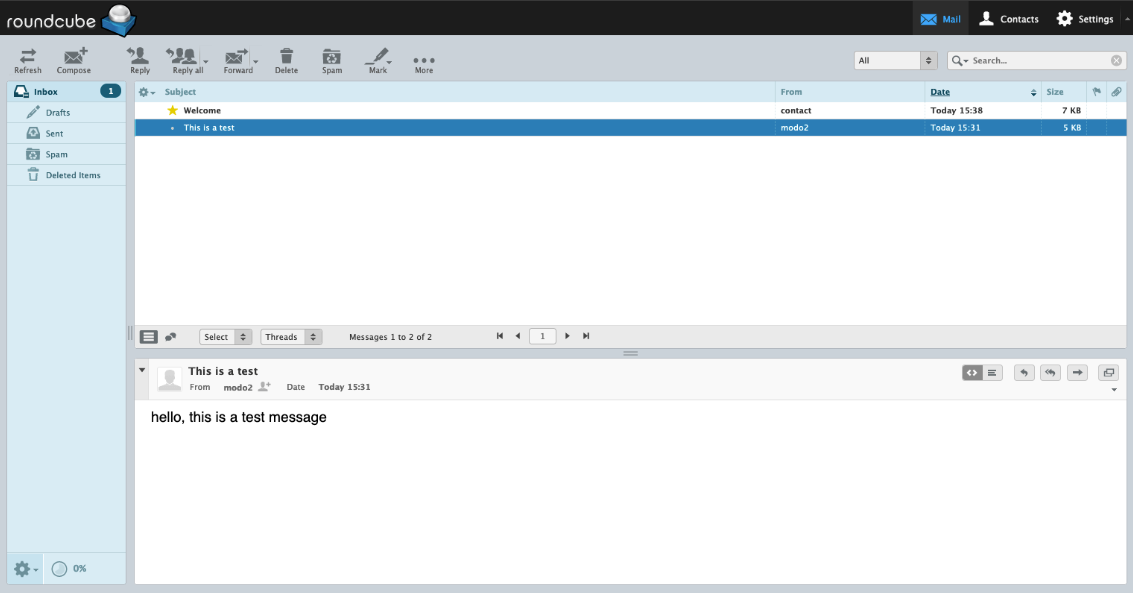
The web interface of the embedded mail client works with the mail server via IMAP protocol and has the following capabilities:
- Create and send emails. Multiple attachments are supported.
- View, delete, and move emails. Manage IMAP folders of the mailbox.
- A personal (for a specific mailbox) address book that works only within the framework of the web application.
- The address book supports the VCARD contact format and can be exported or saved on your computer in this format.
- A calendar with the ability to create events and notify employees about them by mail.
- Colored message labels, as is customary in Thunderbird mail client. They are assigned keys from 1 to 5. Changes are saved on the server so that the labels are visible in another mail client.
- Flexible advanced search for all mailbox emails. Located in the More... section of the drawer toolbar.
Setting up Mail Relay
If SafeUTM has an external IP address, a domain is registered to it, and the necessary records are configured with the registrar and provider, but you want another server to handle the sending and delivery of mail (for example, a pre-configured Exchange server in LAN), then SafeUTM can relay all incoming mail to this machine.
Before setting up the mail relay, make sure that the mail server is enabled on SafeUTM. To set up a mail relay, add an entry of this type to the Relay domains field: mydomain.com|10.20.30.40, where:
mydomain.comis your mail domain assigned to a public SafeUTM address on the Internet.10.20.30.40is the address of your mail server in LAN.
When setting up a mail relay on SafeUTM, it is essential that the main SafeUTM mail domain differs from the Relay domain. For this, in the Main mail domain field in the mail server settings, you need to register a fictional domain that does not match the registered one. This way you can specify multiple Relay domains for several different servers in LAN. All mail domains must be associated with the external address of the SafeUTM server (A and MX records in the DNS zone).
With this scheme, SafeUTM will allow the mail to pass through it directly to the mail server on the local network. Along the way, emails can be checked for spam. For this, enable the appropriate services in the SafeUTM web interface.
SafeUTM will accept mail addressed only to the specified Relay domain. Any other mail will be rejected by the server, so the possibility of receiving an open mail relay during setup is excluded.