---
Please note that settings take 5-7 minutes to apply. Stats and filtering status update every 10 minutes.
--- #### Windows Take a look at the video guide.To check via IPv6 (if it was set up), use the command **nslookup -q=txt black.safedns.com 2001:67c:2778::3939**
Correct results should show your external IP address ("ip"), policy ID ("p"), and also SafeDNS Agent ID ("t") in case it is installed. If you see the results similar to *screenshot 01*, it means that the filtering is active. If the "p":0, check if the IP address in the Dashboard > Settings > Devices is added correctly. [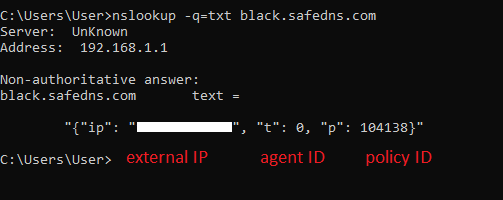](https://docs.safedns.com/uploads/images/gallery/2022-08/dT9b1nVAHAz3ZpB5-1-how-to-check-the-filtering-status.png) If you see the results similar to *screenshot 02,* it means that the filtering is not configured, and the primary and secondary DNS servers on your device or router are set up incorrectly. Please check your DNS settings. [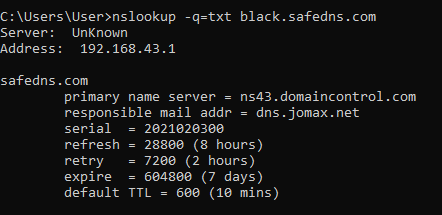](https://docs.safedns.com/uploads/images/gallery/2022-08/xjBLsU0ve7mYpSjM-2-how-to-check-the-filtering-status.png) --- #### Linux 1. Navigate to "**Menu**" 2. Run the "**Terminal**" app 3. Enter and run the command **host -t txt black.safedns.com**To check via IPv6 (if it was set up), use the command **nslookup -q=txt black.safedns.com 2001:67c:2778::3939**
Correct results should show your external IP address ("ip"), policy ID ("p"), and also SafeDNS Agent ID ("t") in case it is installed. If you see the results similar to *screenshot 03*, it means that the filtering is active. If the "p":0, check if the IP address in the Dashboard > Settings > Devices is added correctly. [](https://docs.safedns.com/uploads/images/gallery/2022-08/TId5o6sQhkWTHEdy-3-how-to-check-the-filtering-status.png) If you see the results similar to *screenshot 04,* it means that the filtering is not configured, and the primary and secondary DNS servers on your device or router are set up incorrectly. Please check your DNS settings. [](https://docs.safedns.com/uploads/images/gallery/2022-08/6bv6qLzXjIjNBhQ8-4-how-to-check-the-filtering-status.png) --- #### Mac 1. Launch "**Spotlight"** with ⌘ + SPACE or by clicking on the magnifying glass in your menu 2. Search for and launch the "**Terminal"** app 3. Enter and run the command **host -t txt black.safedns.com**To check via IPv6 (if it was set up), use the command **nslookup -q=txt black.safedns.com 2001:67c:2778::3939**
Correct results should show your external IP address ("ip"), policy ID ("p"), and also SafeDNS Agent ID ("t") in case it is installed. If you see the results similar to *screenshot 05*, it means that the filtering is active. If the "p":0, check if the IP address in the Dashboard > Settings > Devices is added correctly. [](https://docs.safedns.com/uploads/images/gallery/2022-08/D3DaWl43vmPREgpn-5-how-to-check-the-filtering-status.png) If you see the results similar to *screenshot 06,* it means that the filtering is not configured, and the primary and secondary DNS servers on your device or router are set up incorrectly. Please check your DNS settings.Path to the Developer Tools might be different in various browser
Navigate to the Network Tab. The list below shows all the items from the page that were loaded or blocked. The list will be empty if the Network tab is opened after the page is loaded. In this case, refresh the page. The HTTP status can have different values, including: - **200 (OK)** — the access was not blocked and the item has been loaded. - **451** — Unavailable for Legal Reasons. - **Blocked icon** — the access was forbidden and the item had not been loaded. Using these statuses, you can identify the blocked domain. --- #### Example: [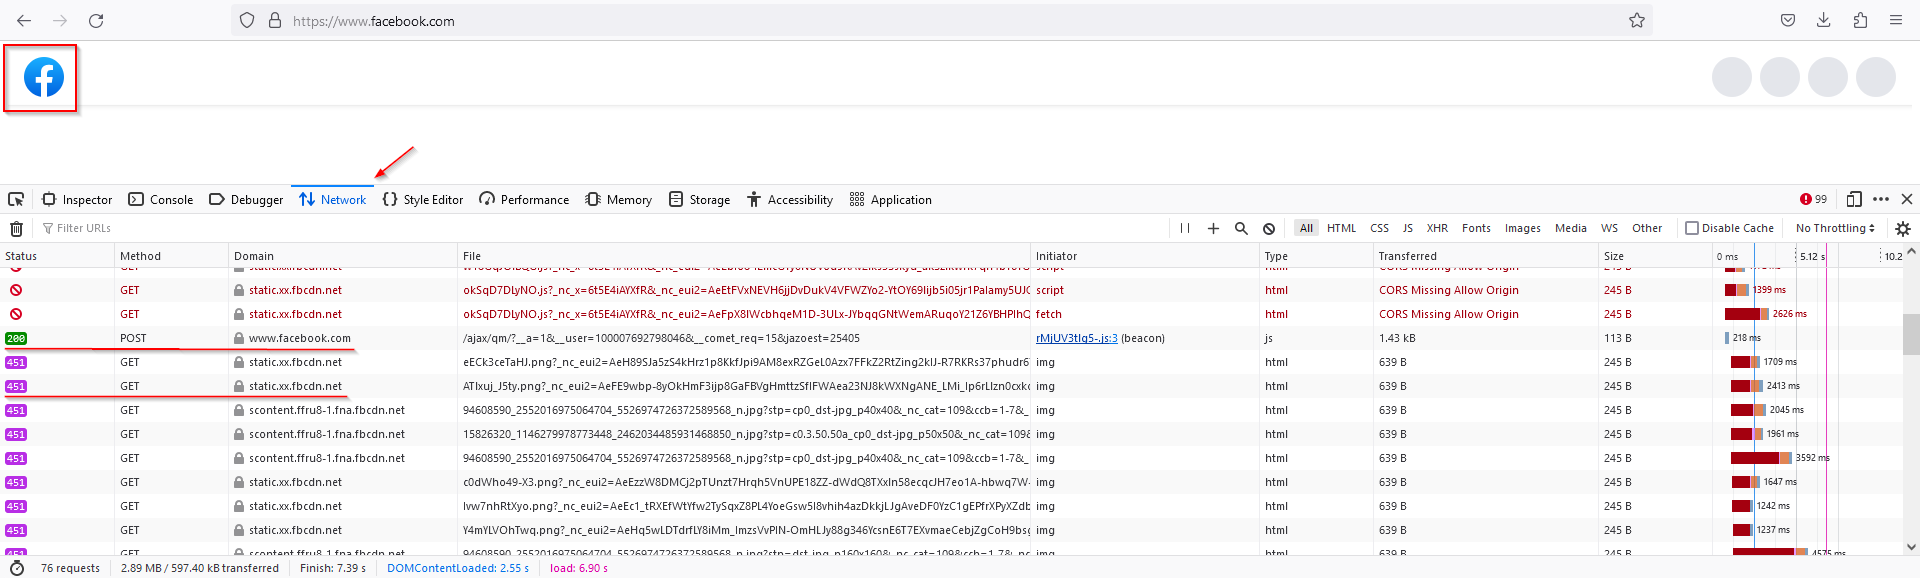](https://docs.safedns.com/uploads/images/gallery/2023-09/OhWevU9daiTCARXx-fbcdn-net-blocked.png) The access to **facebook.com** is not blocked, and the Facebook logo has been loaded. However, all other data on the page was not loaded, because it is located on the blocked **fbcdn.net** domain. To unblock this domain, please check its category here: [https://www.safedns.com/check/](https://www.safedns.com/check/) After that, navigate to the SafeDNS Dashboard and unblock that category. If you want to keep the category blocked, you can add this domain to Allowlist instead. # How to check domain categoryBy default, DD Client checks the IP every 15 minutes. If the IP is changed, it will be updated in the SafeDNS Dashboard.
Please note that settings take 5-7 minutes to apply. Stats and filtering status update every 10 minutes.
# DNS-over-TLS using Stubby The goal of the DNS-over-TLS protocol is to increase user privacy and security by preventing eavesdropping and manipulation of DNS data via man-in-the-middle attacks. With DoT, the content and response of the DNS query are encrypted. Using this feature the SafeDNS service can identify users by their public IP address only. This feature does not work with the SafeDNS Agent or the SafeDNS VPN solution. Before you start, please open your **SafeDNS** **Dashboard > Settings > Devices**. Enter your public IP address in the "**Enter an IP address or DynDNS**" field and click the "**Add**" button. [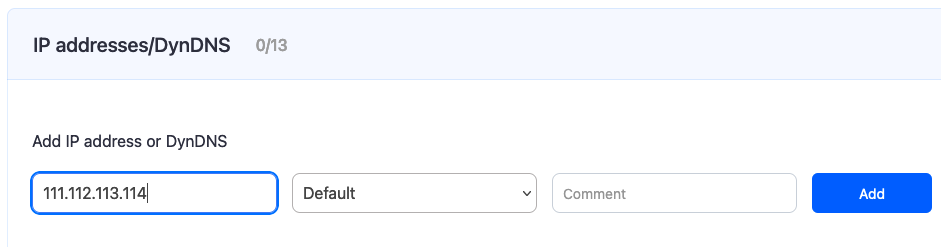](https://docs.safedns.com/uploads/images/gallery/2024-08/3htrW0L4jUUOONjk-dns-over-tls-setup.png) --- #### Windows 10 1\. [Download](https://dnsprivacy.org/wiki/display/DP/Windows+installer+for+Stubby) and install a Stubby .msi package. 2\. Run the Windows Command Prompt as administrator: [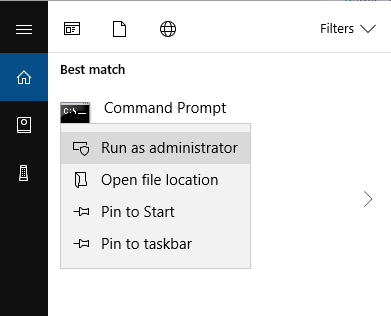](https://docs.safedns.com/uploads/images/gallery/2022-08/71VLBAOxyleQiwmq-2-dns-over-tls-setup-guide.png) 3\. Go to the Stubby directory using the Command Prompt and open **stubby.yml** configuration file with Notepad: [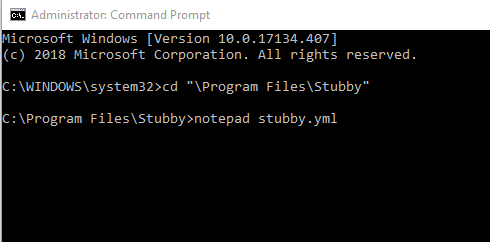](https://docs.safedns.com/uploads/images/gallery/2022-08/iEbdzMlvrh6wN6ss-3-dns-over-tls-setup-guide.png) 4\. Set settings following the example below:resolution\_type: GETDNS\_RESOLUTION\_STUB dns\_transport\_list: GETDNS\_TRANSPORT\_TLS tls\_authentication: GETDNS\_AUTHENTICATION\_NONE tls\_query\_padding\_blocksize: 128 edns\_client\_subnet\_private: 0 idle\_timeout: 100000 listen\_addresses: - 127.0.0.1@53 round\_robin\_upstreams: 1 upstream\_recursive\_servers: - address\_data: 195.46.39.41 tls\_auth\_name: "dns-s.safedns.com" tls\_pubkey\_pinset: - digest: "sha256" value: kbv1ODr8gP7FV9/h2lp5t3sP4TdYZEwqUYj0mk0IBzg=
5\. Run the following command to replace the default DNS server with a local Stubby:PowerShell -ExecutionPolicy bypass -file "**C:\\Program Files\\Stubby\\stubby\_setdns\_windows.ps1**"
6\. Run the **stubby.bat** file [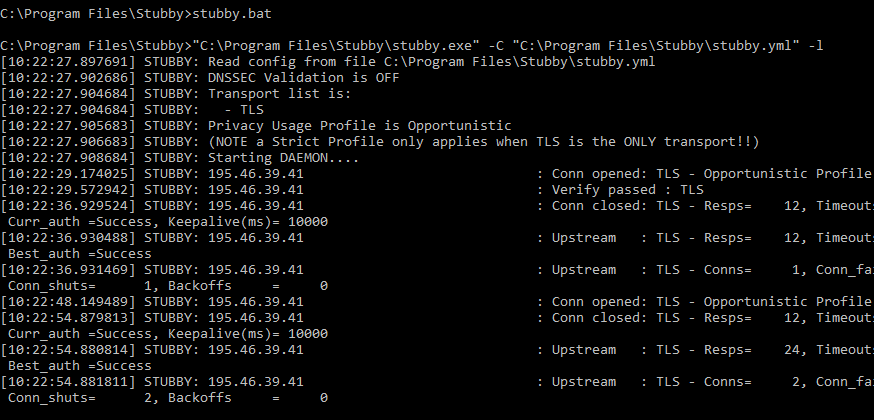](https://docs.safedns.com/uploads/images/gallery/2022-08/XsSPiGAE7UCI4iFl-4-dns-over-tls-setup-guide.png) 7\. Check the filtering. --- #### Linux (Ubuntu) 1\. Install the Stubby package from a repository:$ sudo apt install stubby
2\. Set the configuration file **/etc/stubby/stubby.yml** as follows:resolution\_type: GETDNS\_RESOLUTION\_STUB dns\_transport\_list: - GETDNS\_TRANSPORT\_TLS tls\_authentication: GETDNS\_AUTHENTICATION\_NONE tls\_query\_padding\_blocksize: 128 edns\_client\_subnet\_private : 0 idle\_timeout: 100000 listen\_addresses: - 127.0.0.2@53 round\_robin\_upstreams: 1 upstream\_recursive\_servers: - address\_data: 195.46.39.41 tls\_auth\_name: "dns-s.safedns.com" tls\_pubkey\_pinset: - digest: "sha256" value: kbv1ODr8gP7FV9/h2lp5t3sP4TdYZEwqUYj0mk0IBzg=
3\. Change DNS in **/etc/resolv.conf** file to **127.0.0.2**:nameserver 127.0.0.2
4\. Start the filtering serviceservice stubby start
5\. Check the filtering. --- #### MacOS 1\. [Download](https://dnsprivacy.org/dns_privacy_daemon_-_stubby/installation/macos_homebrew/) and install the Stubby Manager package. If you get a security alert, click on "**Open Anyway**" in the security settings. [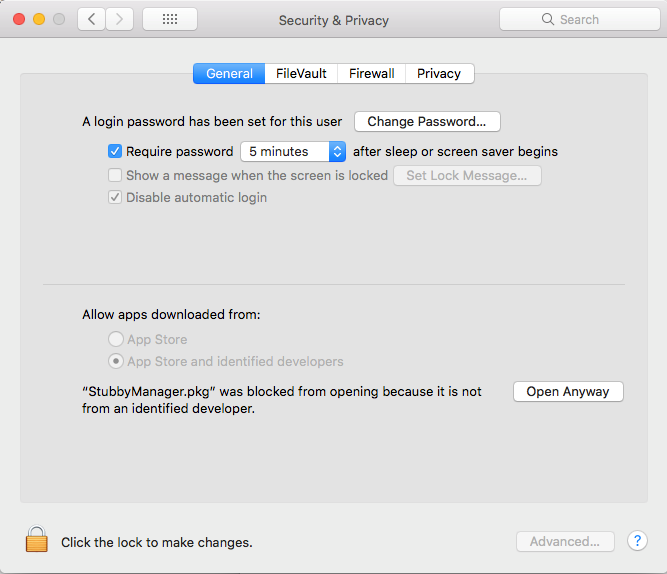](https://docs.safedns.com/uploads/images/gallery/2022-08/bXud5Q8gZWwB4tfL-5-dns-over-tls-setup-guide.png) 2\. Launch a Stubby Manager app after installation and click the "**Advanced**" button. [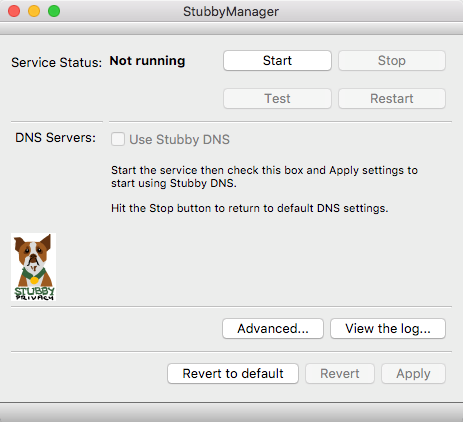](https://docs.safedns.com/uploads/images/gallery/2022-08/hTyr6BBhVgeFD6VA-6-dns-over-tls-setup-guide.png) 3\. Set the configuration file as follows:resolution\_type: GETDNS\_RESOLUTION\_STUB dns\_transport\_list: - GETDNS\_TRANSPORT\_TLS tls\_authentication: GETDNS\_AUTHENTICATION\_NONE tls\_query\_padding\_blocksize: 128 edns\_client\_subnet\_private : 0 idle\_timeout: 100000 listen\_addresses: - 127.0.0.1@53 round\_robin\_upstreams: 1 upstream\_recursive\_servers: - address\_data: 195.46.39.41 tls\_auth\_name: "dns-s.safedns.com" tls\_pubkey\_pinset: - digest: "sha256" value: kbv1ODr8gP7FV9/h2lp5t3sP4TdYZEwqUYj0mk0IBzg=
4\. Apply the settings and click **"Start"**. 5\. Open **"Network Properties"** and set **127.0.0.1** as the DNS server. [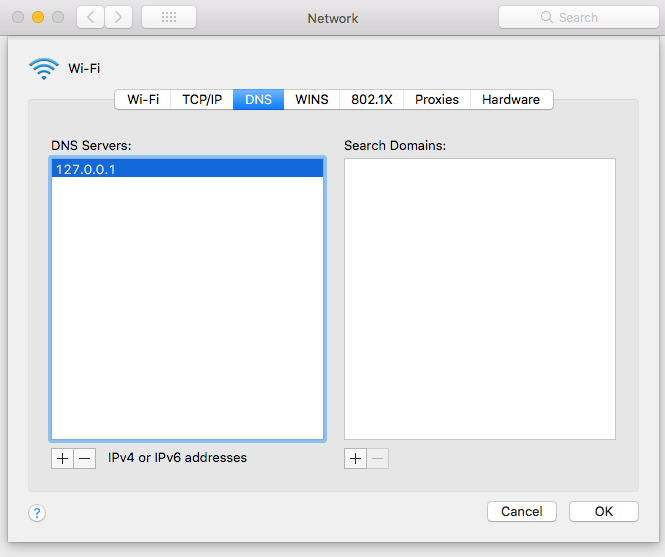](https://docs.safedns.com/uploads/images/gallery/2022-08/aEqeug0rbnRICY5L-7-dns-over-tls-setup-guide.png) 6\. Check the filtering. # SafeDNS Root Certificate For HTTPS Pages #### About the certificate **Root certificate** or **SSL certificate** is the main part of the website security. SSL certificate is required for the correct operation of sites with a secure (HTTPS) connection. If you have issues with displaying the SafeDNS block page (your internet browser shows a message "Unable to access the site"), you need to download a SafeDNS certificate and configure it to use in your browser.Please note that the certificate should be installed on each end device where you want HTTPS pages to display correctly.
[⤵Download **SafeDNS** certificate](https://safedns.com/downloads/safedns_root.crt) If the browser starts installing the certificate after you click on the button, cancel it, right-click on the button and choose "**Save as…**"For Mozilla Firefox, see the next section.
1\. Open the **Start menu**, type in **'Control Panel'**, and open the suggested app. [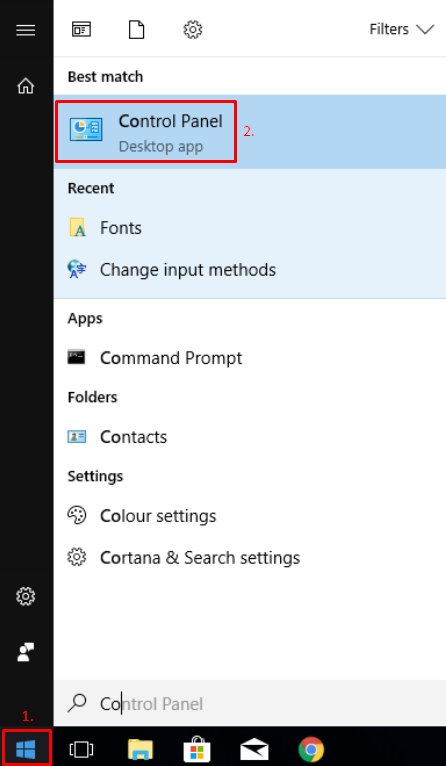](https://docs.safedns.com/uploads/images/gallery/2022-08/EH47xzYL5JOpIgla-1-safedns-root-certificate-for-https-pages.png) 2\. Open **Internet Options**. [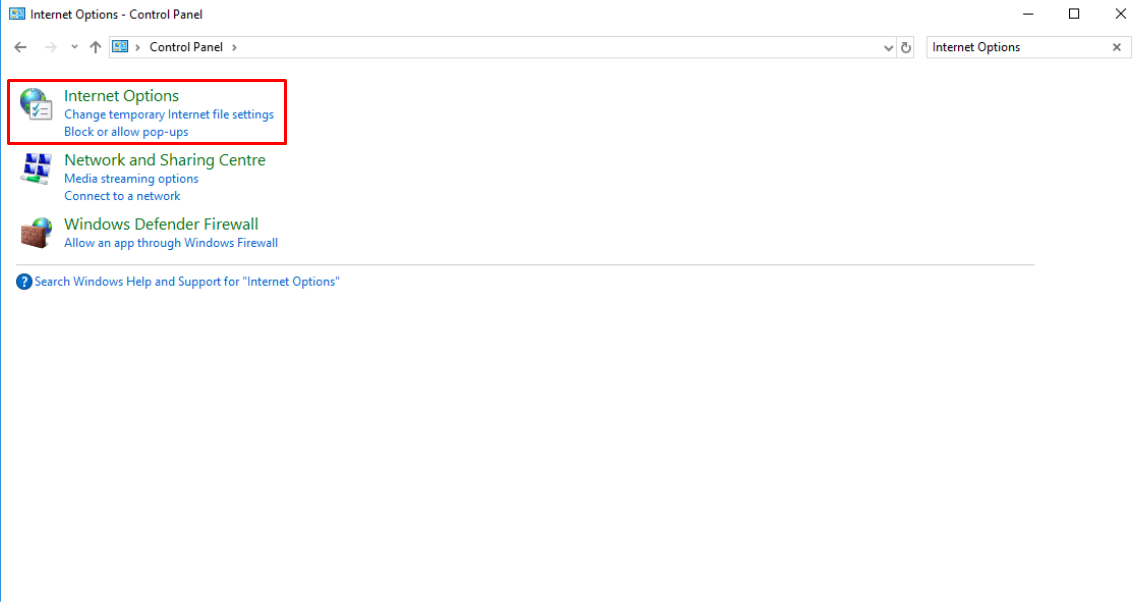](https://docs.safedns.com/uploads/images/gallery/2022-08/EeuikQdFFRGUBNxt-2-safedns-root-certificate-for-https-pages.png) 3\. Navigate to the **Content** tab and click **Certificates**. [](https://docs.safedns.com/uploads/images/gallery/2022-08/BDO7gLR2MCE5Niuq-3-safedns-root-certificate-for-https-pages.png) 4\. Navigate to the **Trusted** **Root** **Certification** **Authorities** tab, and click **Import**. [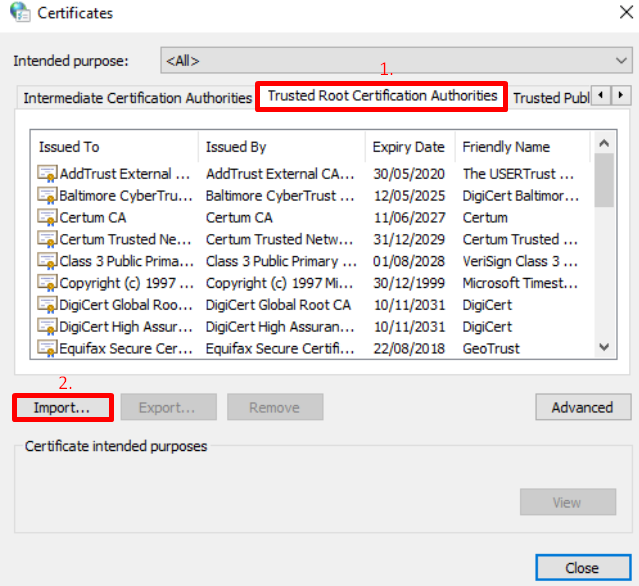](https://docs.safedns.com/uploads/images/gallery/2022-08/cSnSGno6TwpbWWQl-4-safedns-root-certificate-for-https-pages.png) 5\. Click **Next** in **Certificate Import Wizard**. [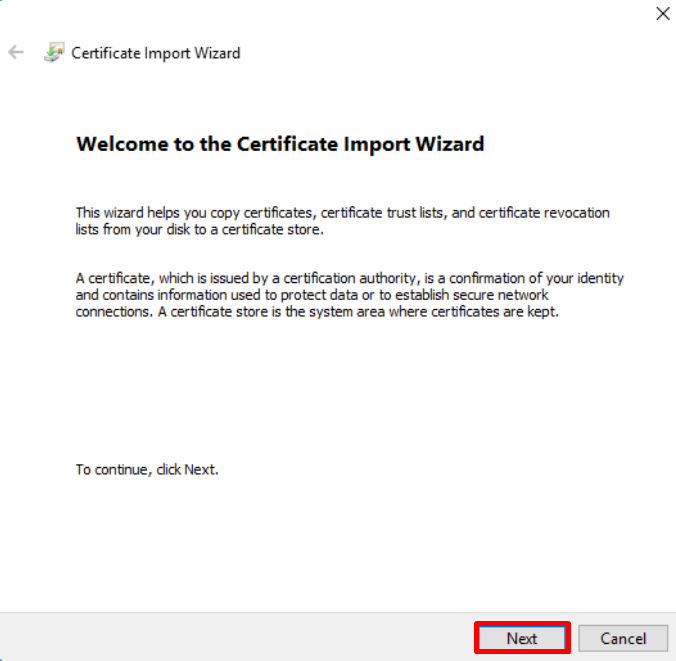](https://docs.safedns.com/uploads/images/gallery/2022-08/LEcB73AGmz3HVE7O-5-safedns-root-certificate-for-https-pages.png) 6\. Click **Browse** and select a downloaded SafeDNS certificate file. [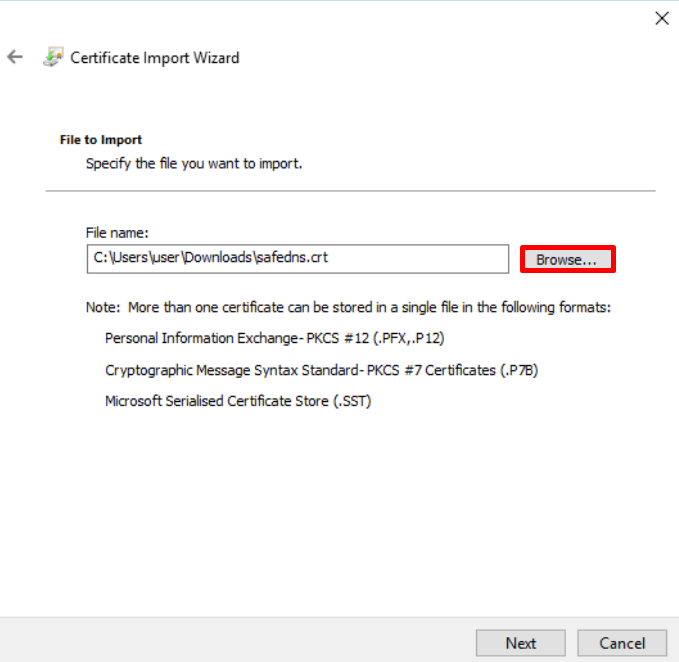](https://docs.safedns.com/uploads/images/gallery/2022-08/cidG7g4x8eQG6LgC-6-safedns-root-certificate-for-https-pages.png) 7\. Make sure that the certificate is placed in the store **Trusted Root Certification Authorities**. [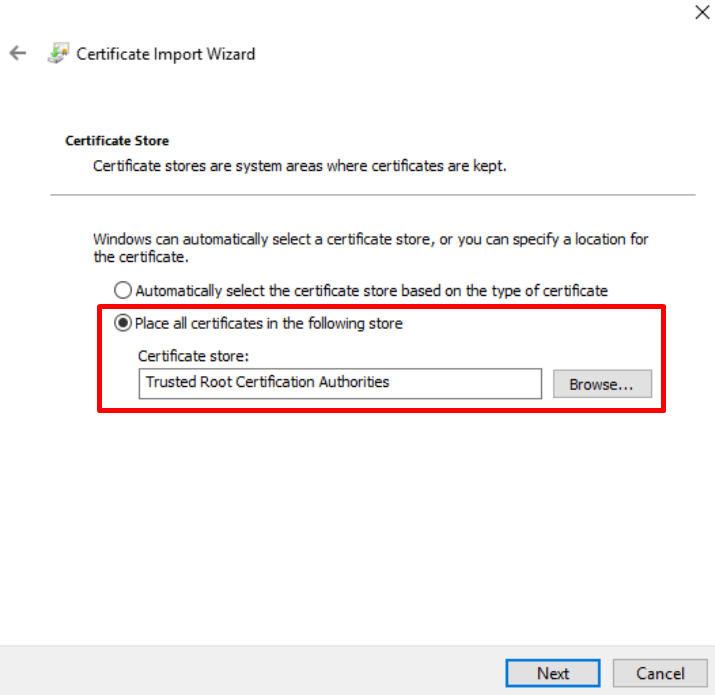](https://docs.safedns.com/uploads/images/gallery/2022-08/GnrtMcCEx2zjraqJ-7-safedns-root-certificate-for-https-pages.png) 8\. Close the window by clicking on **Finish**. [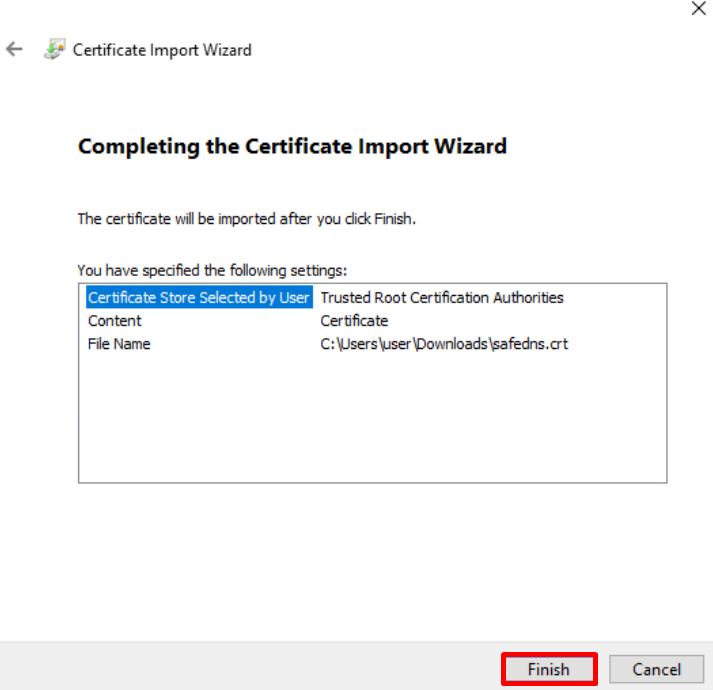](https://docs.safedns.com/uploads/images/gallery/2022-08/DEvvPKW3YTNfjhtR-8-safedns-root-certificate-for-https-pages.png) 9\. Click on **Yes** when **Security Warning** appears. [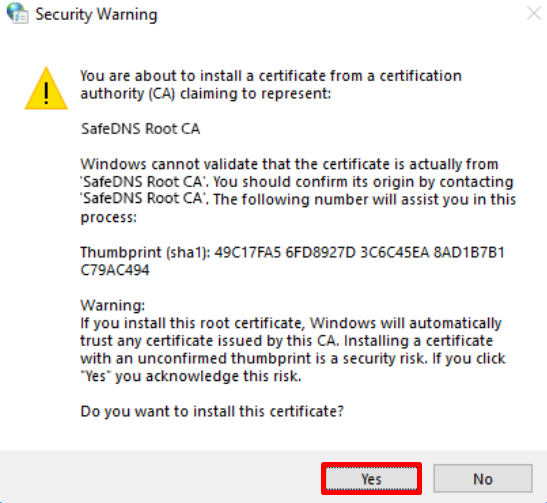](https://docs.safedns.com/uploads/images/gallery/2022-08/Z3TSri5lEA6R3rQk-9-safedns-root-certificate-for-https-pages.png) 10\. Close Certificate Import Wizard by clicking **OK**. [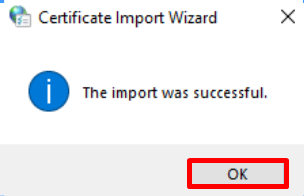](https://docs.safedns.com/uploads/images/gallery/2022-08/92n9pCZg3MAI0mbv-10-safedns-root-certificate-for-https-pages.png)Menu items and the system interface might be different on your device.
1\. Open the Settings app. 2\. Start typing "certificate" in the search box. 3\. Choose the option related to the certificate installation, a new window will open. 4\. Choose "Install certificates from storage". [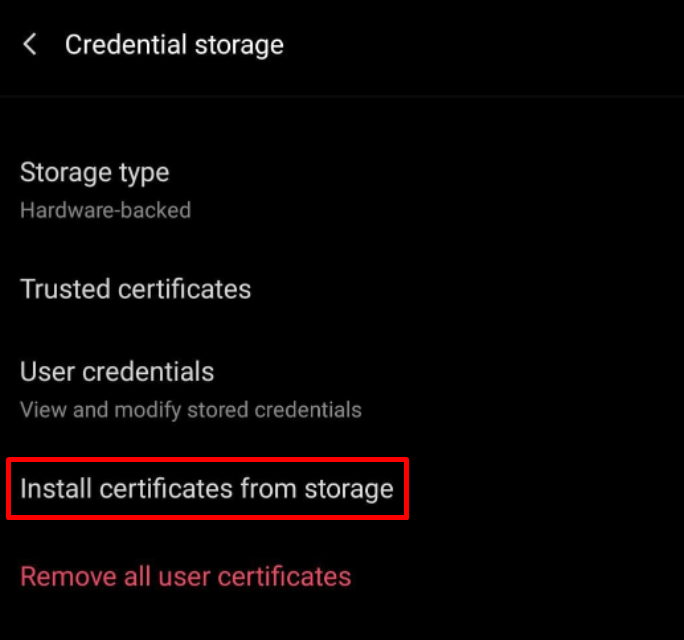](https://docs.safedns.com/uploads/images/gallery/2022-08/xfQCQKLJKrdLKsEh-22-safedns-root-certificate-for-https-pages.png) 5\. Press "CA certificate". [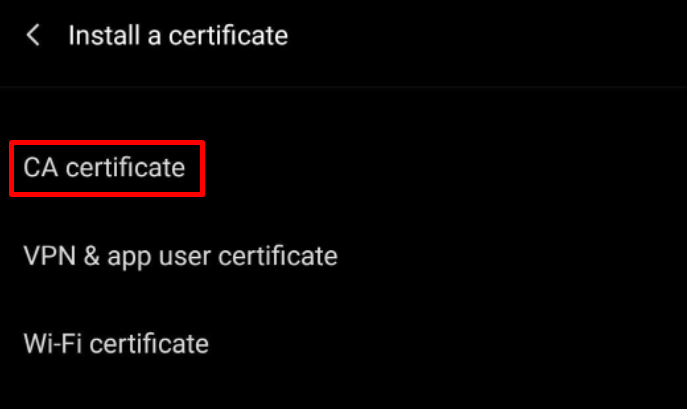](https://docs.safedns.com/uploads/images/gallery/2022-08/X0PjN0UiGjEJcoln-23-safedns-root-certificate-for-https-pages.png) 6\. Follow the on-screen instructions to install the certificate. --- #### Chromebooks and Google Workspace In case the .crt certificate is not accepted, export it as a .pem file and import it into Workspace Admin.If you don't see the block page on HTTPS pages after the certificate installation, or there is a browser warning about an invalid certificate, please, try reinstalling the certificate.
If the issue remains, [⤵contact our technical support team](mailto:support@safedns.com) # How to enable two-factor authentication (2FA) #### Enabling 2FA To enable two-factor authentication, do the following: 1\. Navigate to [https://www.safedns.com/dashboard/account/](https://www.safedns.com/dashboard/account/) 2\. Scroll down to the **Two-Factor Authentication (2FA)** panel [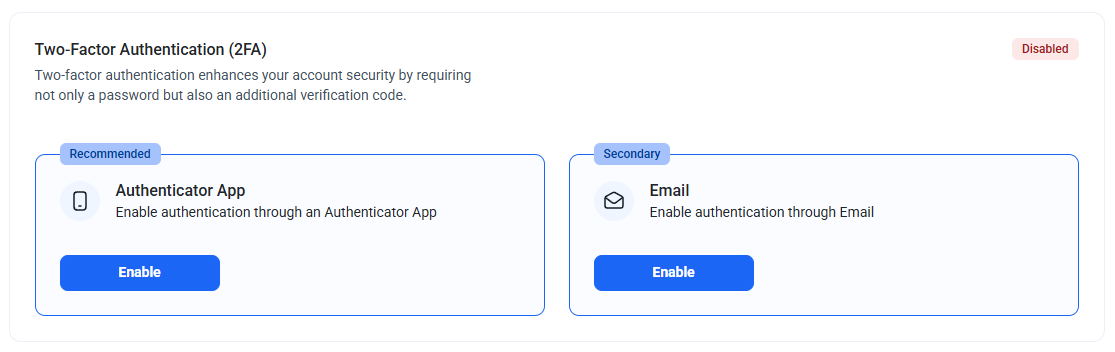](https://docs.safedns.com/uploads/images/gallery/2026-03/OYuQQREM8rcUVLLB-screenshot-568.png) 3\. Choose the preferred method for authentication.We recommend using the **Authenticator App** for better security.
4\. Press **Enable** and follow the on-screen instructions for the selected method. 5\. Save the backup codes when prompted.Backup codes are shown only once. We strongly recommend keeping them on a different device or writing them down. Each code can be used only once. Backup codes can be regenerated by pressing the **Regenerate** button. Previously generated codes will be invalidated.
If needed, you can enable both authentication methods. To do that, press **Enable** under the other method, then follow the on-screen instructions. --- #### Using 2FA 2FA will be prompted on each login after entering the valid login and password. [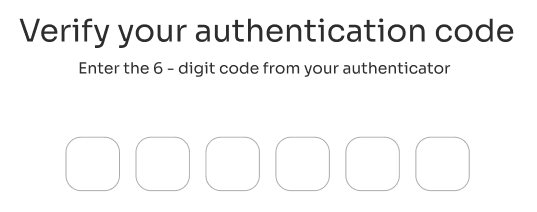](https://docs.safedns.com/uploads/images/gallery/2026-03/tTmsUr9Tk43z9scE-screenshot-571.png) If both authentication methods are enabled, you can use the other method via the **Use the other method** option. [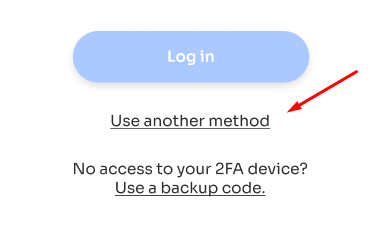](https://docs.safedns.com/uploads/images/gallery/2026-03/KicbSoBOIXqg6eHV-screenshot-569.png) --- #### Using Backup Codes If you lost access to the authentication method(s), you can use the backup codes instead via the **Use a backup code** option. [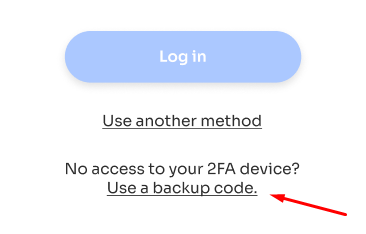](https://docs.safedns.com/uploads/images/gallery/2026-03/gdCEwE5g9JSpdGdo-screenshot-570.png)Each backup code can be used only once.
--- #### Disabling 2FA You can disable 2FA by pressing the Disable button in the Two-Factor Authentication (2FA) panel. [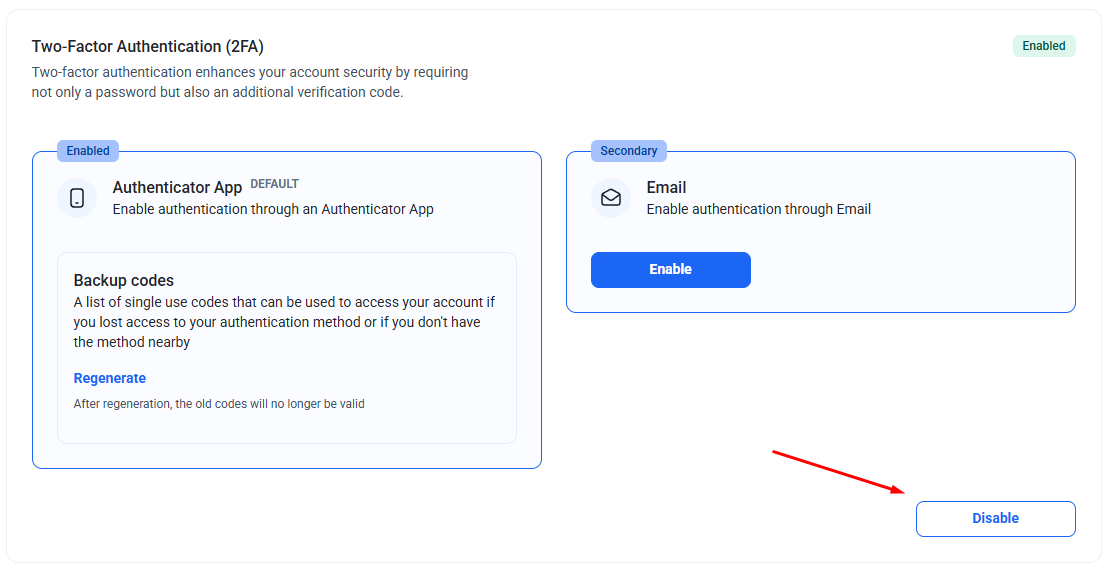](https://docs.safedns.com/uploads/images/gallery/2026-03/fDXGeT4gjtYjrjsv-screenshot-572.png) If both authentication methods are enabled, you can disable one or both. --- #### Disabling 2FA via SafeDNS Support If you lost access to authentication methods and backup codes, you can request to disable 2FA via the **Use a backup code > Send Request** option. [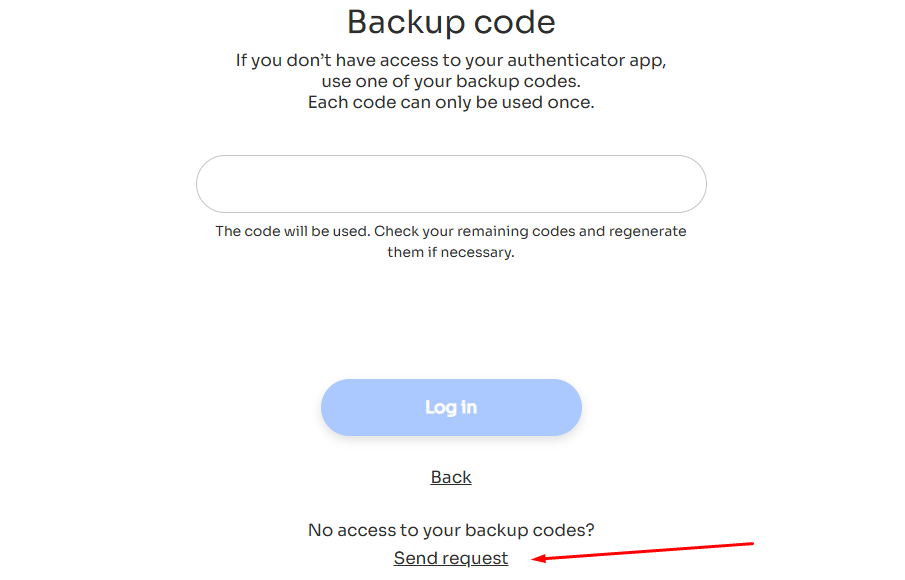](https://docs.safedns.com/uploads/images/gallery/2026-03/eQjZVajo1FzBH0VU-screenshot-573.png) After the request is sent, the SafeDNS Support team will respond within 3 hours to the email address of your SafeDNS account. If you need Support to reply to the other email, please send the request manually toPlease note that for security reasons, Support will ask additional questions to verify the account ownership.