Mac OS
- SafeDNS Agent for macOS Setup
- Mac Filtering Setup via OpenVPN
- Mac DNS Setup
- Deploying SafeDNS Endpoint Lite for macOS via MDM
- Creating the config.plist file for SafeDNS Endpoint Lite on macOS
- Create and deploy configuration profiles for SafeDNS Endpoint Lite on macOS
- SafeDNSDaemon installation via MDM on macOS
- Running the SafeDNS Uninstaller script
SafeDNS Agent for macOS Setup
Installation requirements: macOS 14 (Sonoma) or newer.
The Agent is available on the following billing plans: Safe Family, Pro, Pro Plus, and archived Safe@Home, Safe@Office.
Getting started
- Log in to your SafeDNS account with your registration email and password.
- Navigate to the Getting Started widget on the main page of the Dashboard and select the macOS button.
- Click on the download link below and wait for the Agent to download.
Alternatively, you can use the direct link to download the Agent from the SafeDNS website - SafeDNS macOS Agent.

Installation
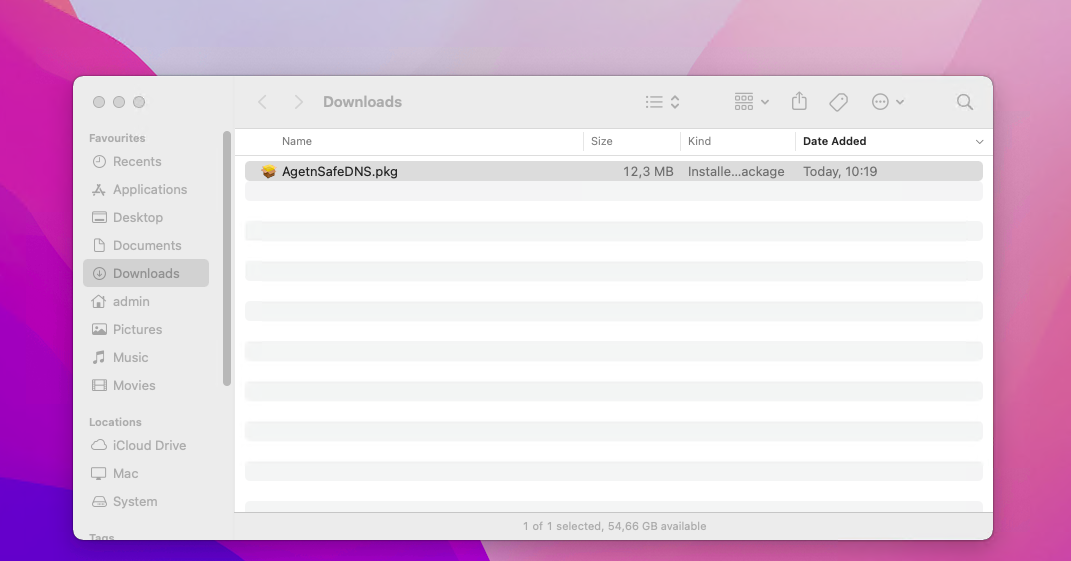
1. After downloading, open the Downloads directory and double-click on the downloaded package to start the installation process.
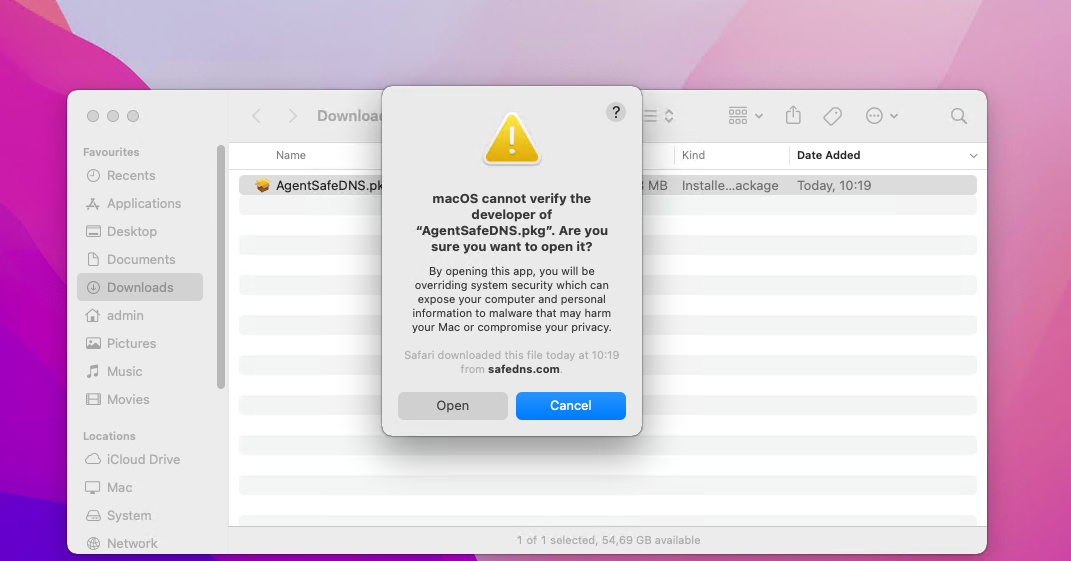
2. If you see a message before installing that says “macOS can’t verify the developer of AgentSafeDNS.pkg…”, please hold the Control button, right-click on AgentSafeDNS.pkg, and click Open in the opened context menu.
3. In the appeared dialogue, click Open and follow the instructions of the installer. During the installation process you will be asked to enter the administrator password.
First launch
1. After installation, launch the SafeDNS Agent from the Launchpad.
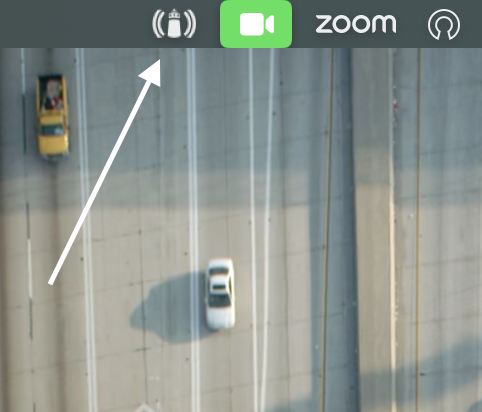
The Agent will be accessible by clicking on the icon in the system tray after the launch.
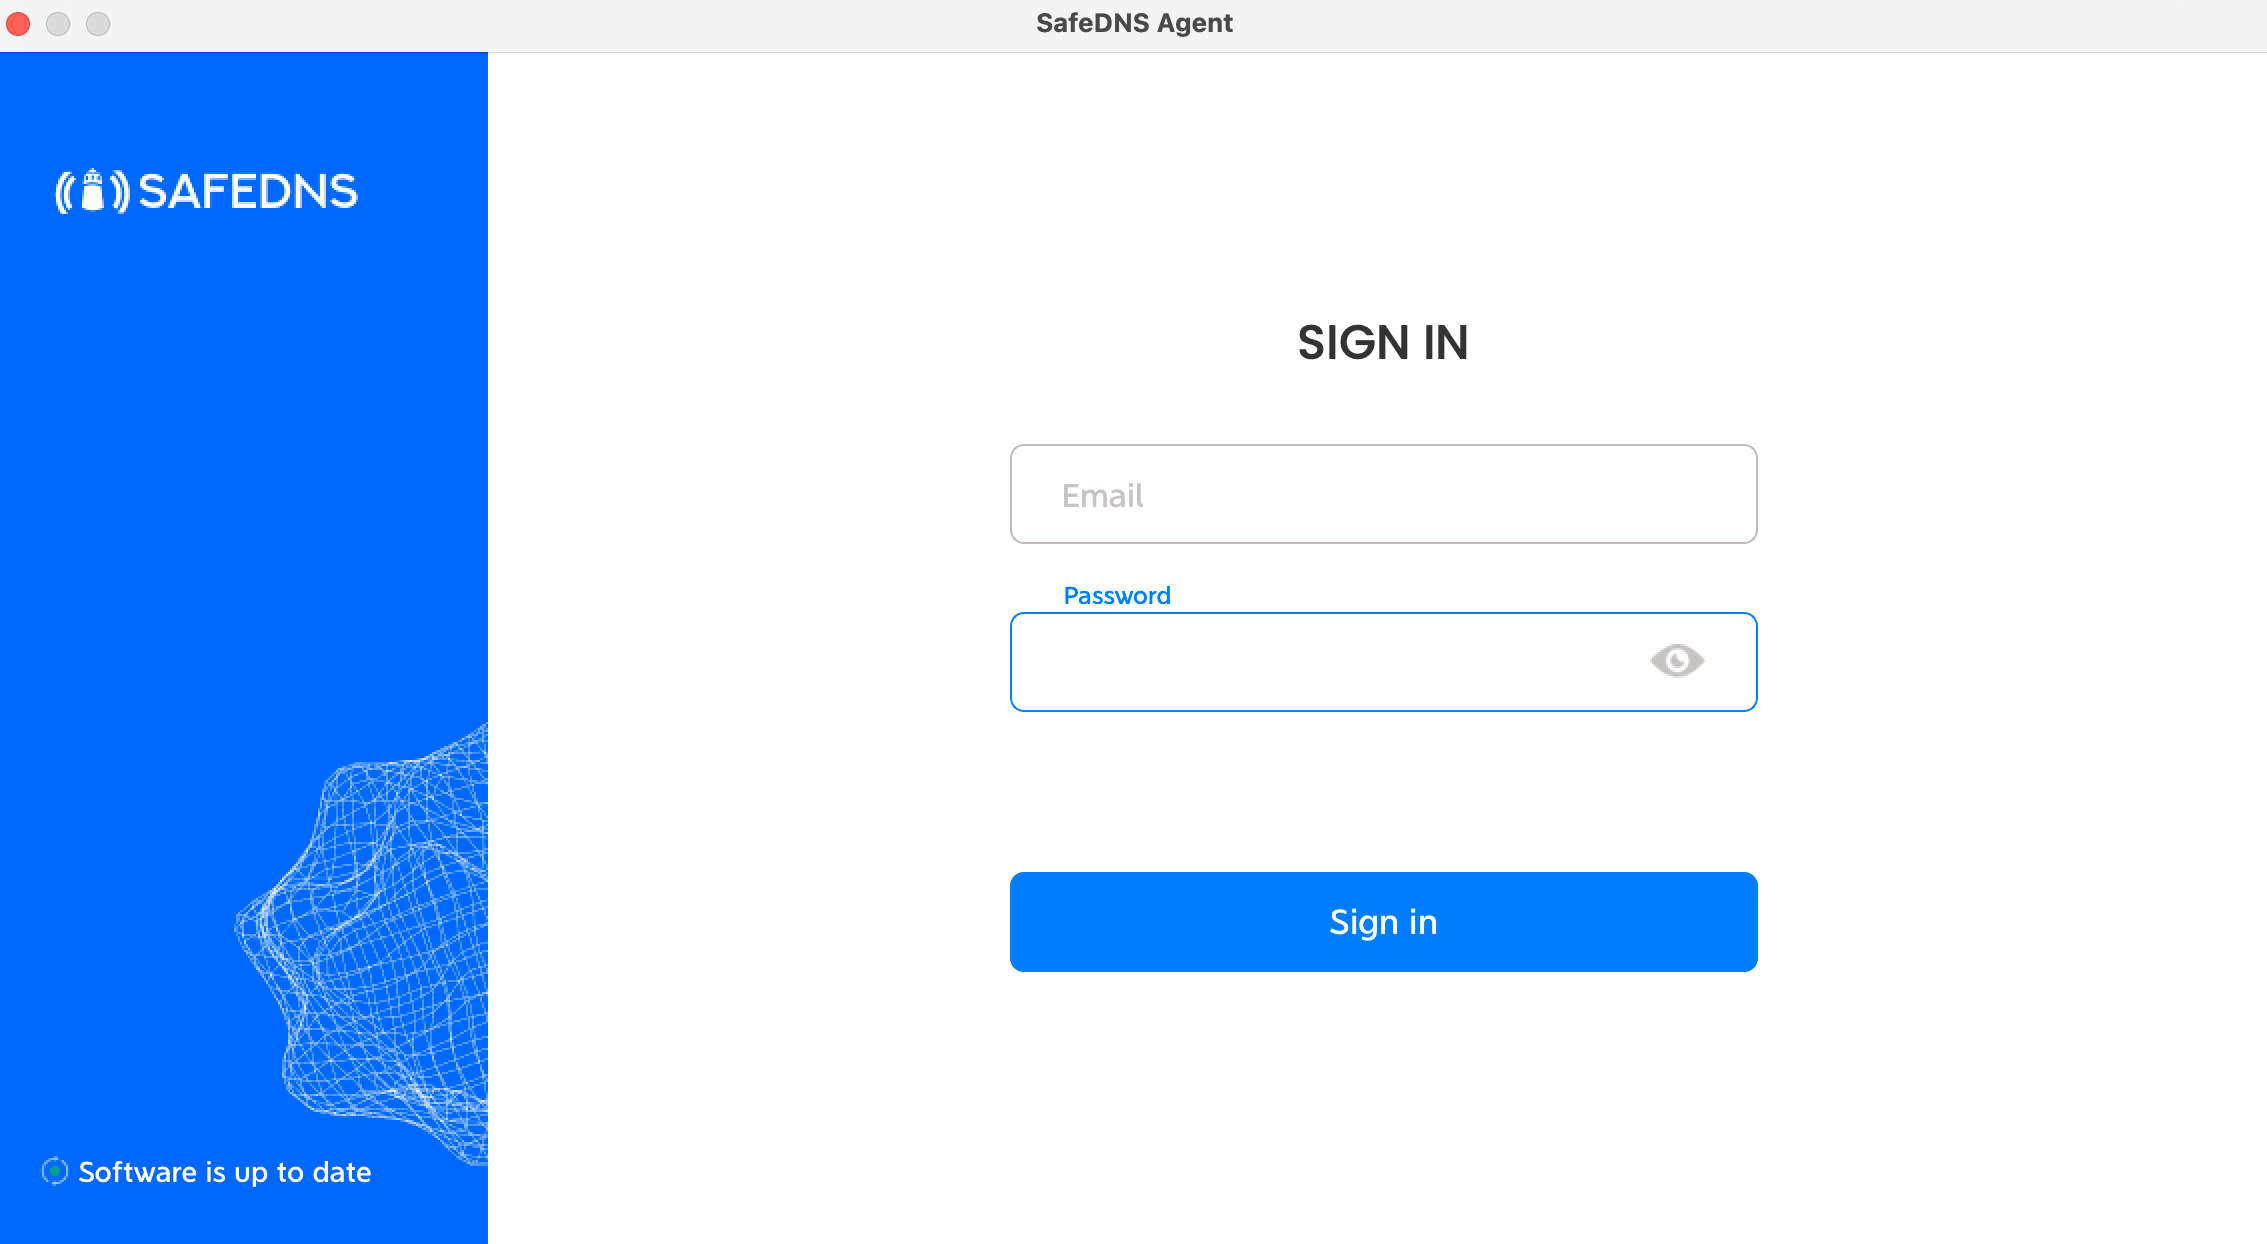
2. Enter your SafeDNS account credentials in the opened window. If you don’t have an account yet, please choose a suitable plan and register using the registration page.
3. Set up the security PIN that will be used later to restrict access to the Agent.
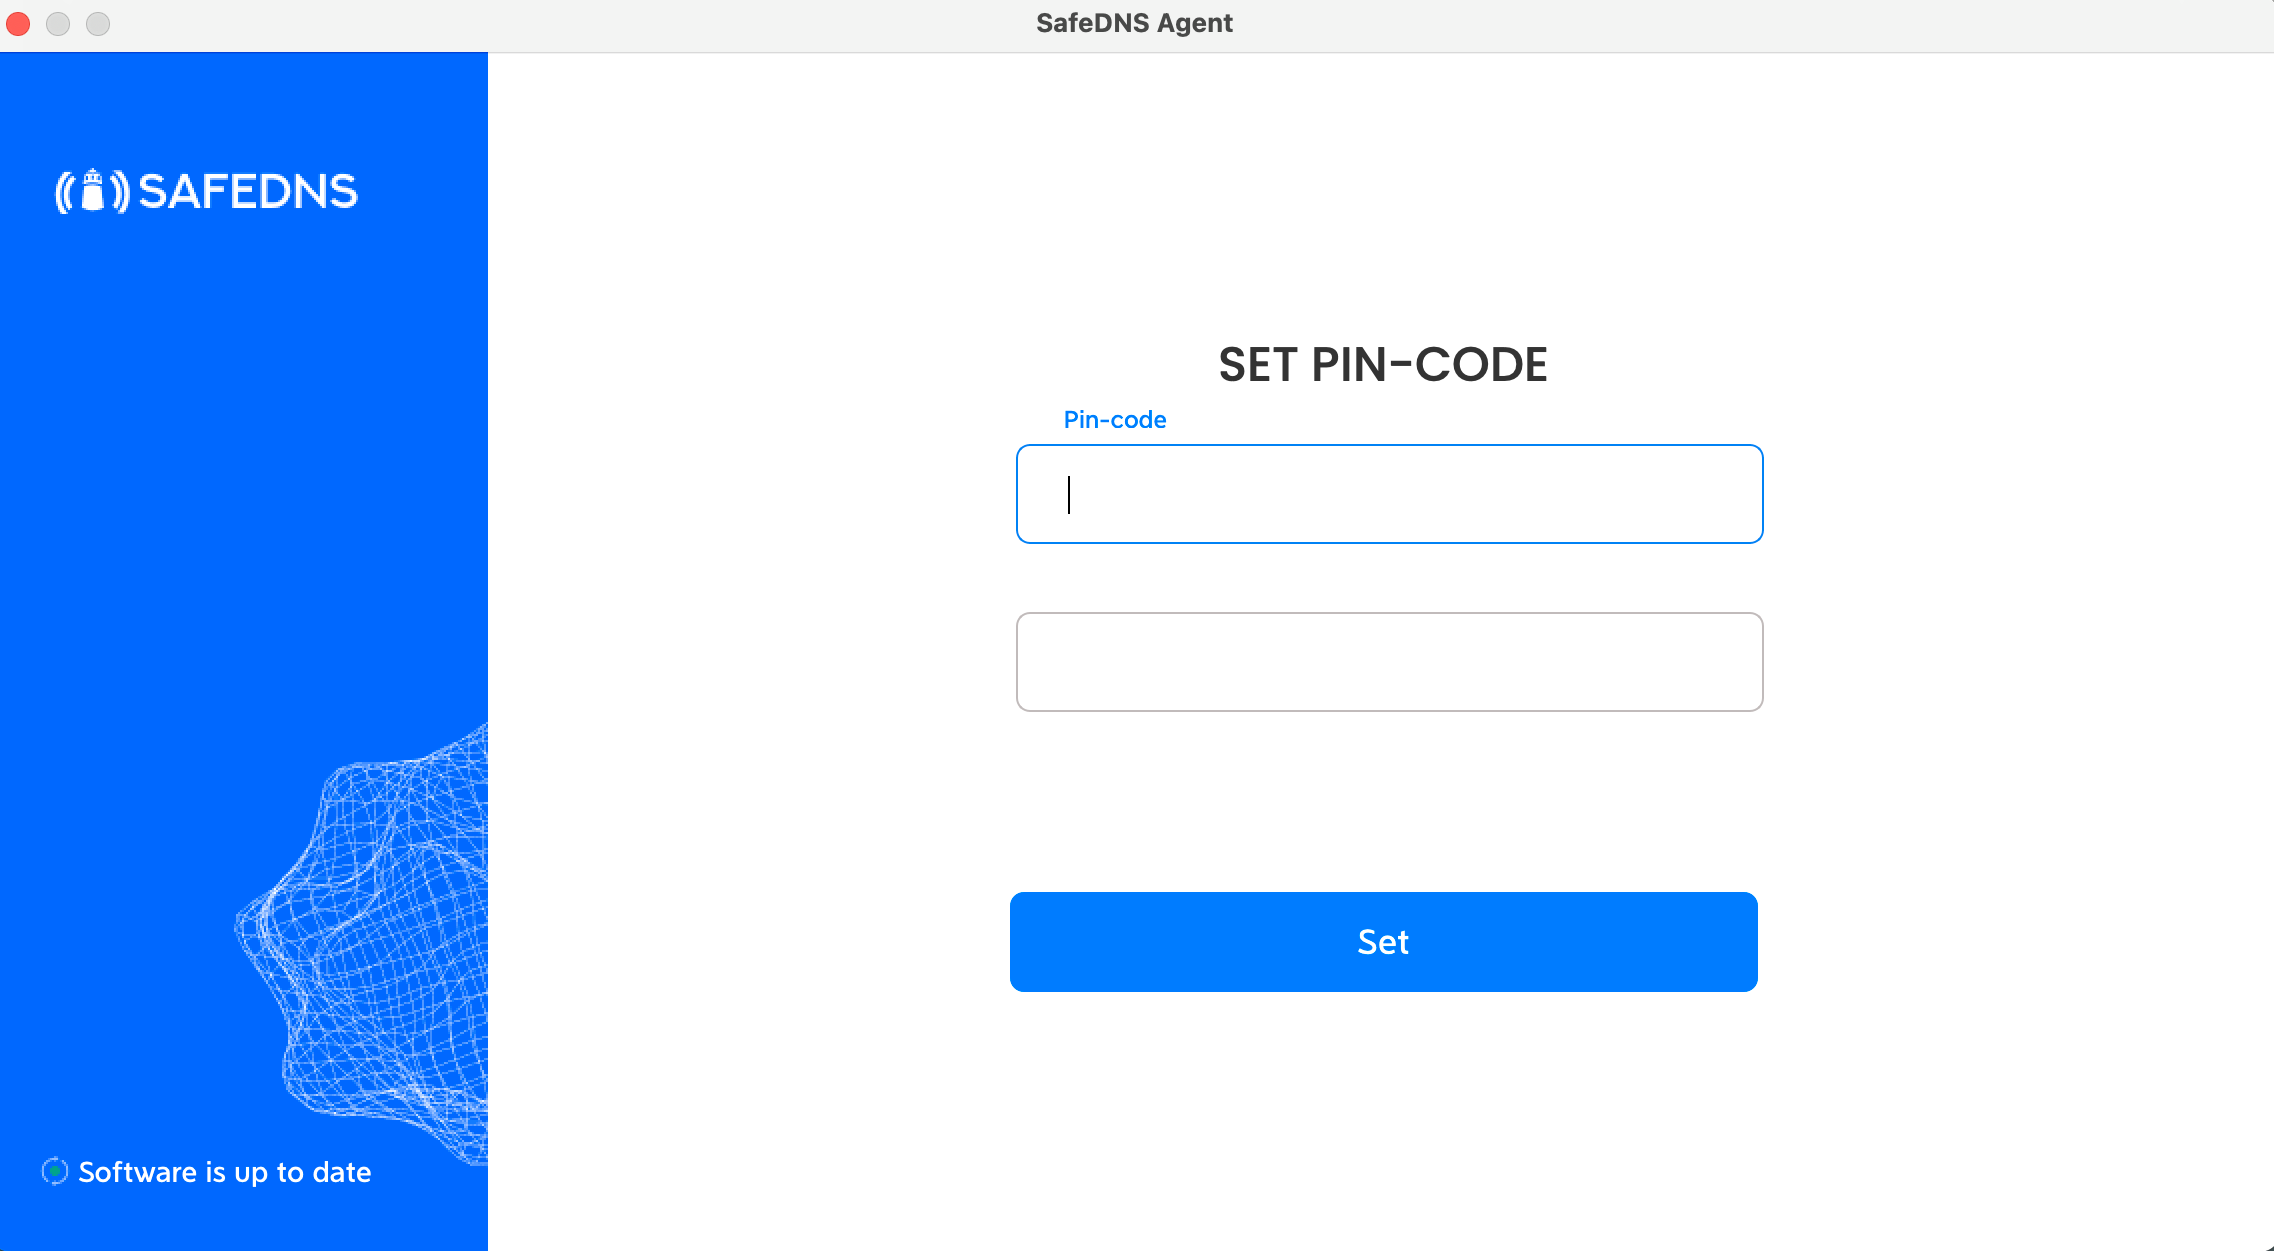
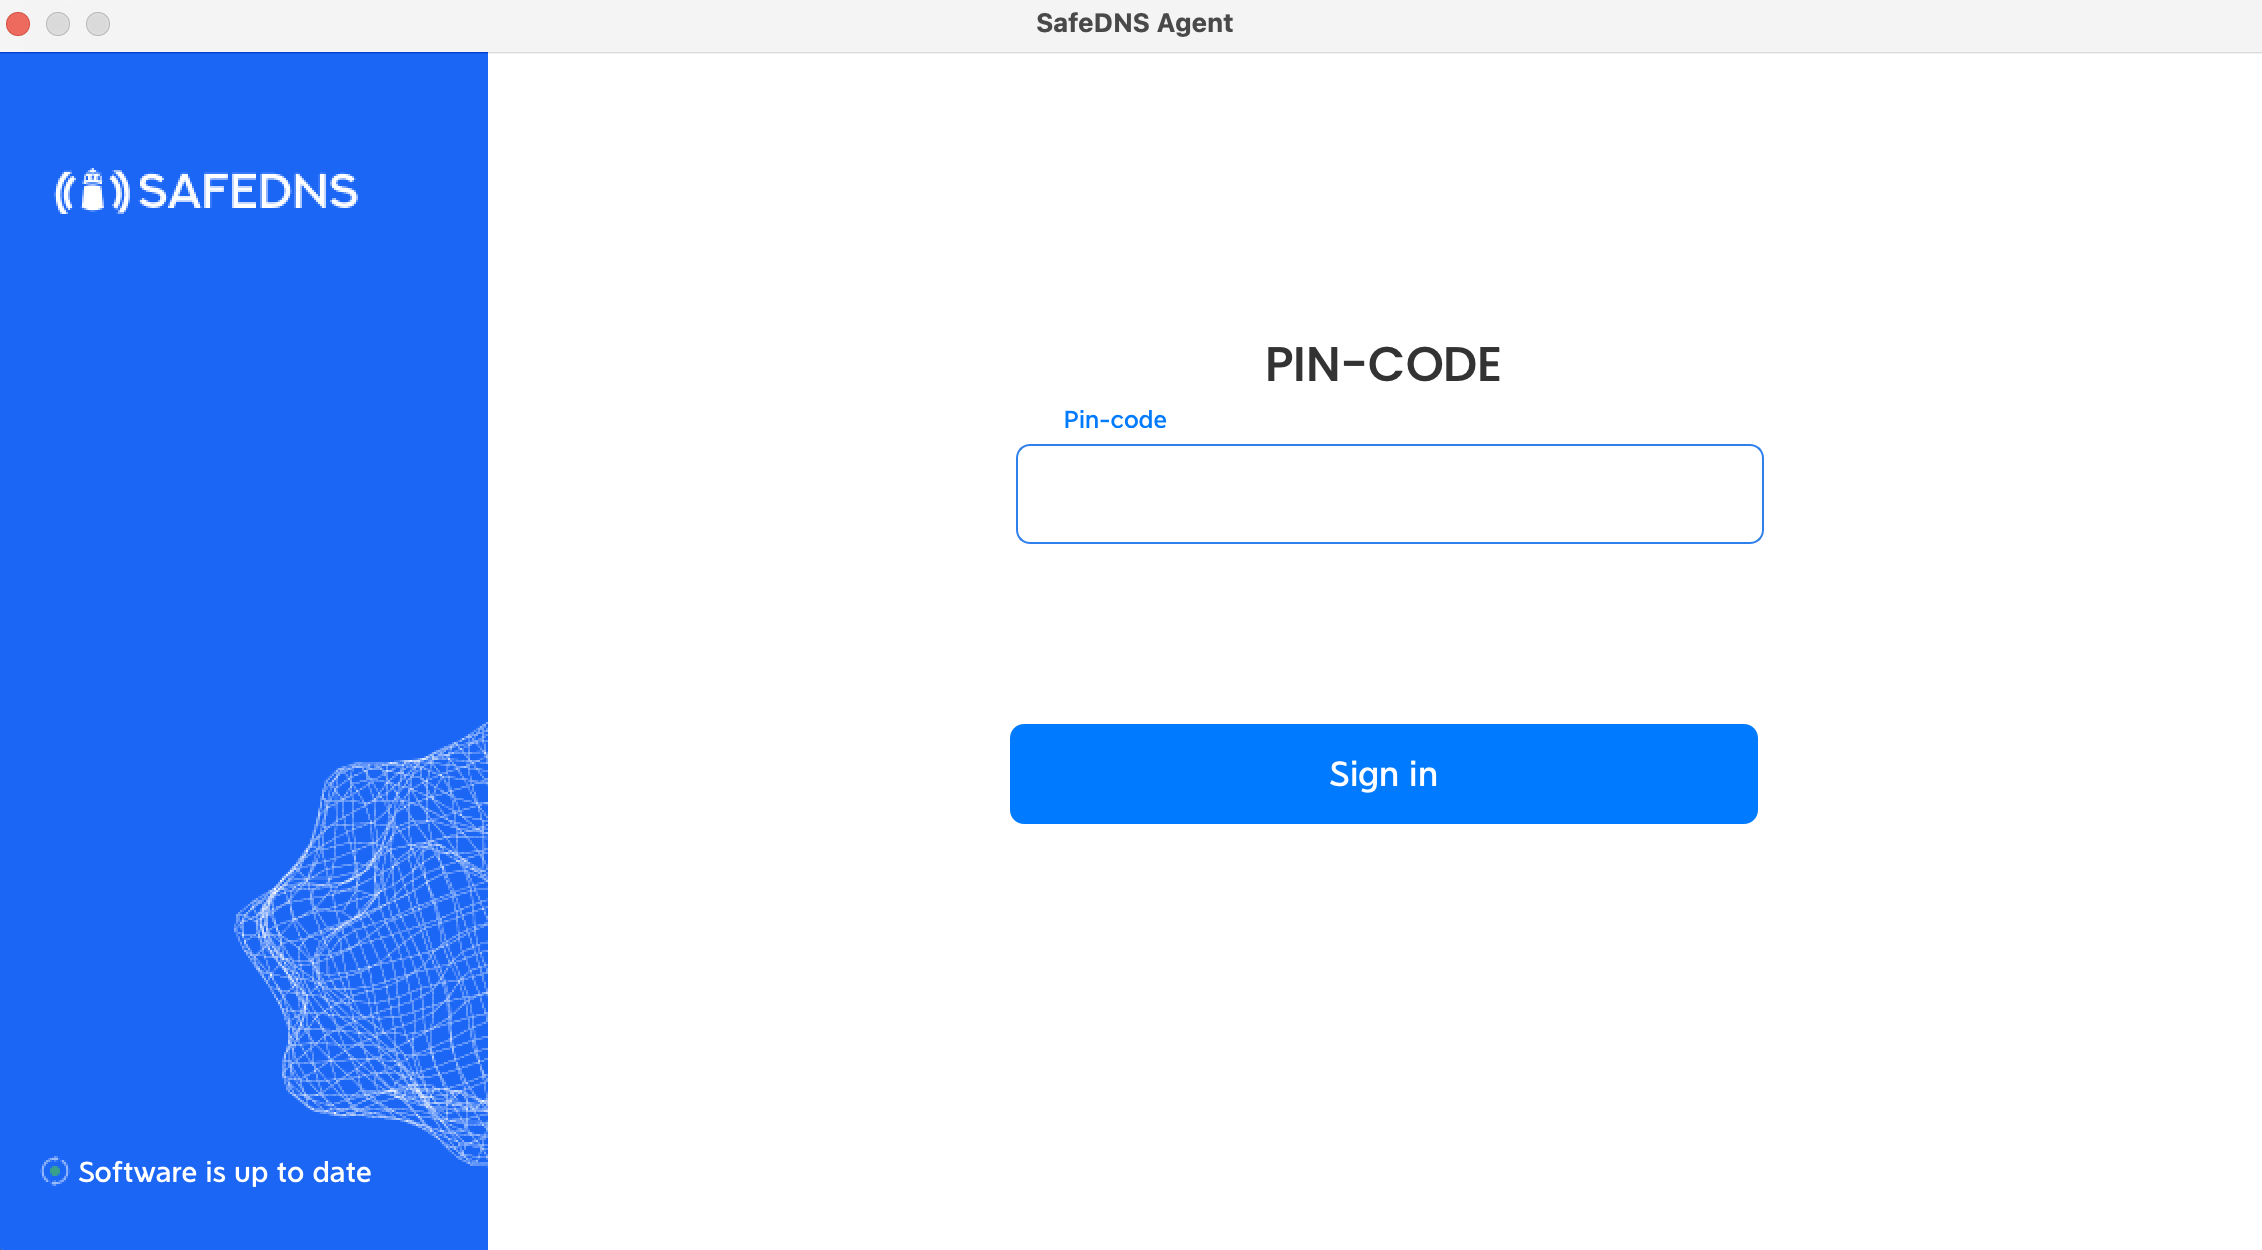
4. Enter the PIN once again to sign in to the Agent.
Agent overview
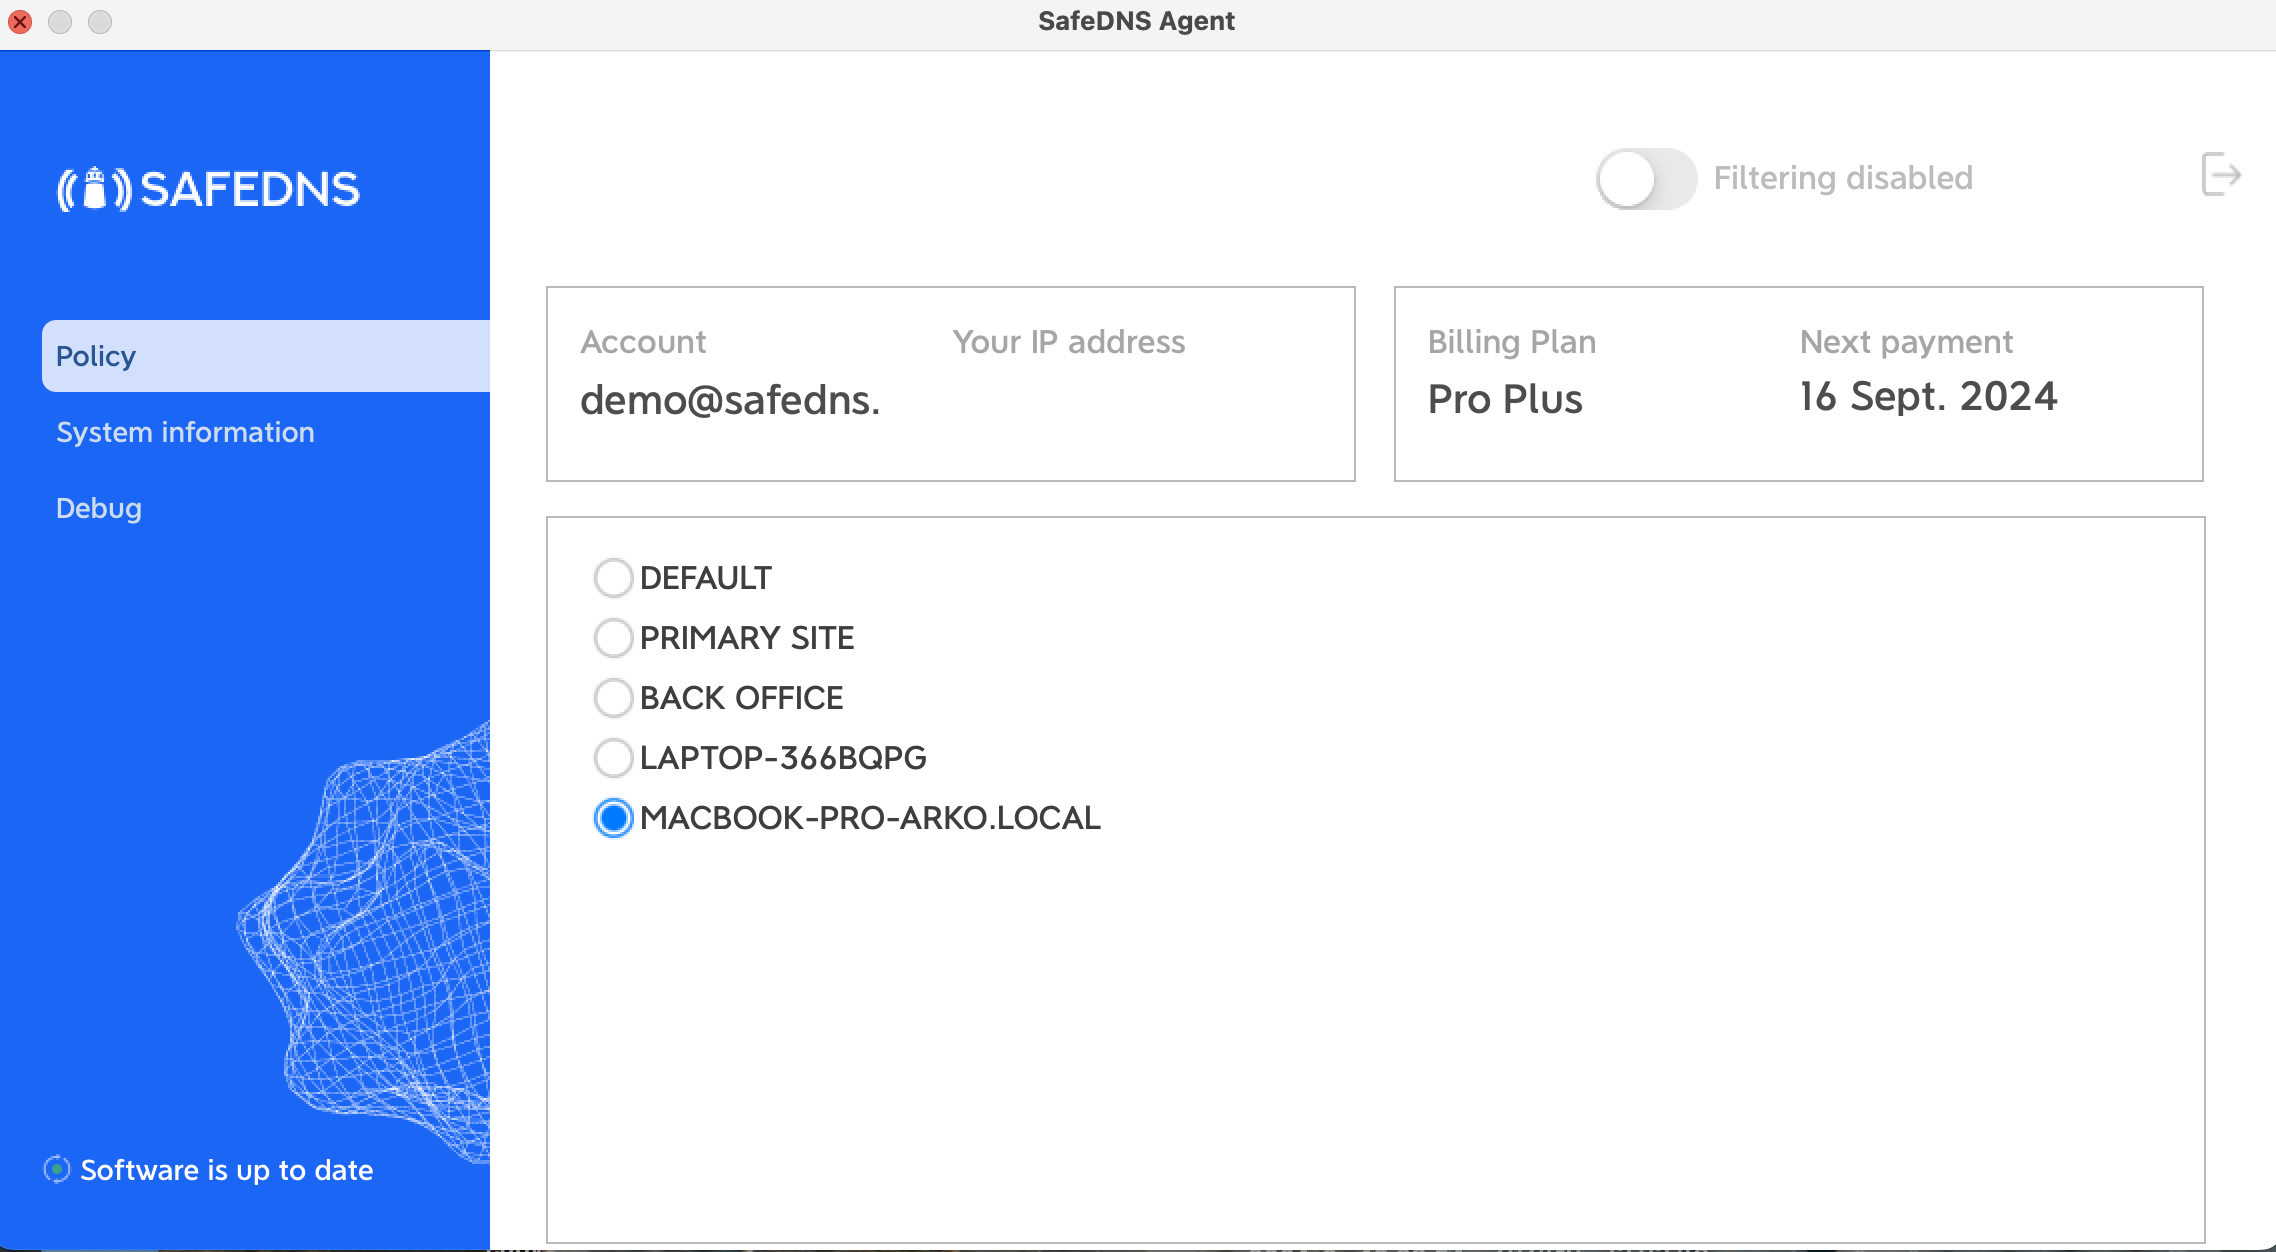
1. In the main window of the Agent, you can view your account information, current IP address, your Billing Plan, and the Subscription expiration date.
All filtering rules changes can be made in the SafeDNS Dashboard.
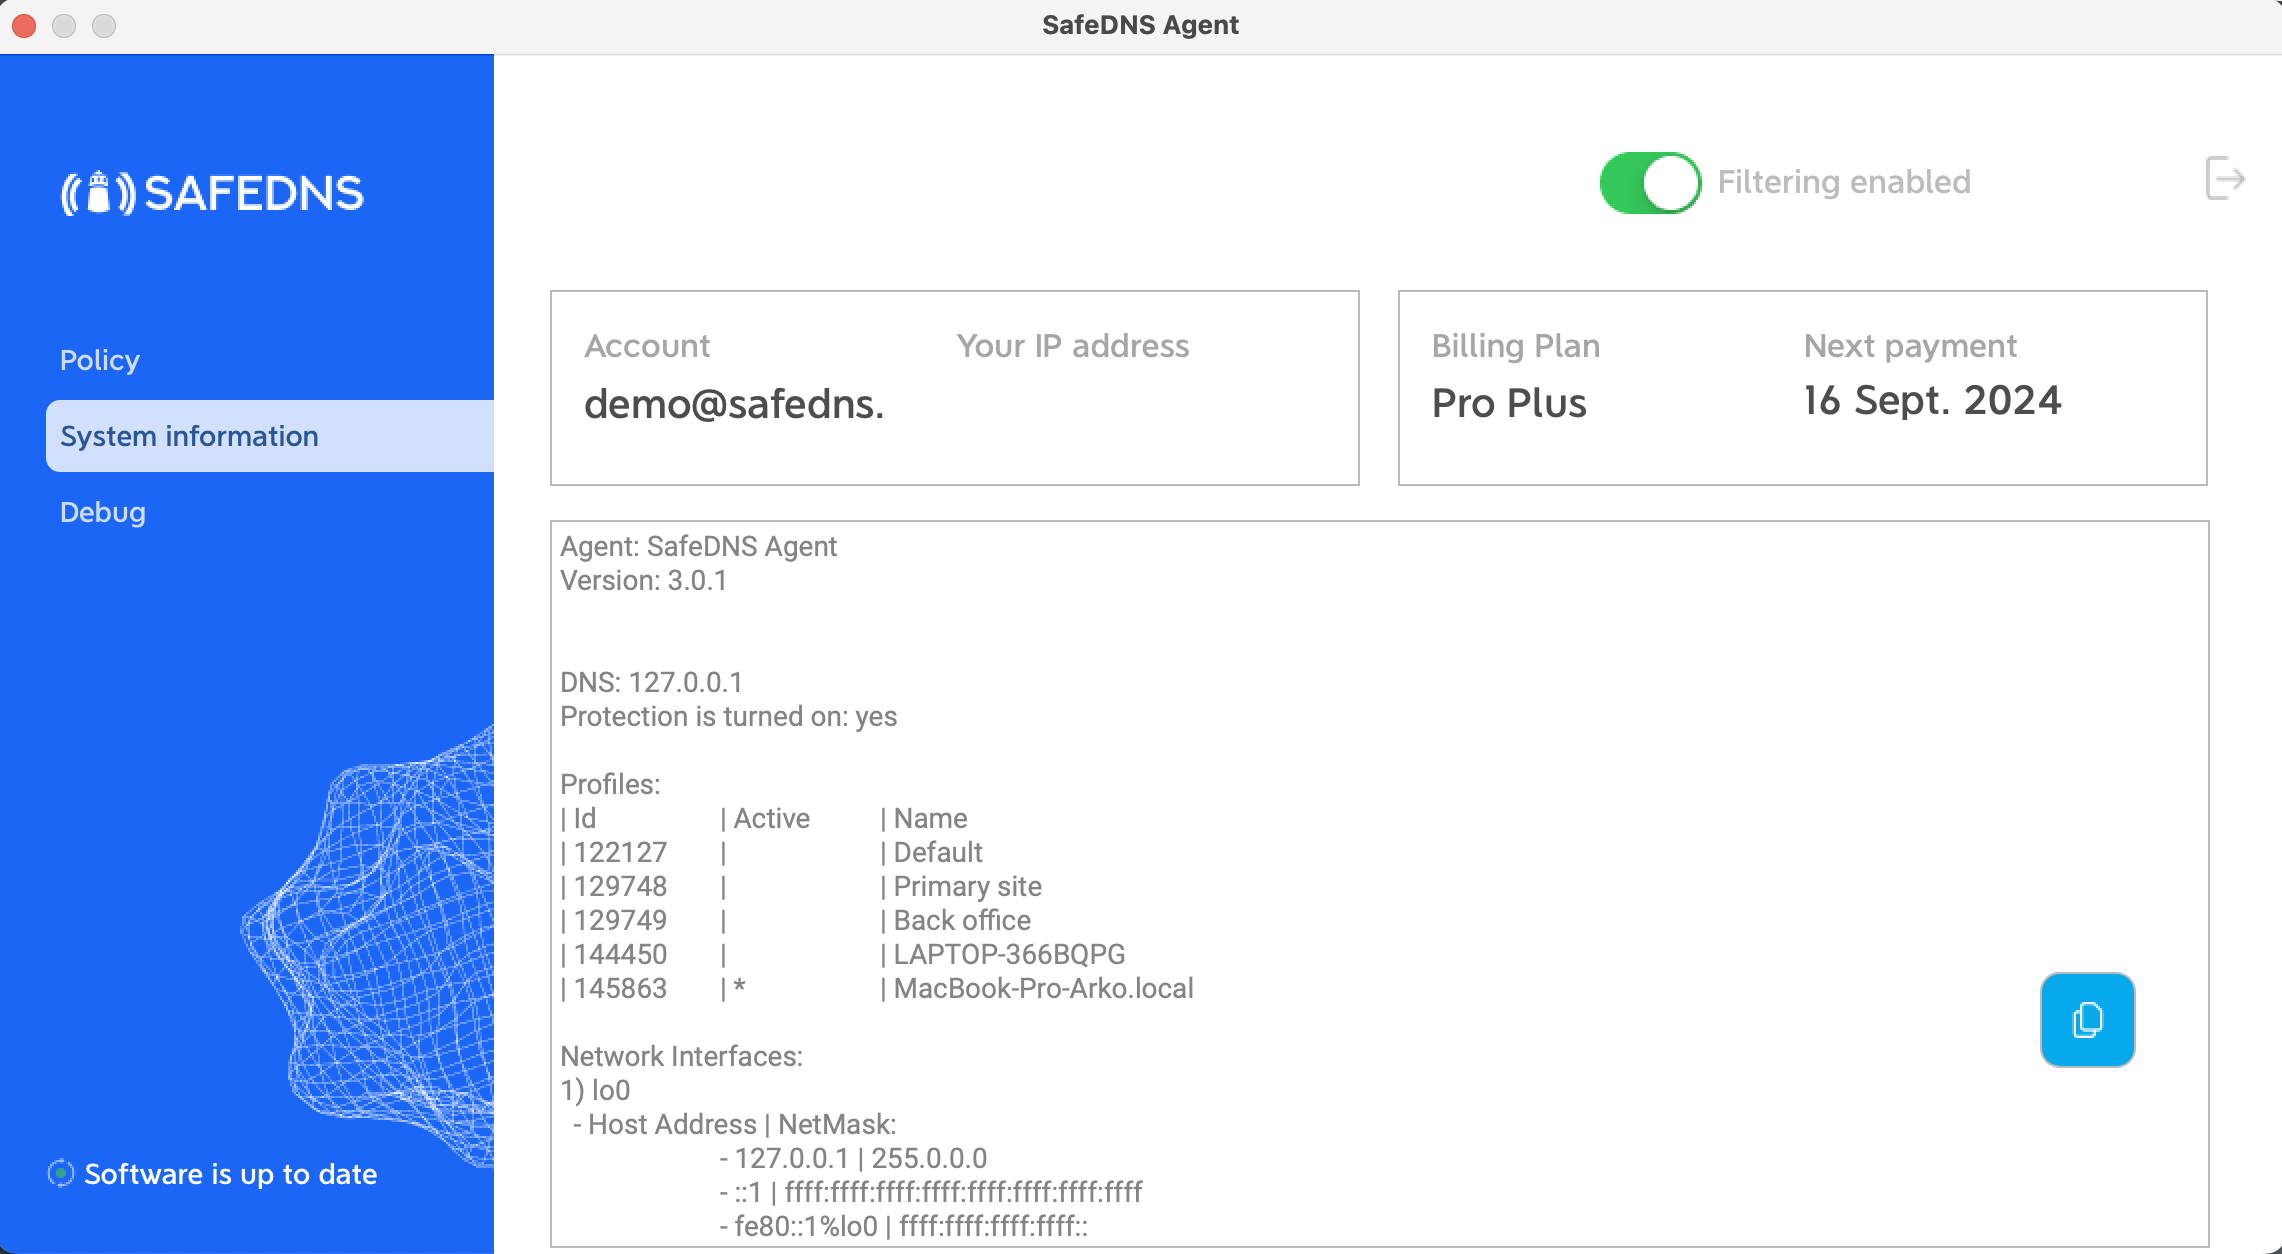
2. The system information menu shows brief information about the Agent, current filtering policies, and network interfaces. The information in this menu can be copied to the clipboard by clicking the "Copy to clipboard" button.

Additional settings
To make sure the Agent was installed correctly, please navigate to the "Settings" tab in the SafeDNS Dashboard and scroll to the bottom.
If you see the record with the Device name and your IP address, it means that the filtering is working.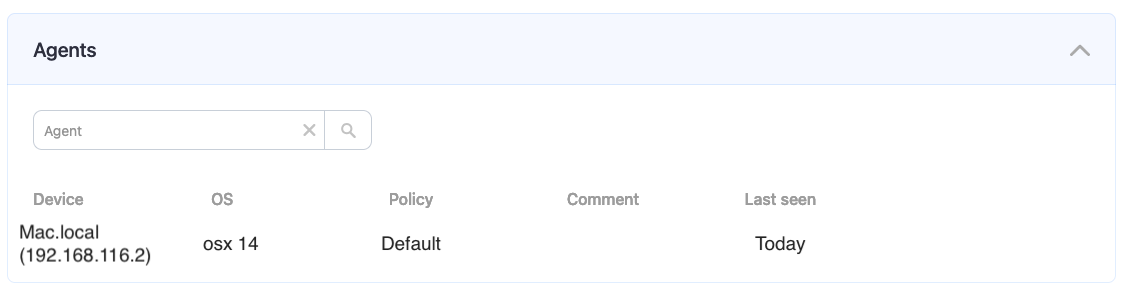
After that, you can adjust the filtering Policy according to your needs. You can select categories to block in the SafeDNS Dashboard under the Categories tab.
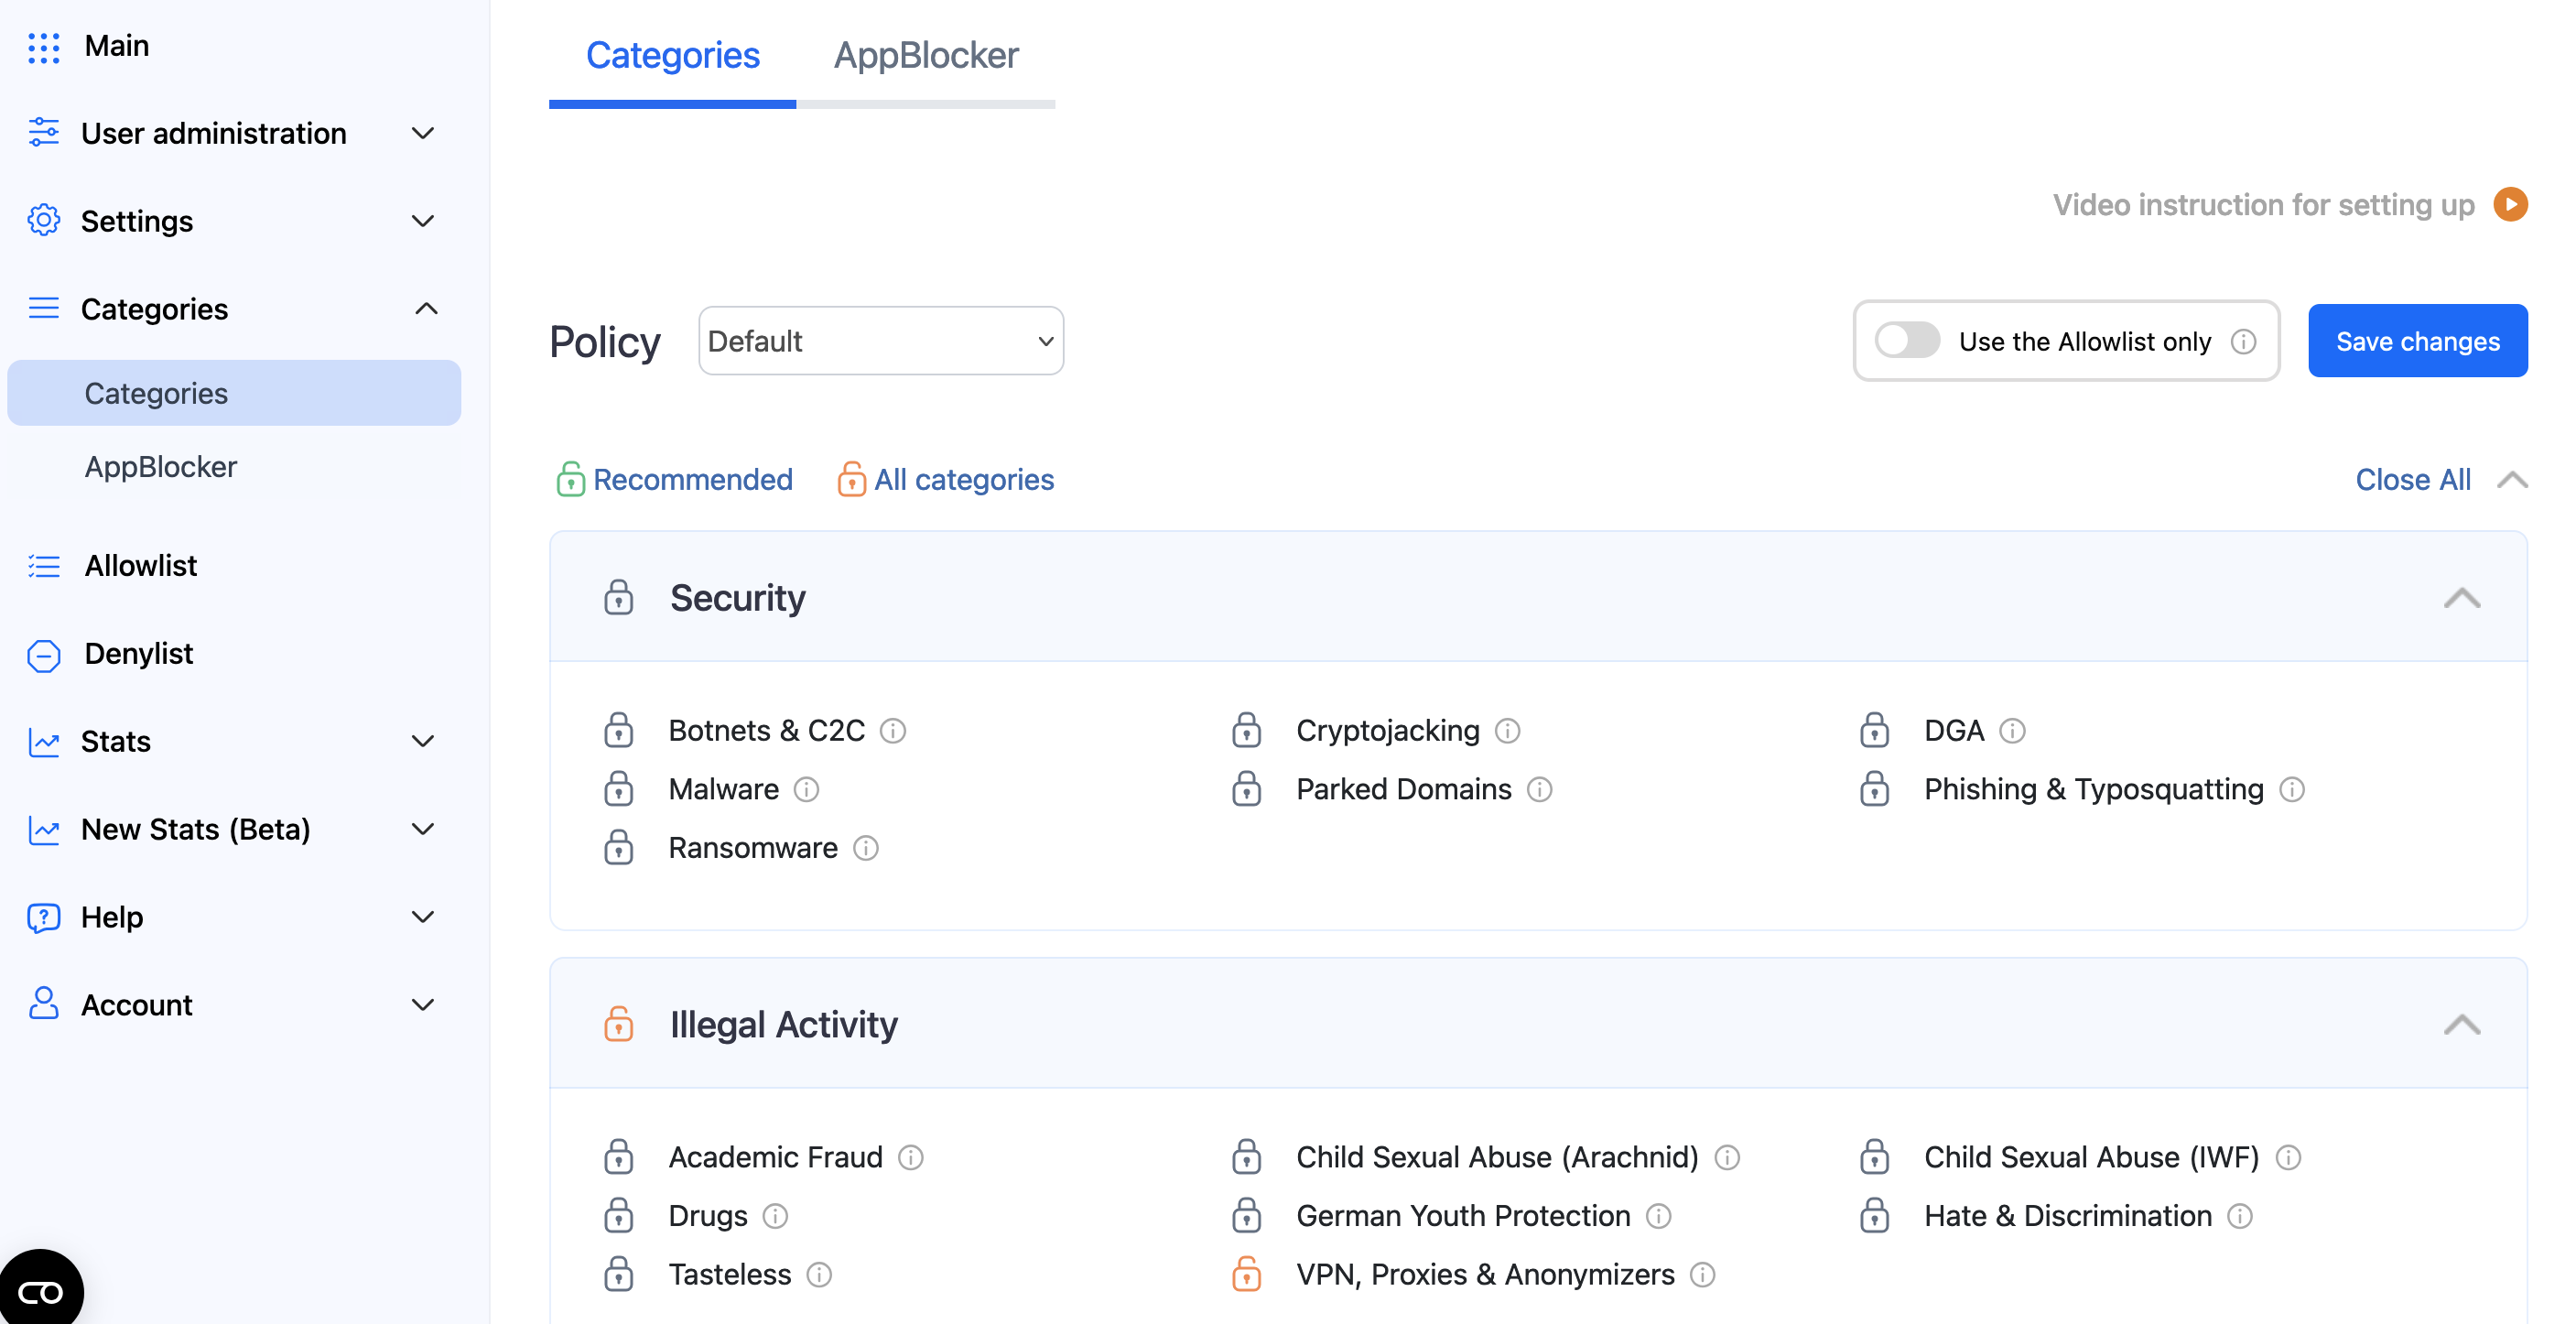
Don't forget to click the "Save changes" button.
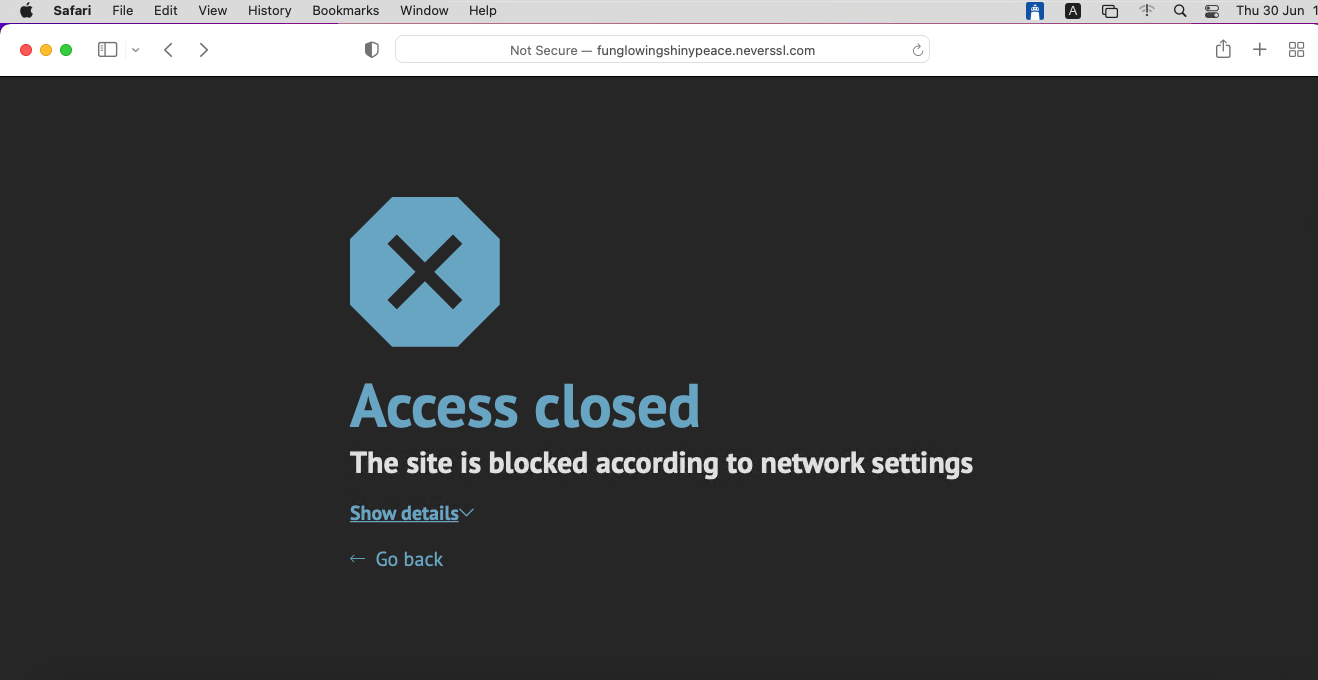
The setup is finished!
A blocked website will display an error message that the Access is closed.
If the filtering doesn't work according to your policy settings, clear the cache of your browser using this guide.
!Please note, that settings take 5-7 minutes to apply.
!Stats and filtering status update hourly.
Uninstallation
To uninstall the Agent from the Mac device, do the following:
- Download the uninstallation script: uninstall.sh
- Run this file.
For MDM users:
- Download the uninstallation script: uninstall.sh
- Navigate to the Scripts tab
- Create a new script and insert the contents of
uninstall.sh - Run the script on target devices
Mac Filtering Setup via OpenVPN
Please note, that this filtering option works via the third-party app OpenVPN.
If you encounter any issues, please contact our Technical Support.
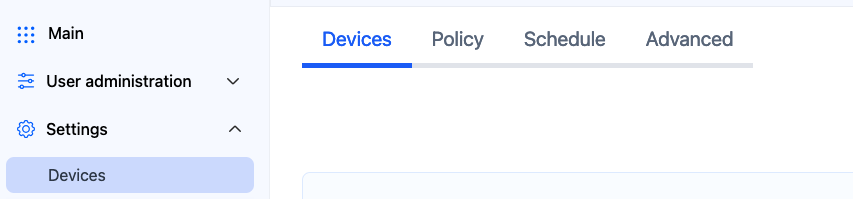
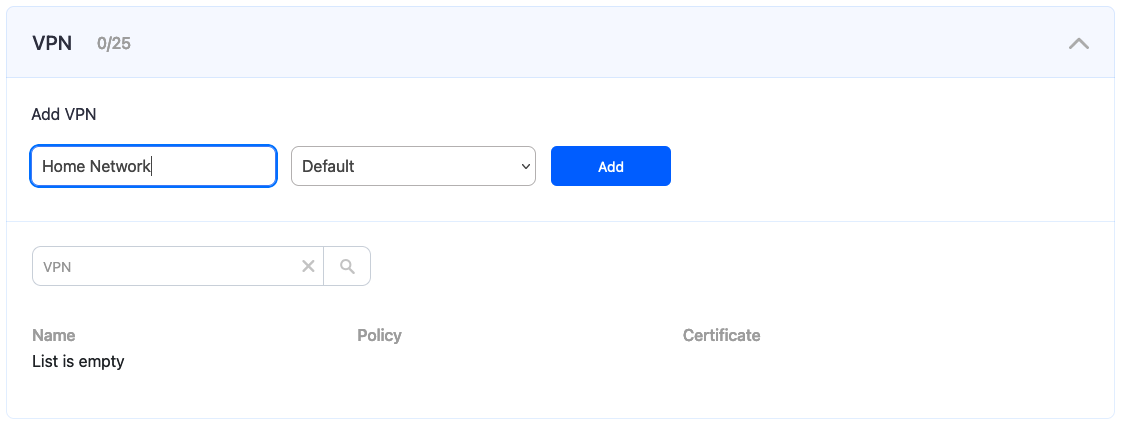
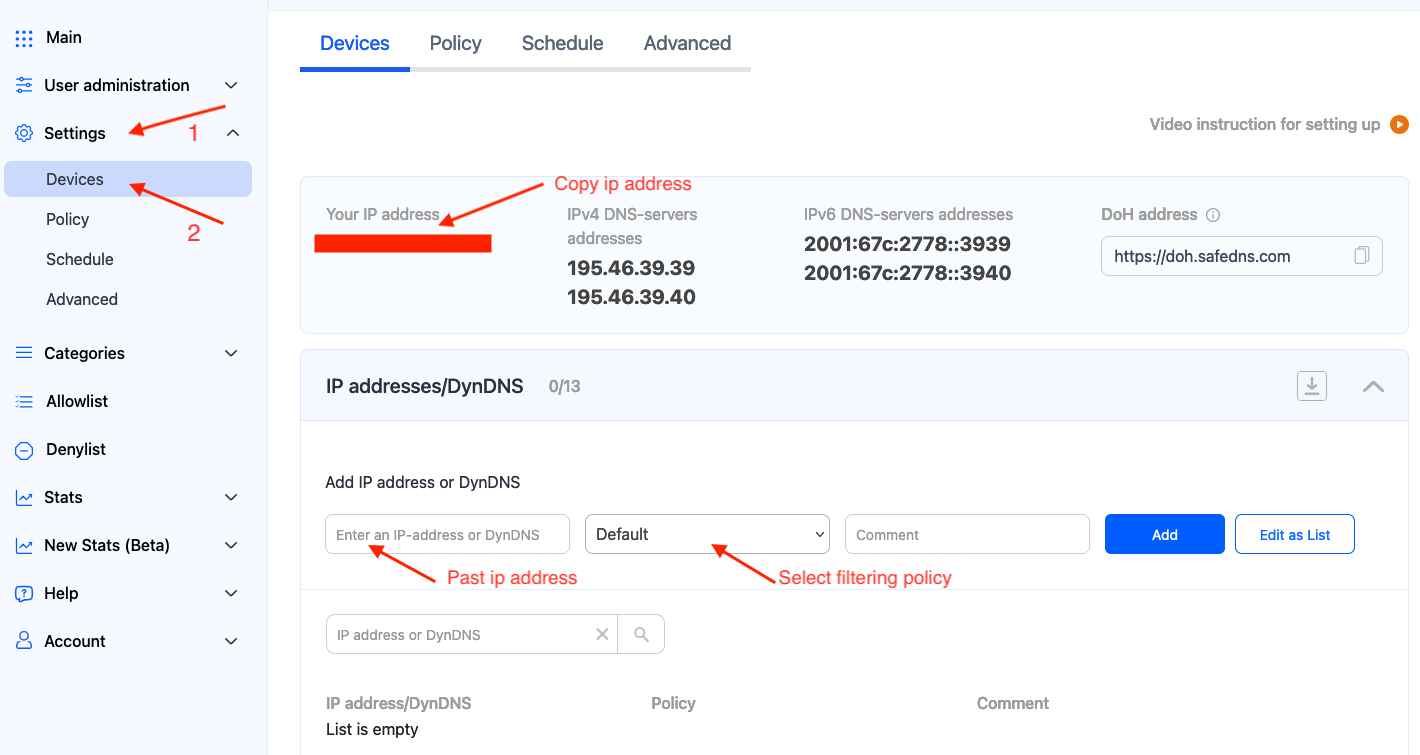
1. Open the SafeDNS Dashboard and navigate to Settings > Devices.
2. Scroll down to the VPN section, enter any name for a new VPN connection, and click Add.
Choose a filtering policy before adding a VPN connection, if needed.
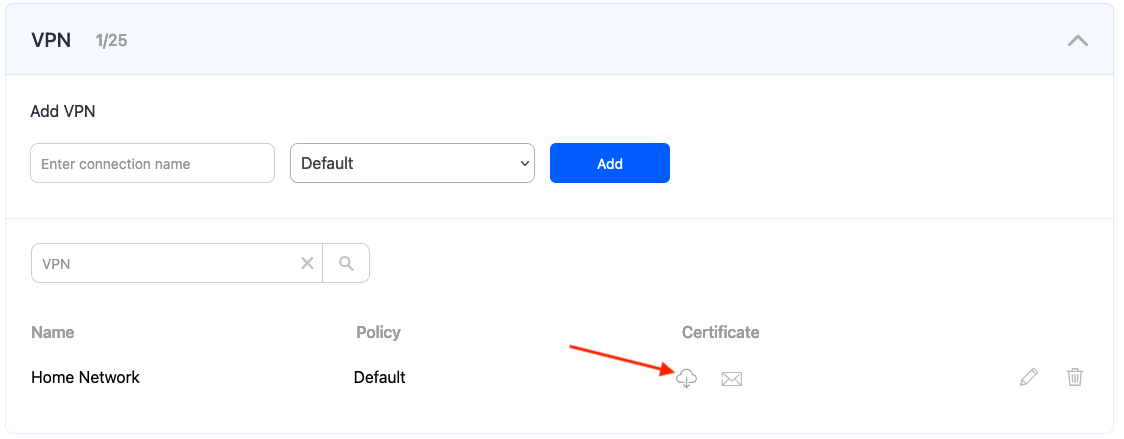
3. Upon creating the connection, two icons will appear in the "Certificate" column. One is for downloading the Certificate, and the other is for sending it by email. Press the "Cloud download" icon.
Multiple devices can use the same filtering policy, but each device should use its own VPN certificate.
You can also change the filtering policy of the created VPN connection by clicking on the pencil icon to the right. Please note, that you don't need to redownload your VPN certificate on your mobile device if you change its filtering policy.
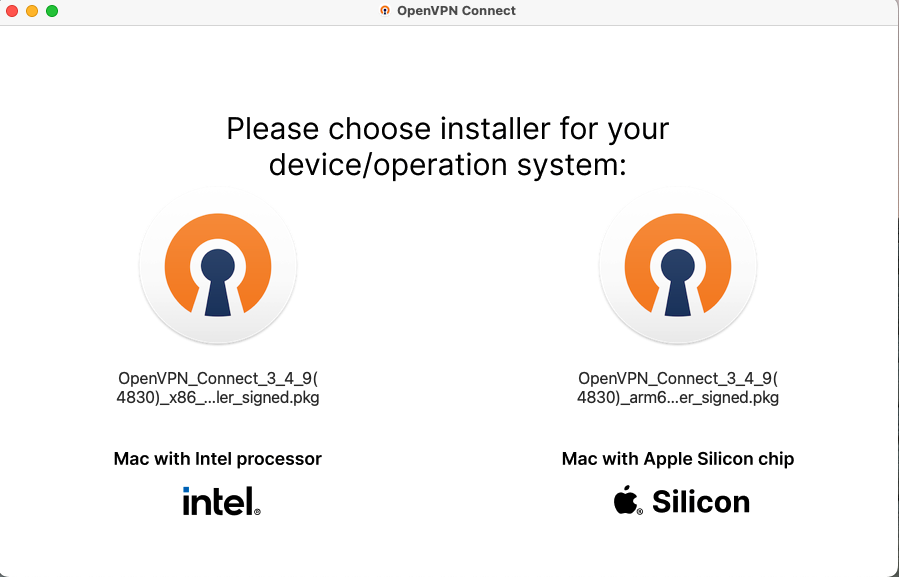
4. Download OpenVPN Connect.
5. Choose the installer for your Mac device.
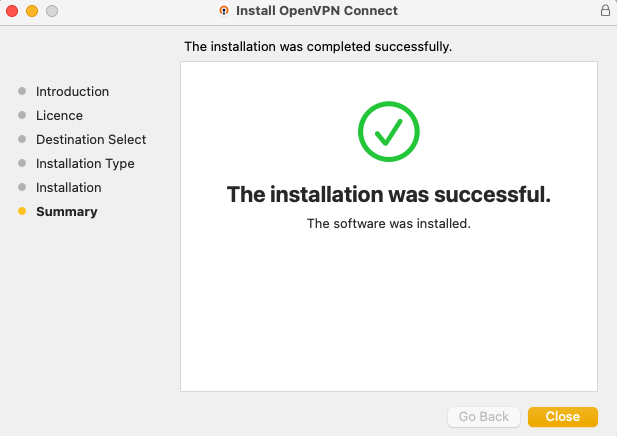
6. Follow the on-screen instructions to finish the installation process.
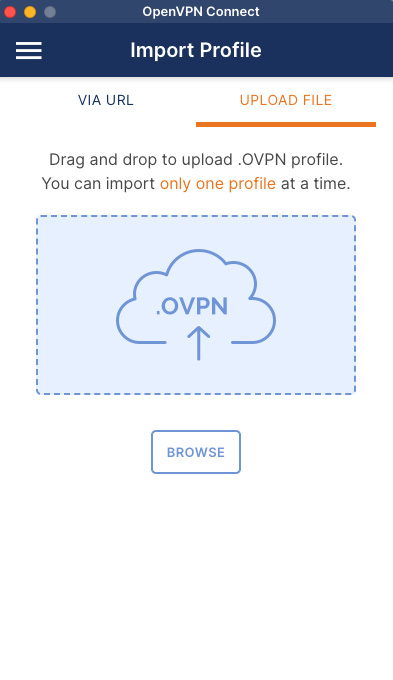
7. Select the Upload File menu and import the downloaded .ovpn certificate file.
The Certificate has the following name format: safedns-123456.ovpn
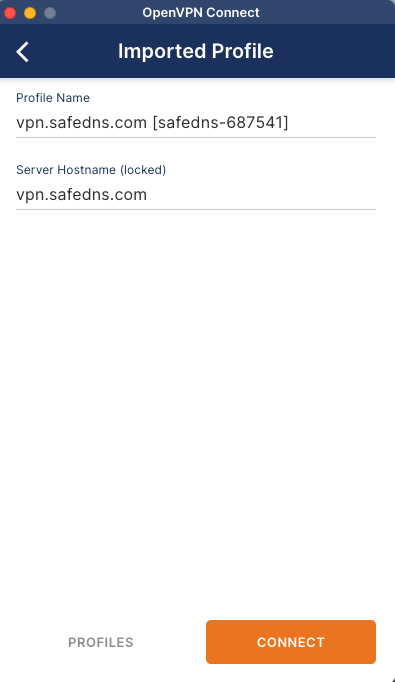
8. Click on the Connect button.
9. Wait until the VPN connection is established.
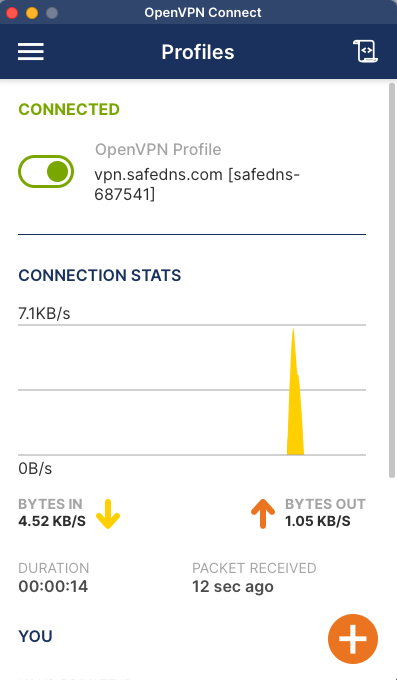
Your Mac is now filtered with the SafeDNS filtering policy.
Please note that settings take 5-7 minutes to apply.
Stats and filtering status update every 10 minutes.
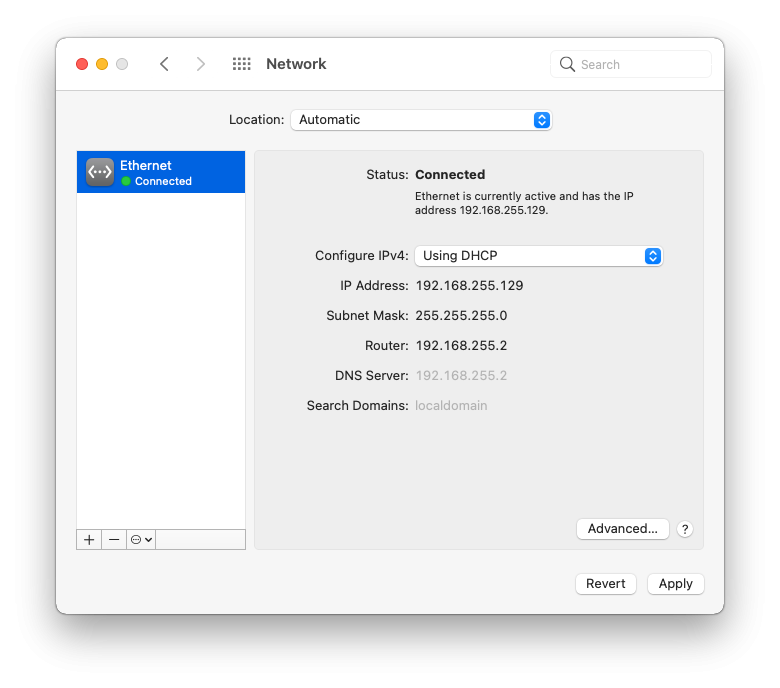
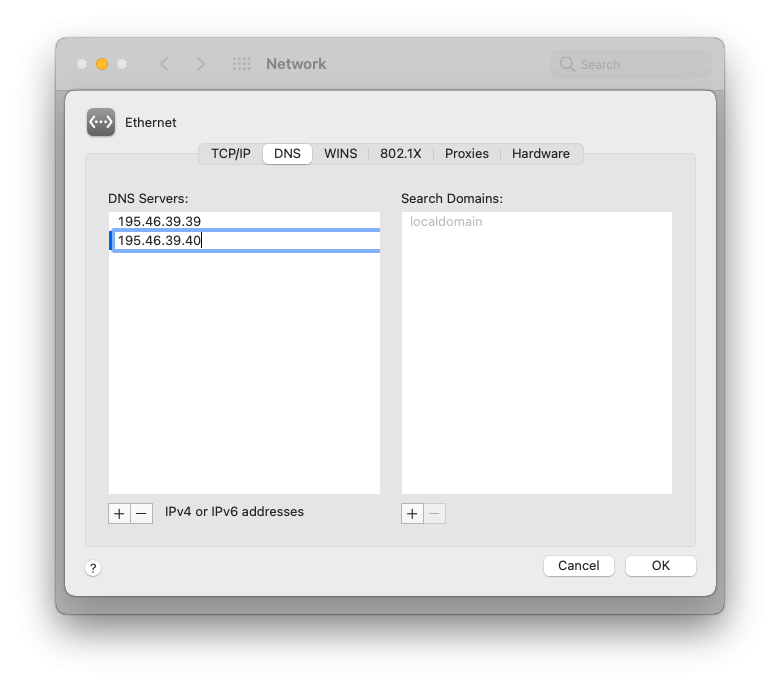
Mac DNS Setup
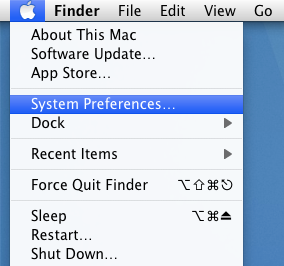
3. Click on the "Network" in the "Internet & Wireless" section of the opened window.

4. Choose an active connection from the list and click the "Advanced" button.
5. Select the "DNS" tab, add SafeDNS servers 195.46.39.39 and 195.46.39.40, and click "OK".
Your Mac is now filtered with the SafeDNS filtering policy.
Please note that settings take 5-7 minutes to apply.
Stats and filtering status update every 10 minutes.
Deploying SafeDNS Endpoint Lite for macOS via MDM
System requirements: macOS Tahoe 26 or later, Mac with Apple silicon — M1 chip or later.
The Agent is available on the following billing plans: Safe Family, Pro, Pro Plus, and archived Safe@Home, Safe@Office.
This guide explains how to deploy SafeDNS Endpoint Lite for macOS to multiple macOS devices using an MDM solution.
The deployment consists of the following stages:
- Create the Config.plist script file on the target devices.
- Create and install the required configuration profiles on the target devices using the script and .mobileconfig files.
- Install the SafeDNS daemon on the target devices using the safedns-daemon-20260515-1335-signed.pkg package.
- Install the SafeDNS Endpoint Lite host and filtering module using the SafeDNSMacProxy_2026-05-14_1744.pkg package. (Provided from SafeDNS)
1. Installing the agent on client devices
Before deploying the agent at scale, complete the preparation steps below.
- Ask SafeDNS technical support (support@safedns.com) to enable the required features for your account.
- Obtain your Base64-encoded AuthKey from SafeDNS.
- Deploy the create-conf.sh script to the target devices according to these instructions.
- Create and install the two required configuration profiles on the target devices according to this guide.
- Deploy the SafeDNS daemon to the target devices according to the SafeDNSDaemon installation guide.
After these steps are complete, you can deploy the SafeDNS Endpoint Lite agent.
Install the agent package, which includes the host and filtering module, in the same way as the SafeDNS daemon package, using the attached installer package.
2. Uninstalling the agent
To remove SafeDNS Endpoint Lite from target devices:
- Add the SafeDNS Uninstaller script to Scripts in SimpleMDM according to the Running the SafeDNS Uninstaller script guide.
- Deploy the uninstaller script to the target devices in the same way as the create-conf.sh script.
- Remove the SafeDNS configuration profiles, the SafeDNS Endpoint Lite agent, and the SafeDNS daemon from the target devices.
IMPORTANT
After removing the agent and the daemon, RESTART each target device.
The agent operates at the kernel level. After removal, some runtime records remain in the kernel until the device is restarted. If the device is not restarted, reinstalling the agent on the same device may cause errors or unstable behavior.
3. Additional information
Preventing DNS-over-HTTPS bypass in browsers
Advanced users may try to bypass system DNS filtering by configuring a custom DNS-over-HTTPS (DoH) resolver in Chromium-based browsers. The SafeDNS agent works with system DNS, so additional protection is required to reduce this risk.
SafeDNS provides two layers of protection against this scenario:
1. Browser DNS policy configuration profile
Create and deploy the Safedns_browser_dns_policy custom configuration profile using the Safedns_browser_dns_policy.mobileconfig file.
This profile is deployed in the same way as the SafeDNS_DNS_Proxy custom configuration profile.
The profile restricts access to DNS-related settings in major browsers.
However, it does not cover all browsers. Firefox is not included in this policy.
2. Built-in DoH bypass detection
The SafeDNS filtering module includes a mechanism that detects attempts to bypass filtering through third-party DoH services and blocks those connections.
Known limitation
If an advanced user manually configures a self-hosted DoH resolver or another non-standard custom DoH solution in the browser, DNS filtering may not work as expected.
Creating the config.plist file for SafeDNS Endpoint Lite on macOS
System requirements: macOS Tahoe 26 or later, Mac with Apple silicon — M1 chip or later.
The Agent is available on the following billing plans: Safe Family, Pro, Pro Plus, and archived Safe@Home, Safe@Office.
Use this guide to create the Config.plist file on target macOS devices before deploying SafeDNS Endpoint Lite.
1. Add the AuthKey to the script
Open create-conf.sh and replace "123zZGNlOGYtN2Nokd00M2ZlLWAKD2UtNTU000NlNjc5Maaa" (line 9) with your Base64-encoded AuthKey.
LOG_FILE="/var/log/safedns-installer.log"
AUTH_KEY="123zZGNlOGYtN2Nokd00M2ZlLWAKD2UtNTU000NlNjc5Maaa" — the part to modify
DEVICE_NAME=$(scutil --get ComputerName 2>/dev/null || hostname)It won't work with the sample key from the original script
2. Upload the script to SimpleMDM
1. Go to Scripts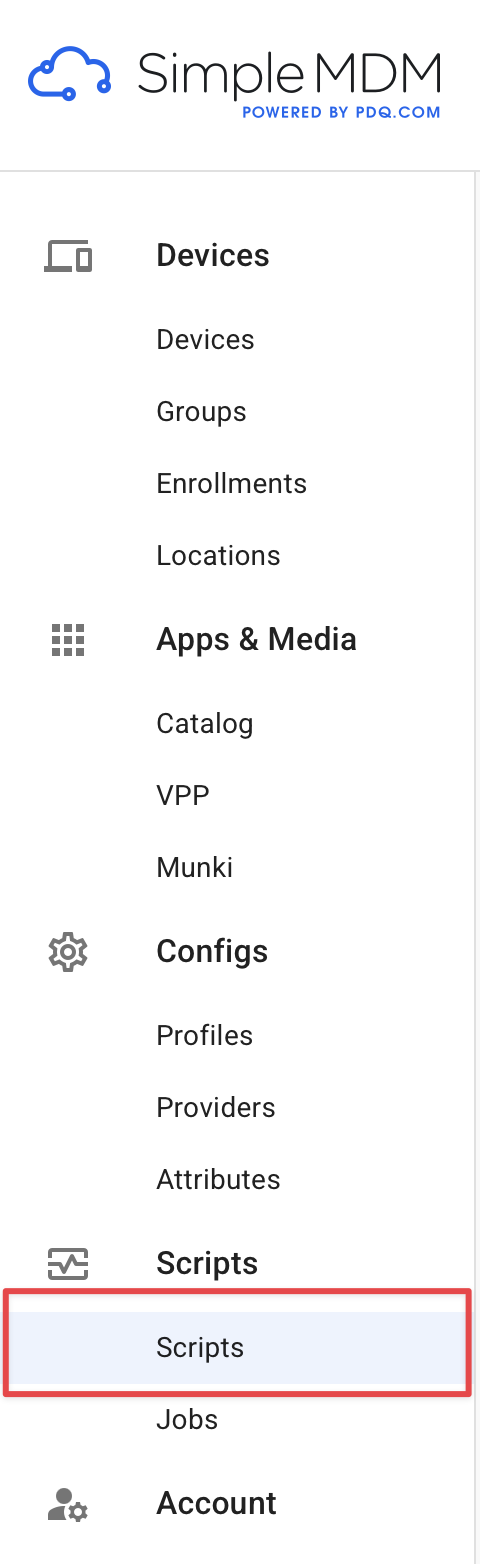
2. Click on Create Script
3. Give it a name, for example SafeDNS_Installer, upload the updated create-conf.sh, and click Save.
3. Run the script on target devices
1. Go to Jobs > Create Job.
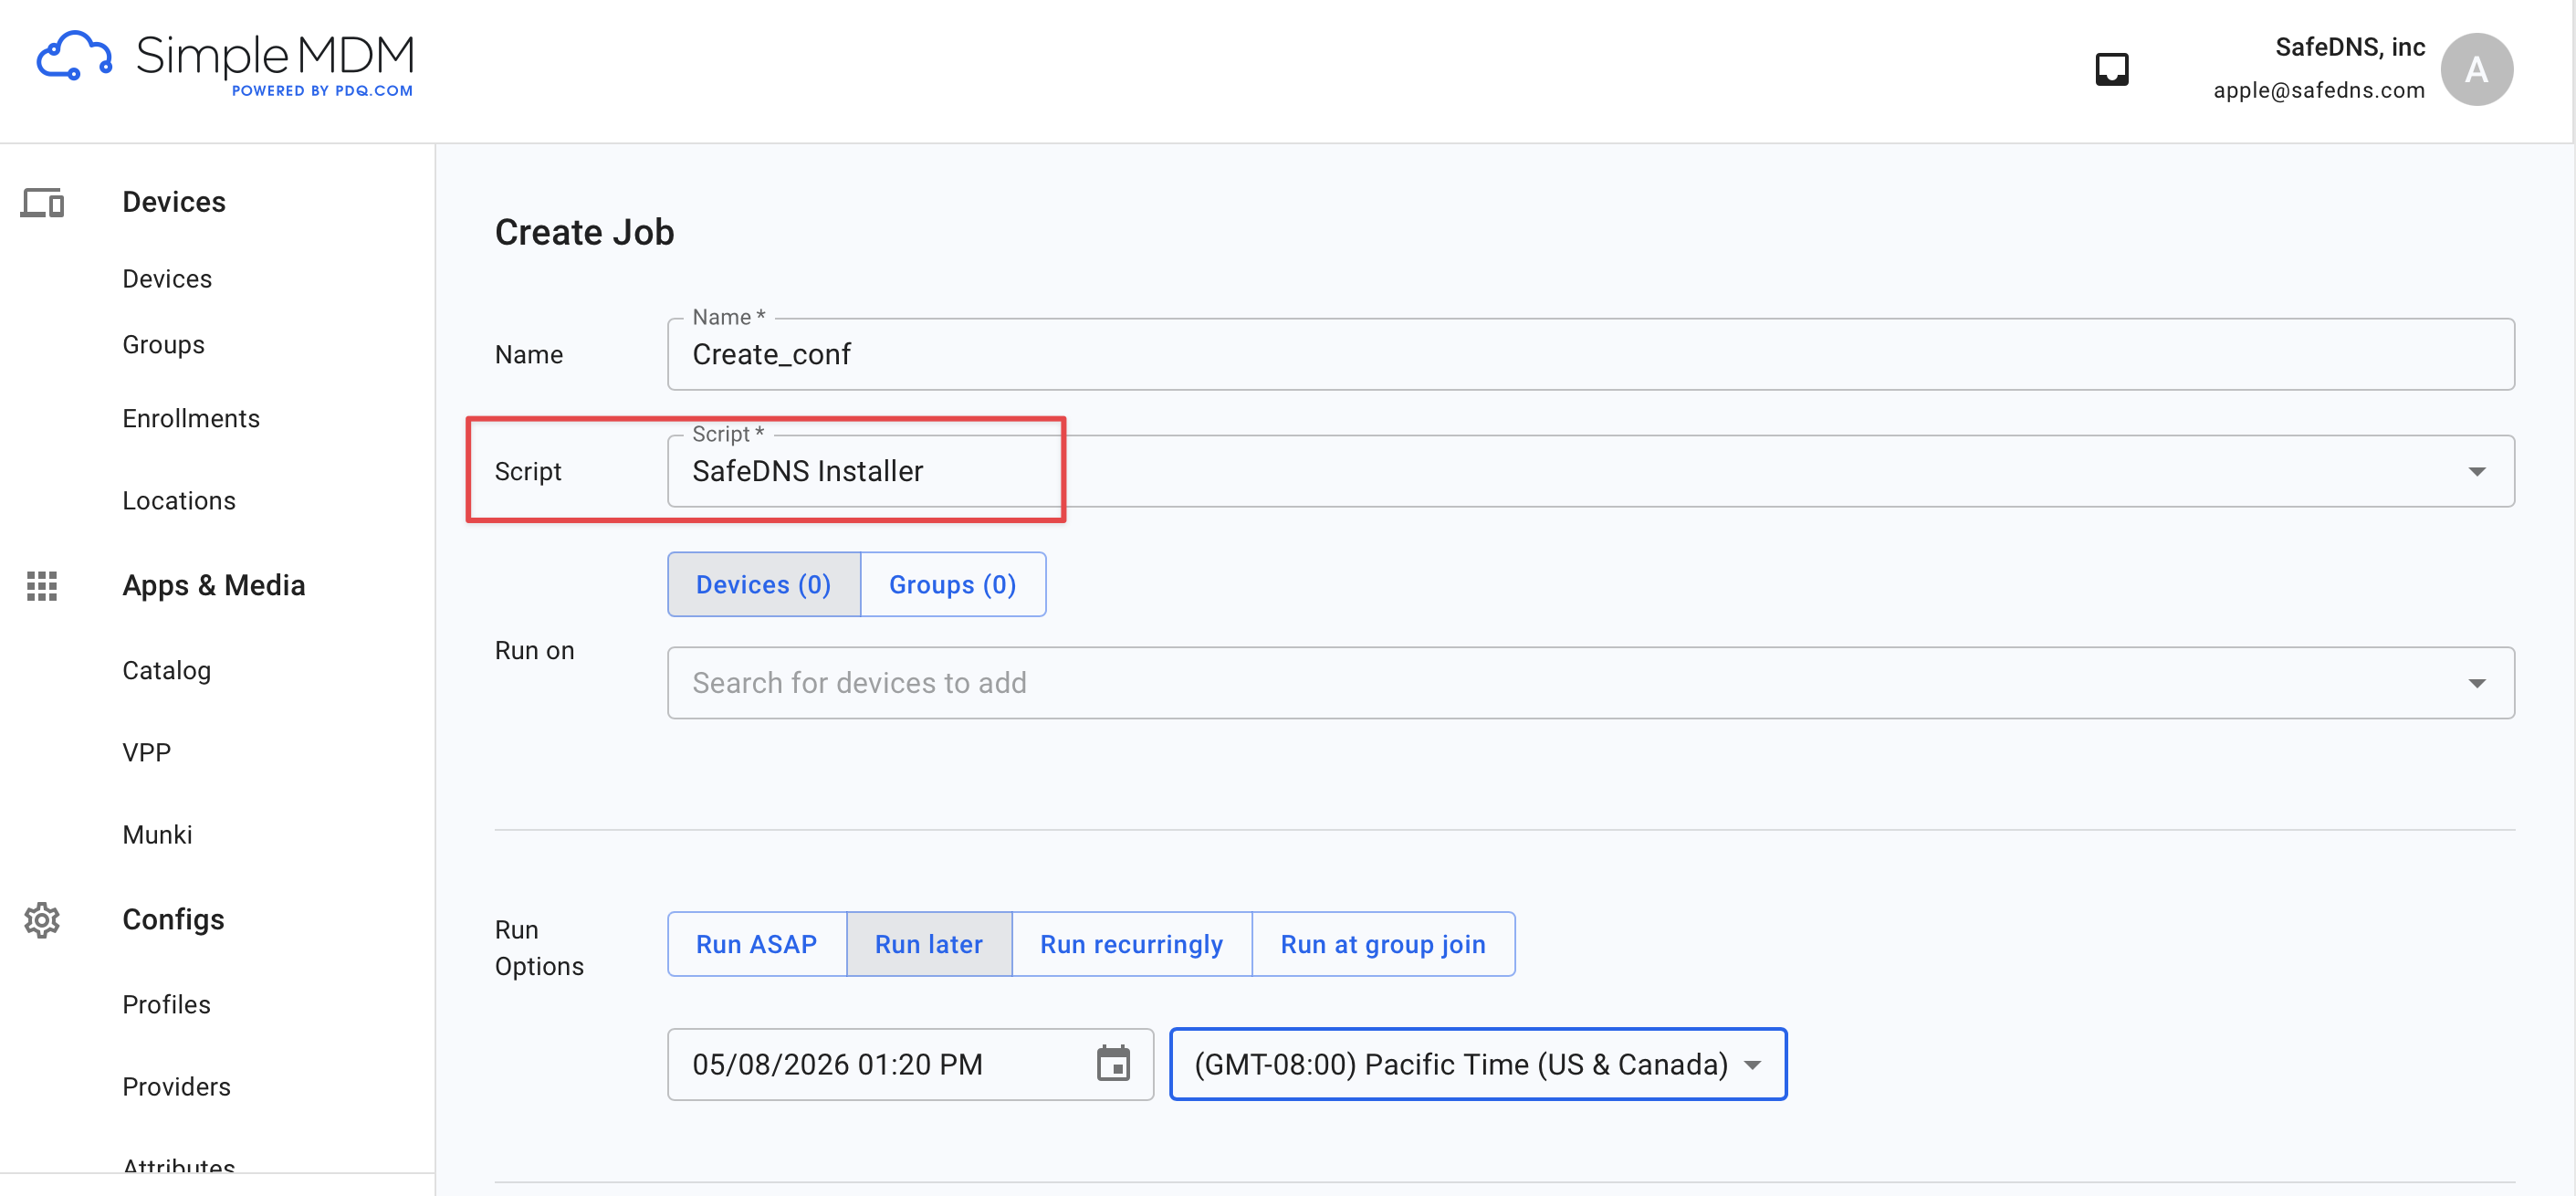
2. Select the script you created with your AuthKey, choose the target devices or device groups, configure the run option, and run the job.
4. Verify the result
After the job runs, check that the following files were created on the target Mac:
- Config.plist
- /var/log/safedns-installer.log
The log file confirms that the script was delivered and executed.
Create and deploy configuration profiles for SafeDNS Endpoint Lite on macOS
System requirements: macOS Tahoe 26 or later, Mac with Apple silicon — M1 chip or later.
The Agent is available on the following billing plans: Safe Family, Pro, Pro Plus, and archived Safe@Home, Safe@Office.
Before deploying the SafeDNS daemon and filtering module, install two configuration profiles on the target macOS devices:
- SafeDNS_DNS_Proxy - Custom Configuration Profile
- SafeDNS_Profile_for_System_Extension - System Extension Policy
The steps below use SimpleMDM as an example. Other MDM platforms may use different menu names.
1. Create the SafeDNS DNS Proxy profile
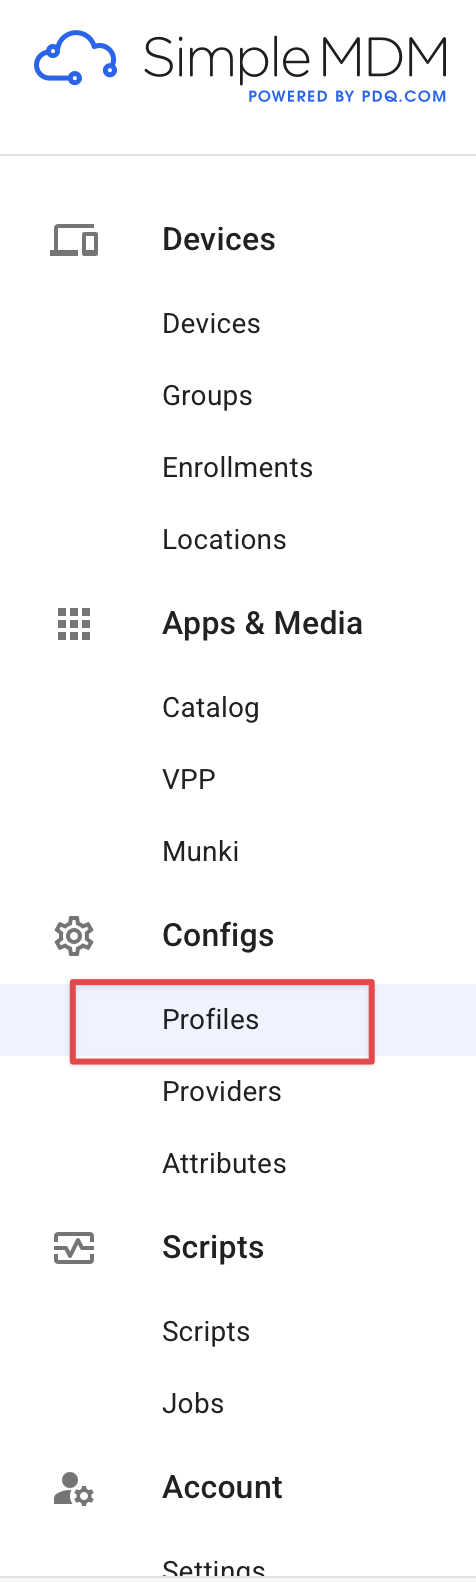
- Go to Configs > Profiles

- Click Create Profile.

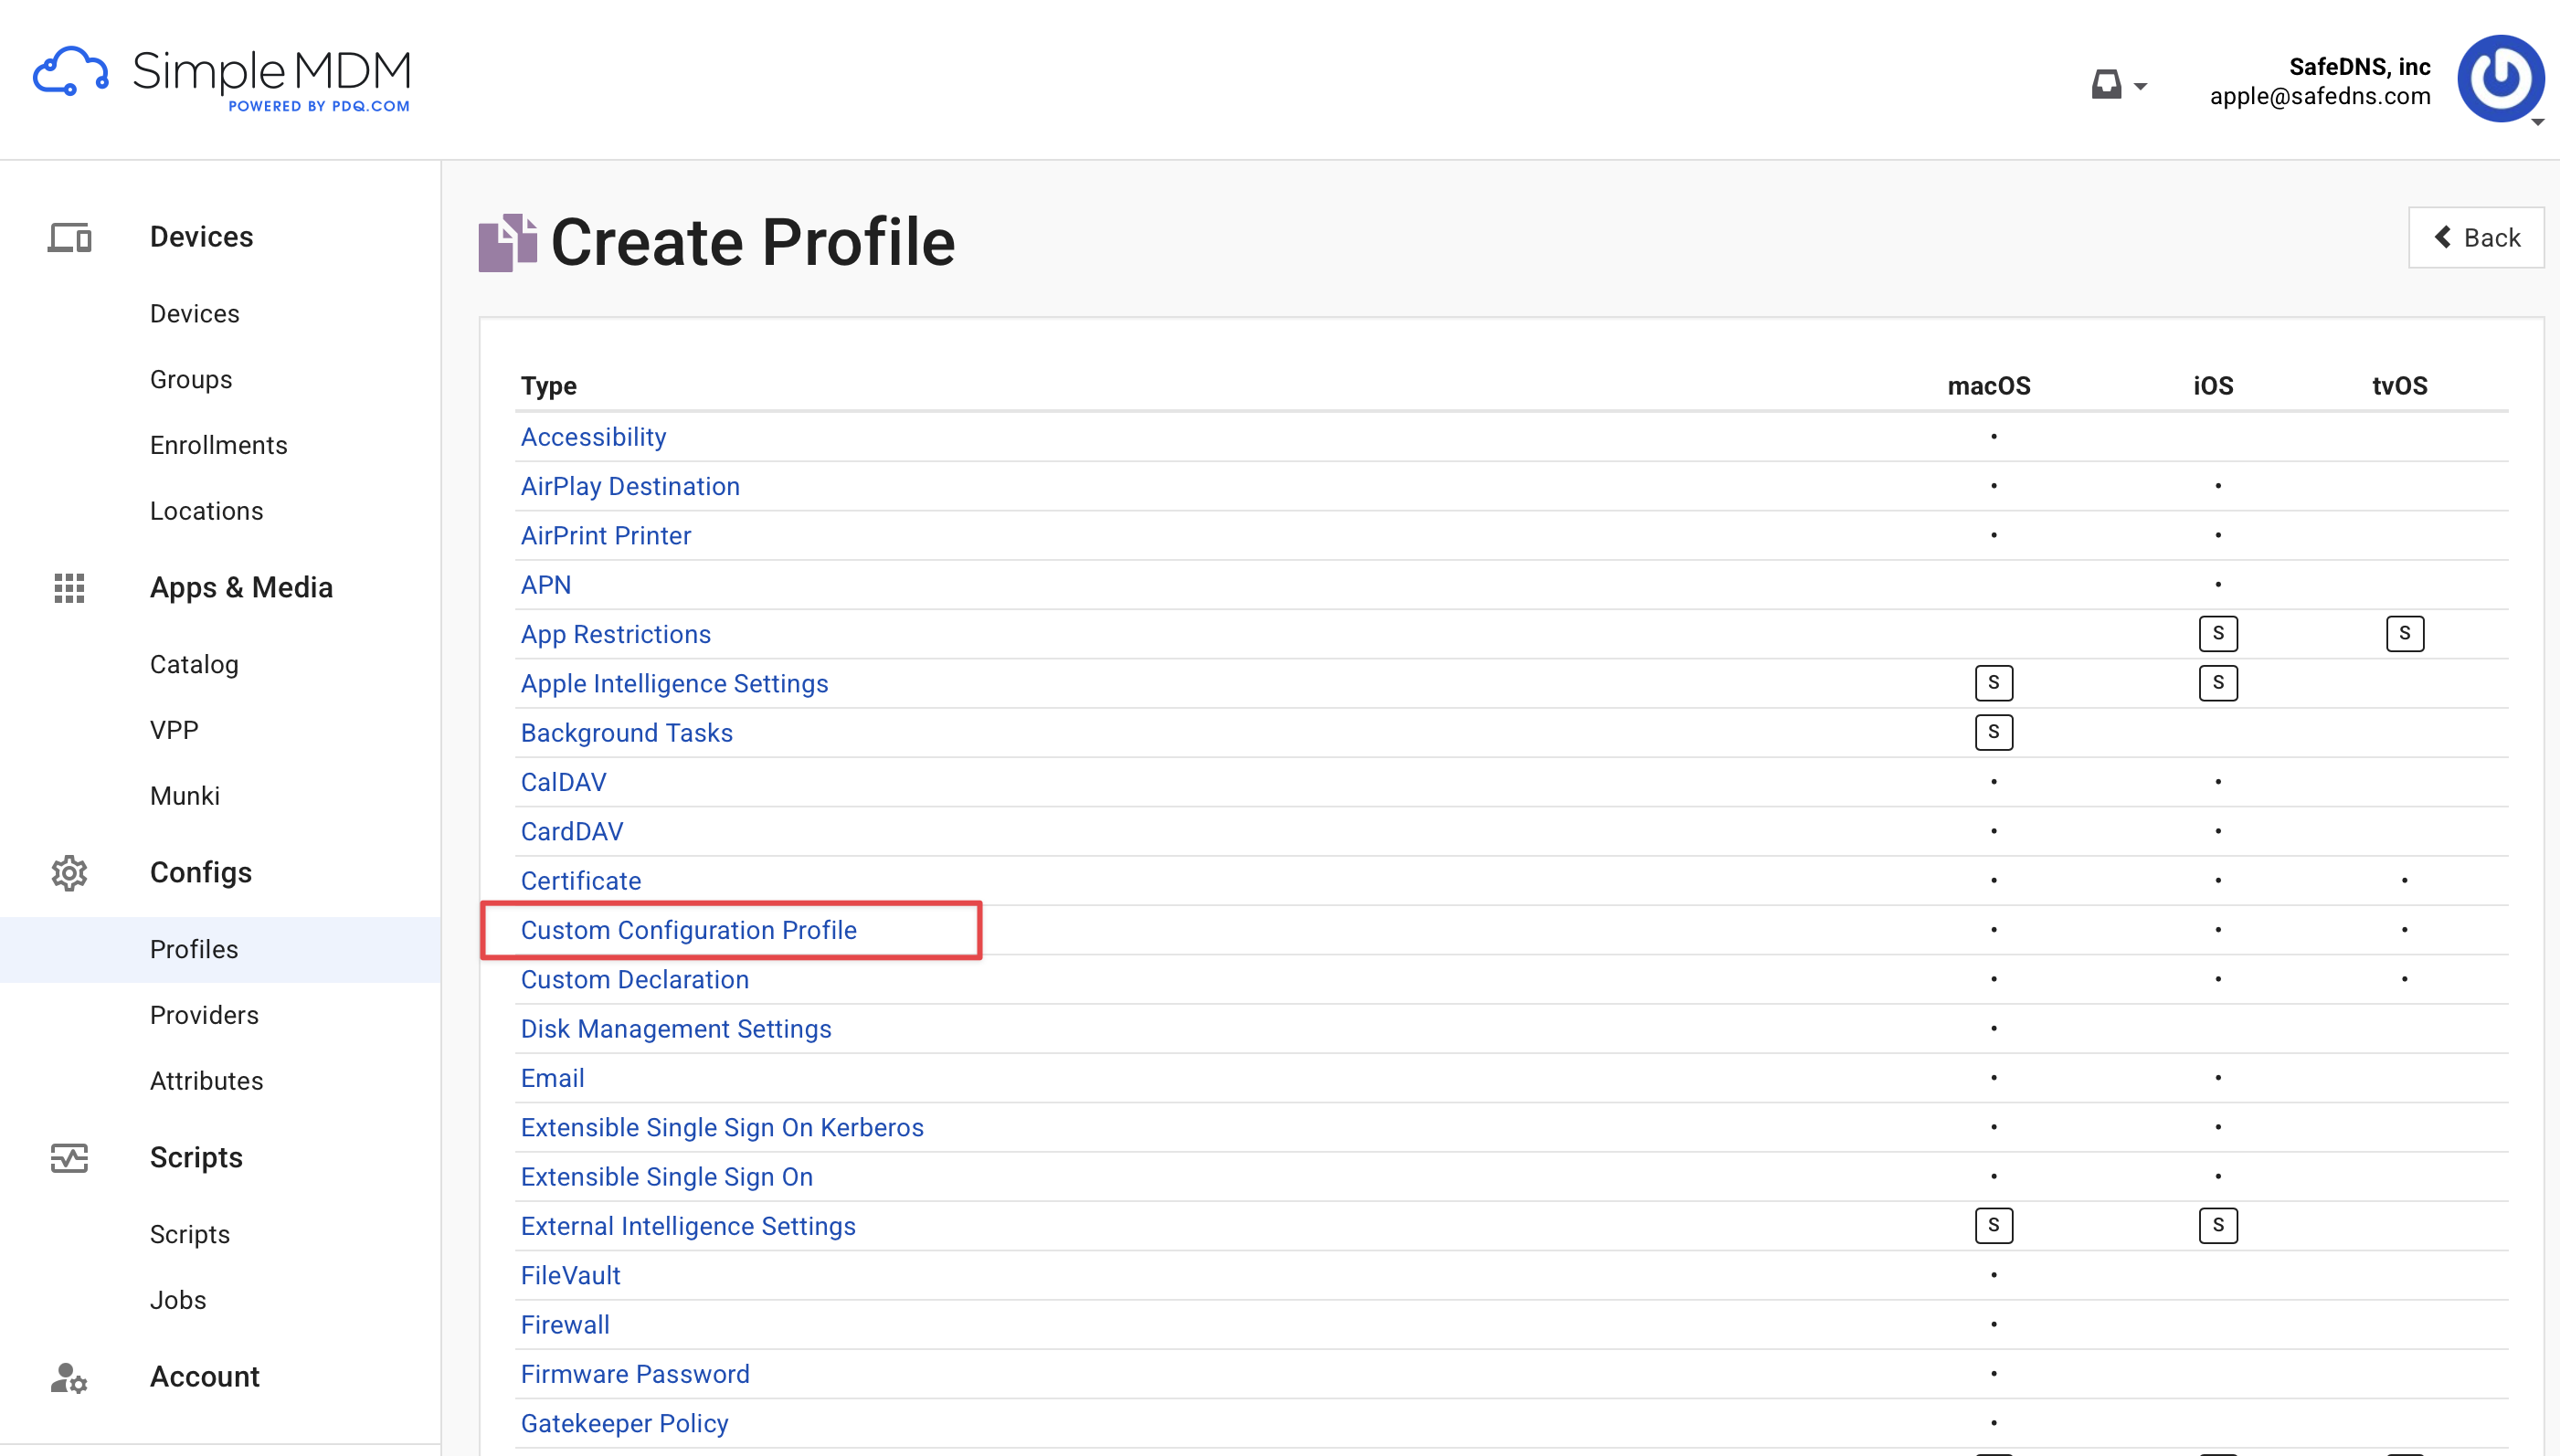
- Select Custom Configuration Profile.

- Name the profile SafeDNS_DNS_Proxy (as an example).
- Upload SafeDNS-DNSProxy.mobileconfig without changing the file (Provided by Sad). This file has all the required parameters.
- Click Save.

2. Create the System Extension profile
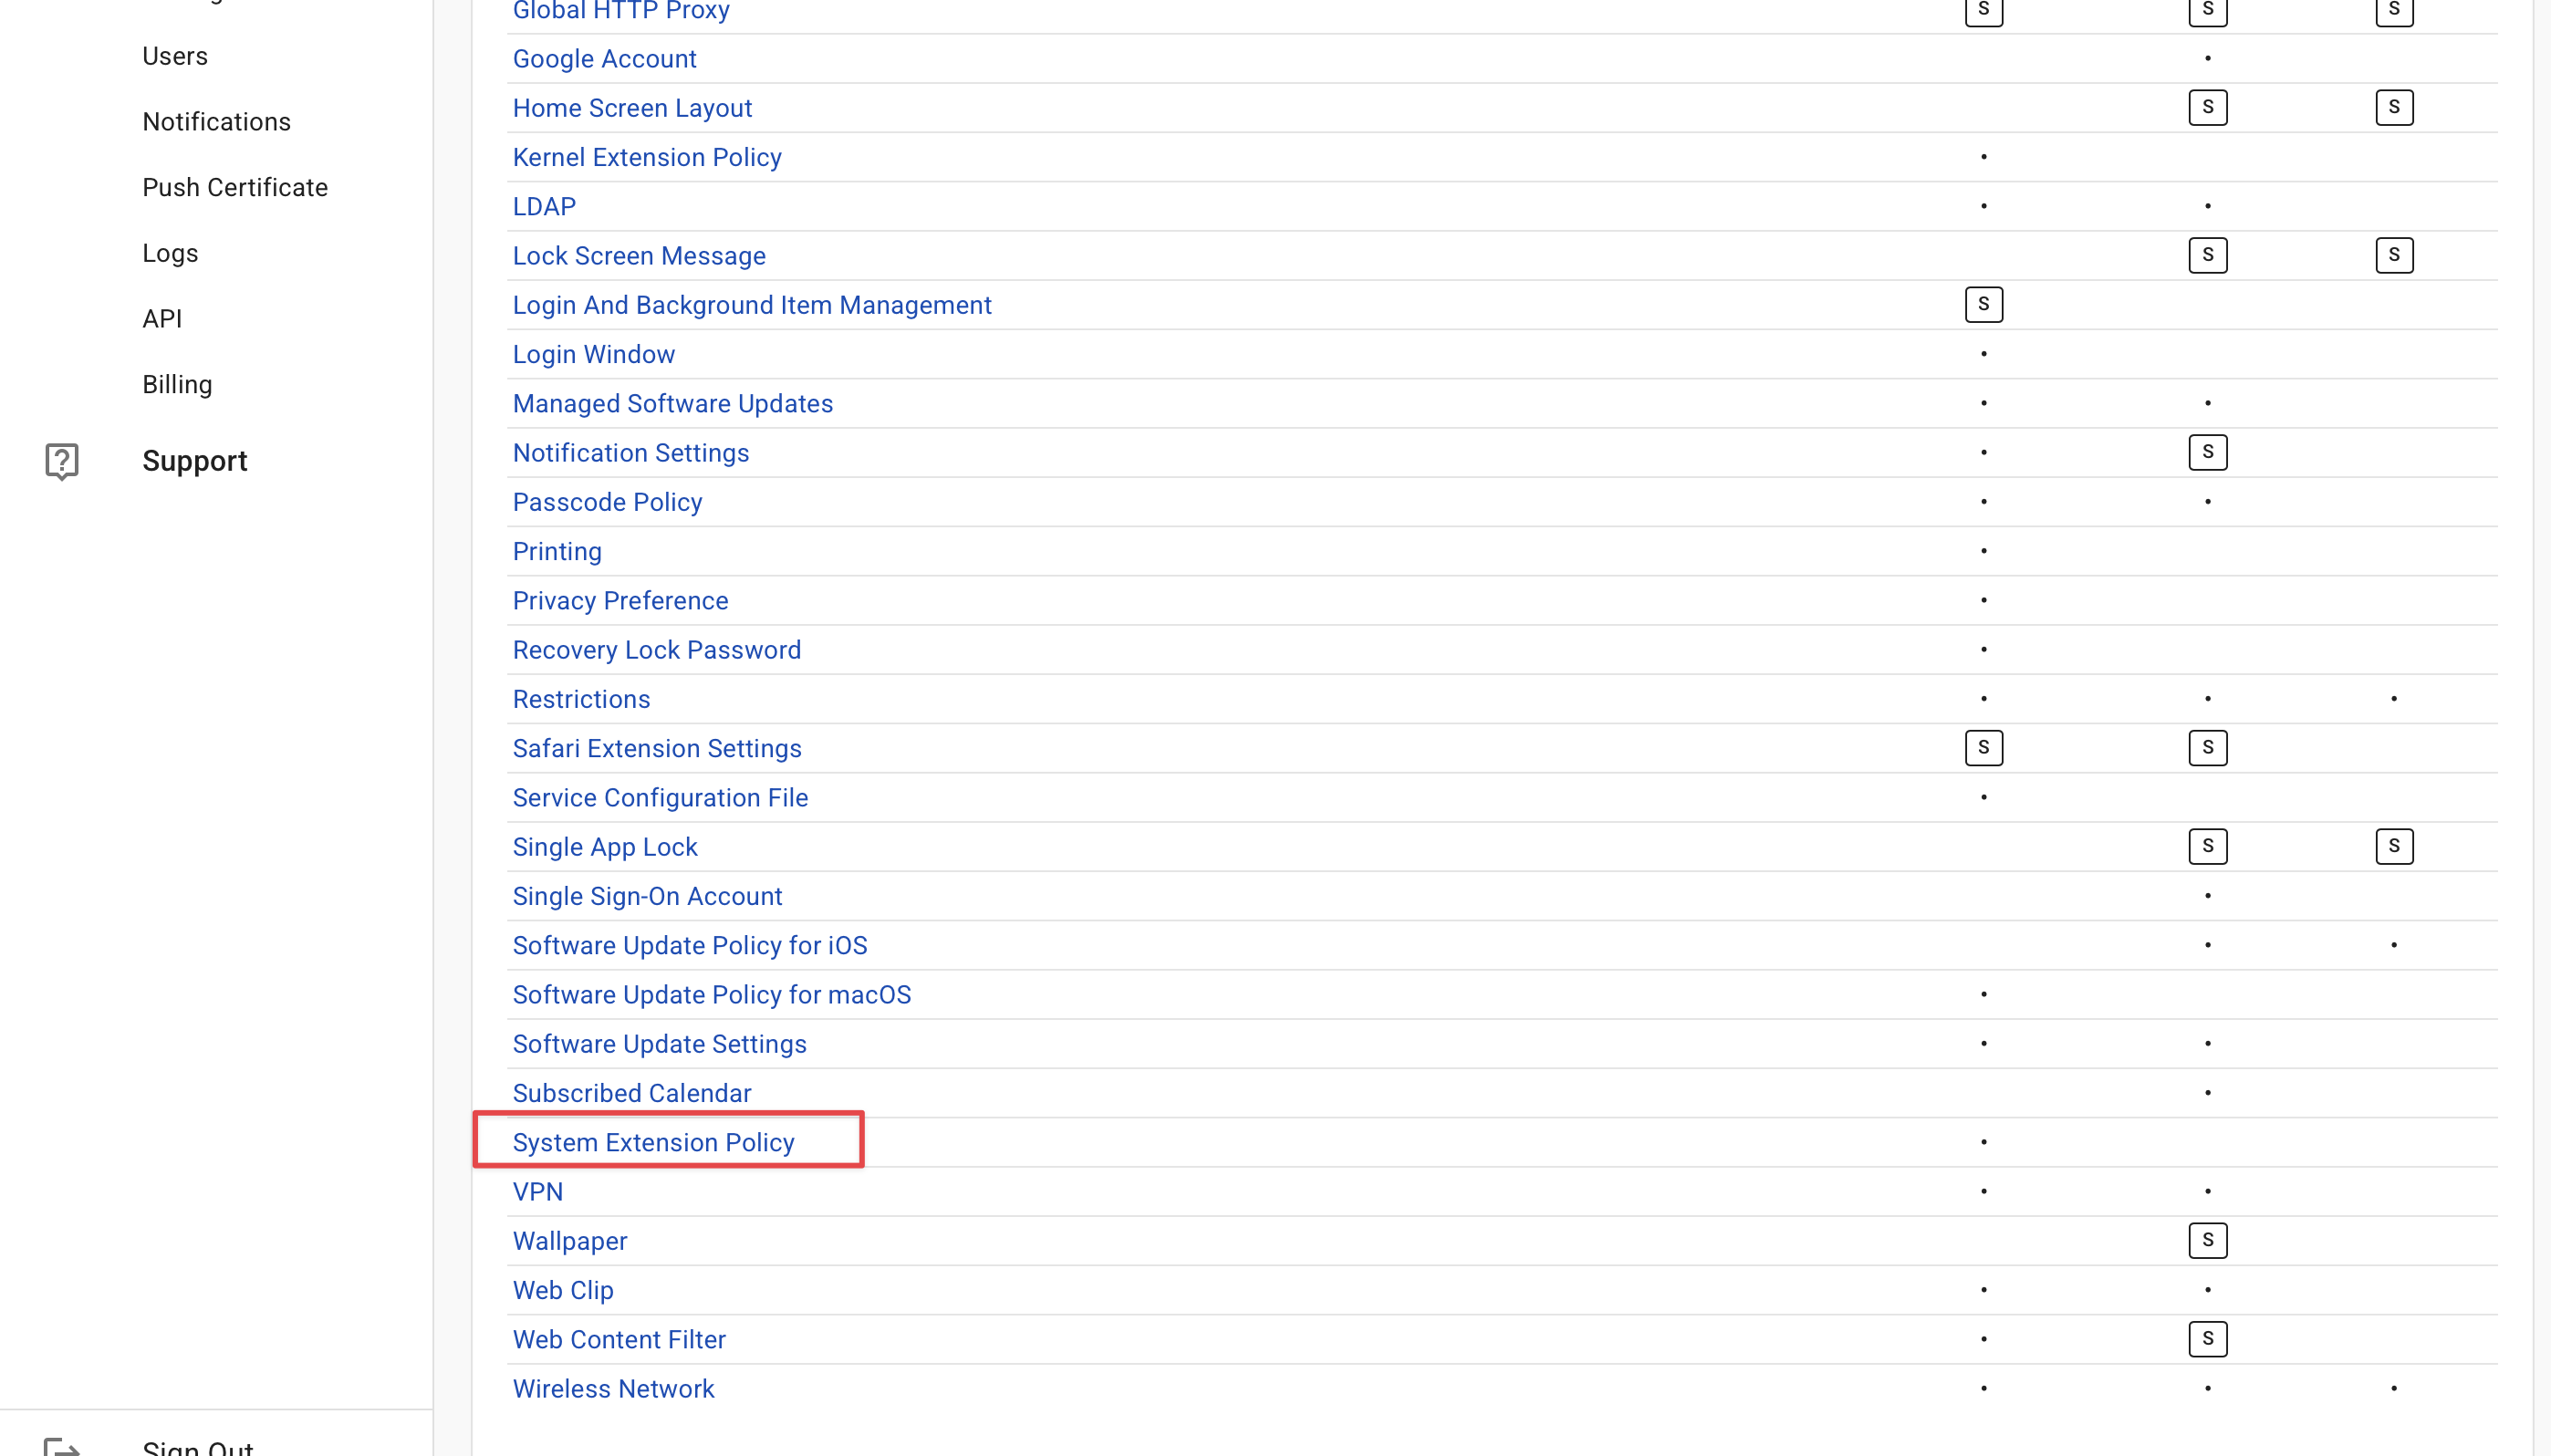
- Go to Configs > Profiles > Create Profile.
- Select System Extension Policy.

- Name the profile SafeDNS_Profile_for_System_Extension (as an example).
- Use the following values:
-
Team Identifier — B2TN6DQ93U
-
Bundle Identifier — com.safedns.agent.SafeDNSMacProxy.dnsProxy
-
Notes (optional) — SafeDNS DNS Proxy system extension (SafeDNSMacProxyDNS)
-
-
Allow the following extension types:
- Driver Extension
- Network Extension
- Endpoint Security Extension

- Click Save.
3. Assign the profiles to target devices
- Go to Groups and select the target device group.
- Open the Profiles tab.
- Add both profiles created earlier:
- SafeDNS_DNS_Proxy
- SafeDNS_Profile_for_System_Extension
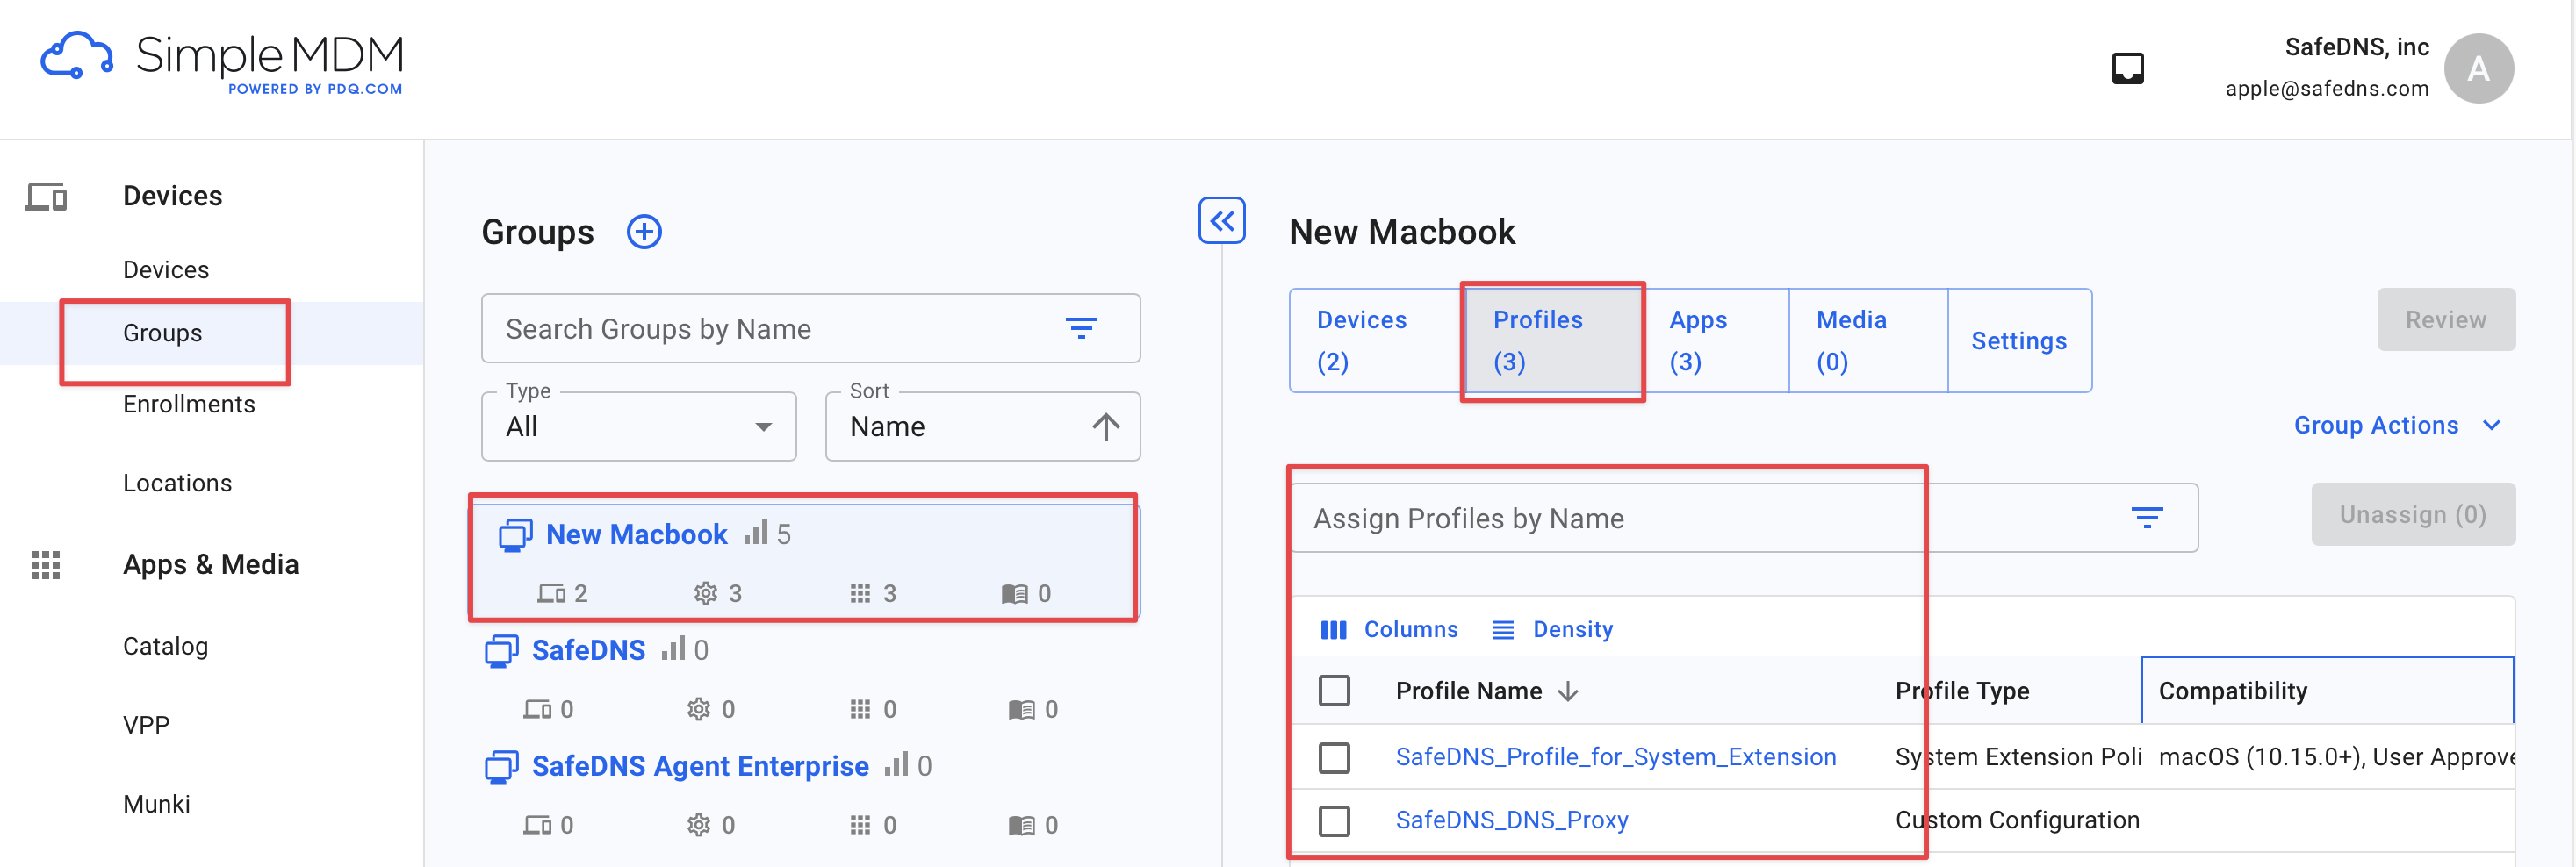
- Click Review > Save changes.
- Run Group Actions > Sync Profile.
The profiles should appear in 2-5 seconds on the target Mac under System Settings > General > Device Management.
How to remove the profiles
To remove the profiles, unassign both profiles from the device group, save the changes, and run Sync Profile again.
After synchronization, check System Settings > General > Device Management on the target Mac. The SafeDNS profiles should no longer be listed.
SafeDNSDaemon installation via MDM on macOS
System requirements: macOS Tahoe 26 or later, Mac with Apple silicon — M1 chip or later.
The Agent is available on the following billing plans: Safe Family, Pro, Pro Plus, and archived Safe@Home, Safe@Office.
SafeDNSDaemon registers each managed macOS device in the SafeDNS dashboard and obtains the DNS token required for filtering.
The example below uses SimpleMDM, but the same logic applies to other MDM platforms.
Deployment steps
- Download the package safedns-daemon-20260515-1335-signed.pkg
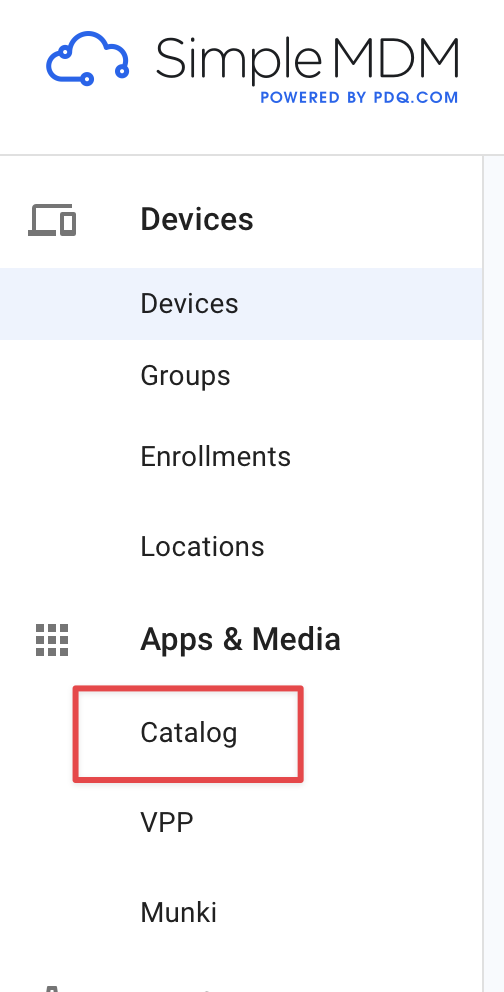
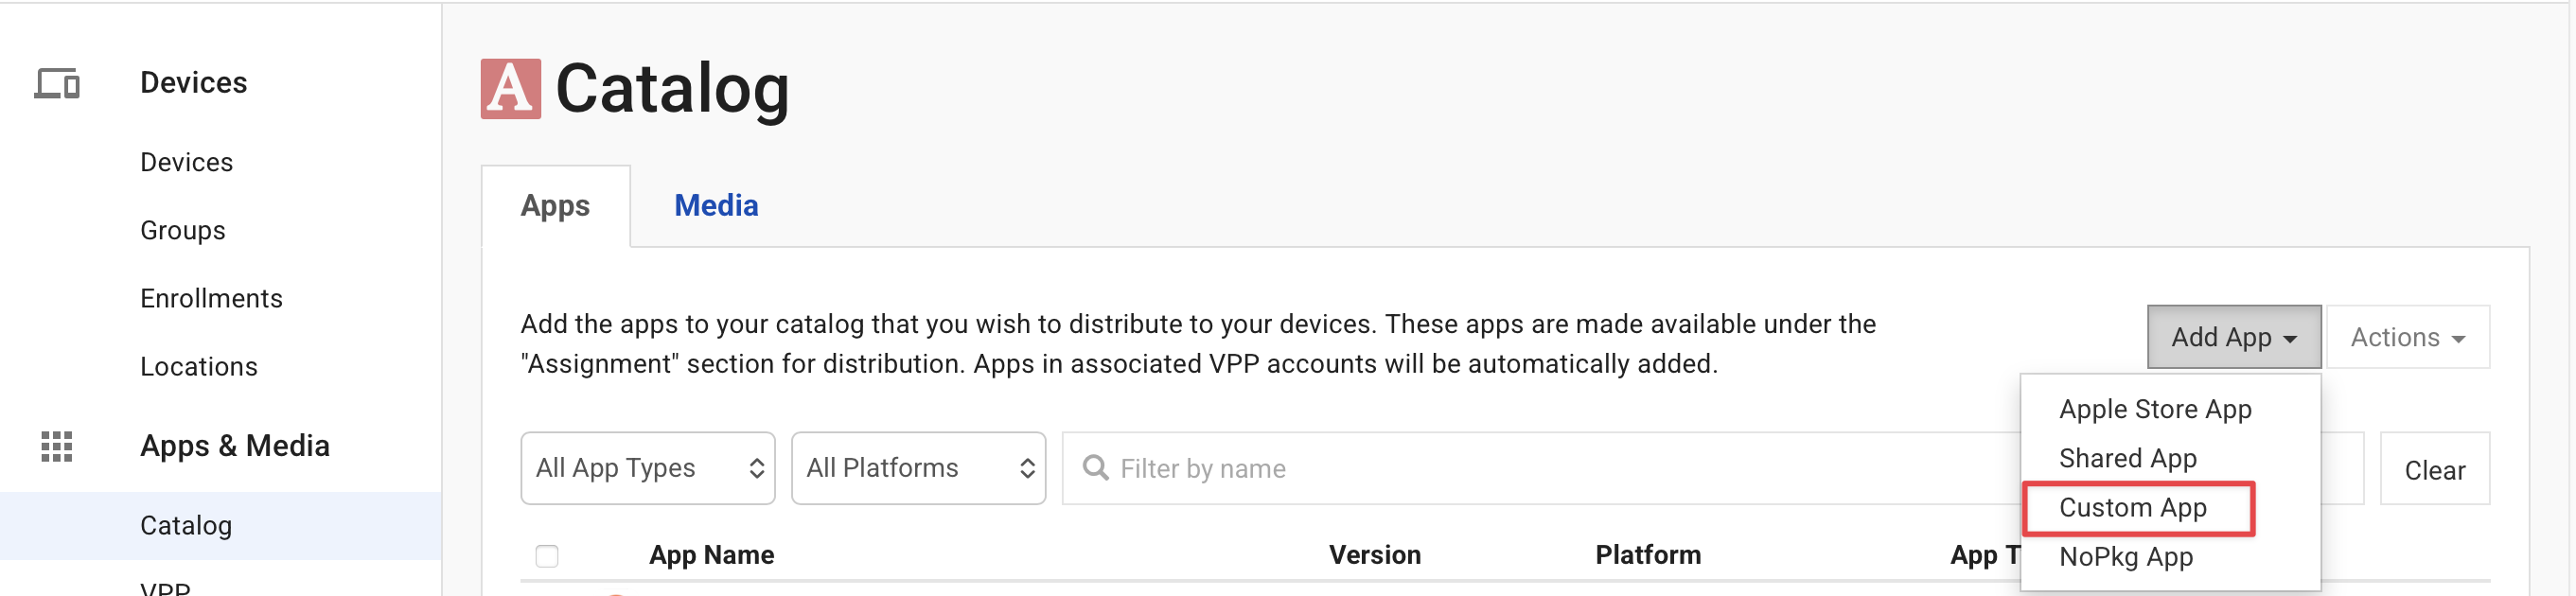
- Upload the package to the MDM catalog: Go to Apps & Media -> Catalog ->

- Select Add App -> Custom App.

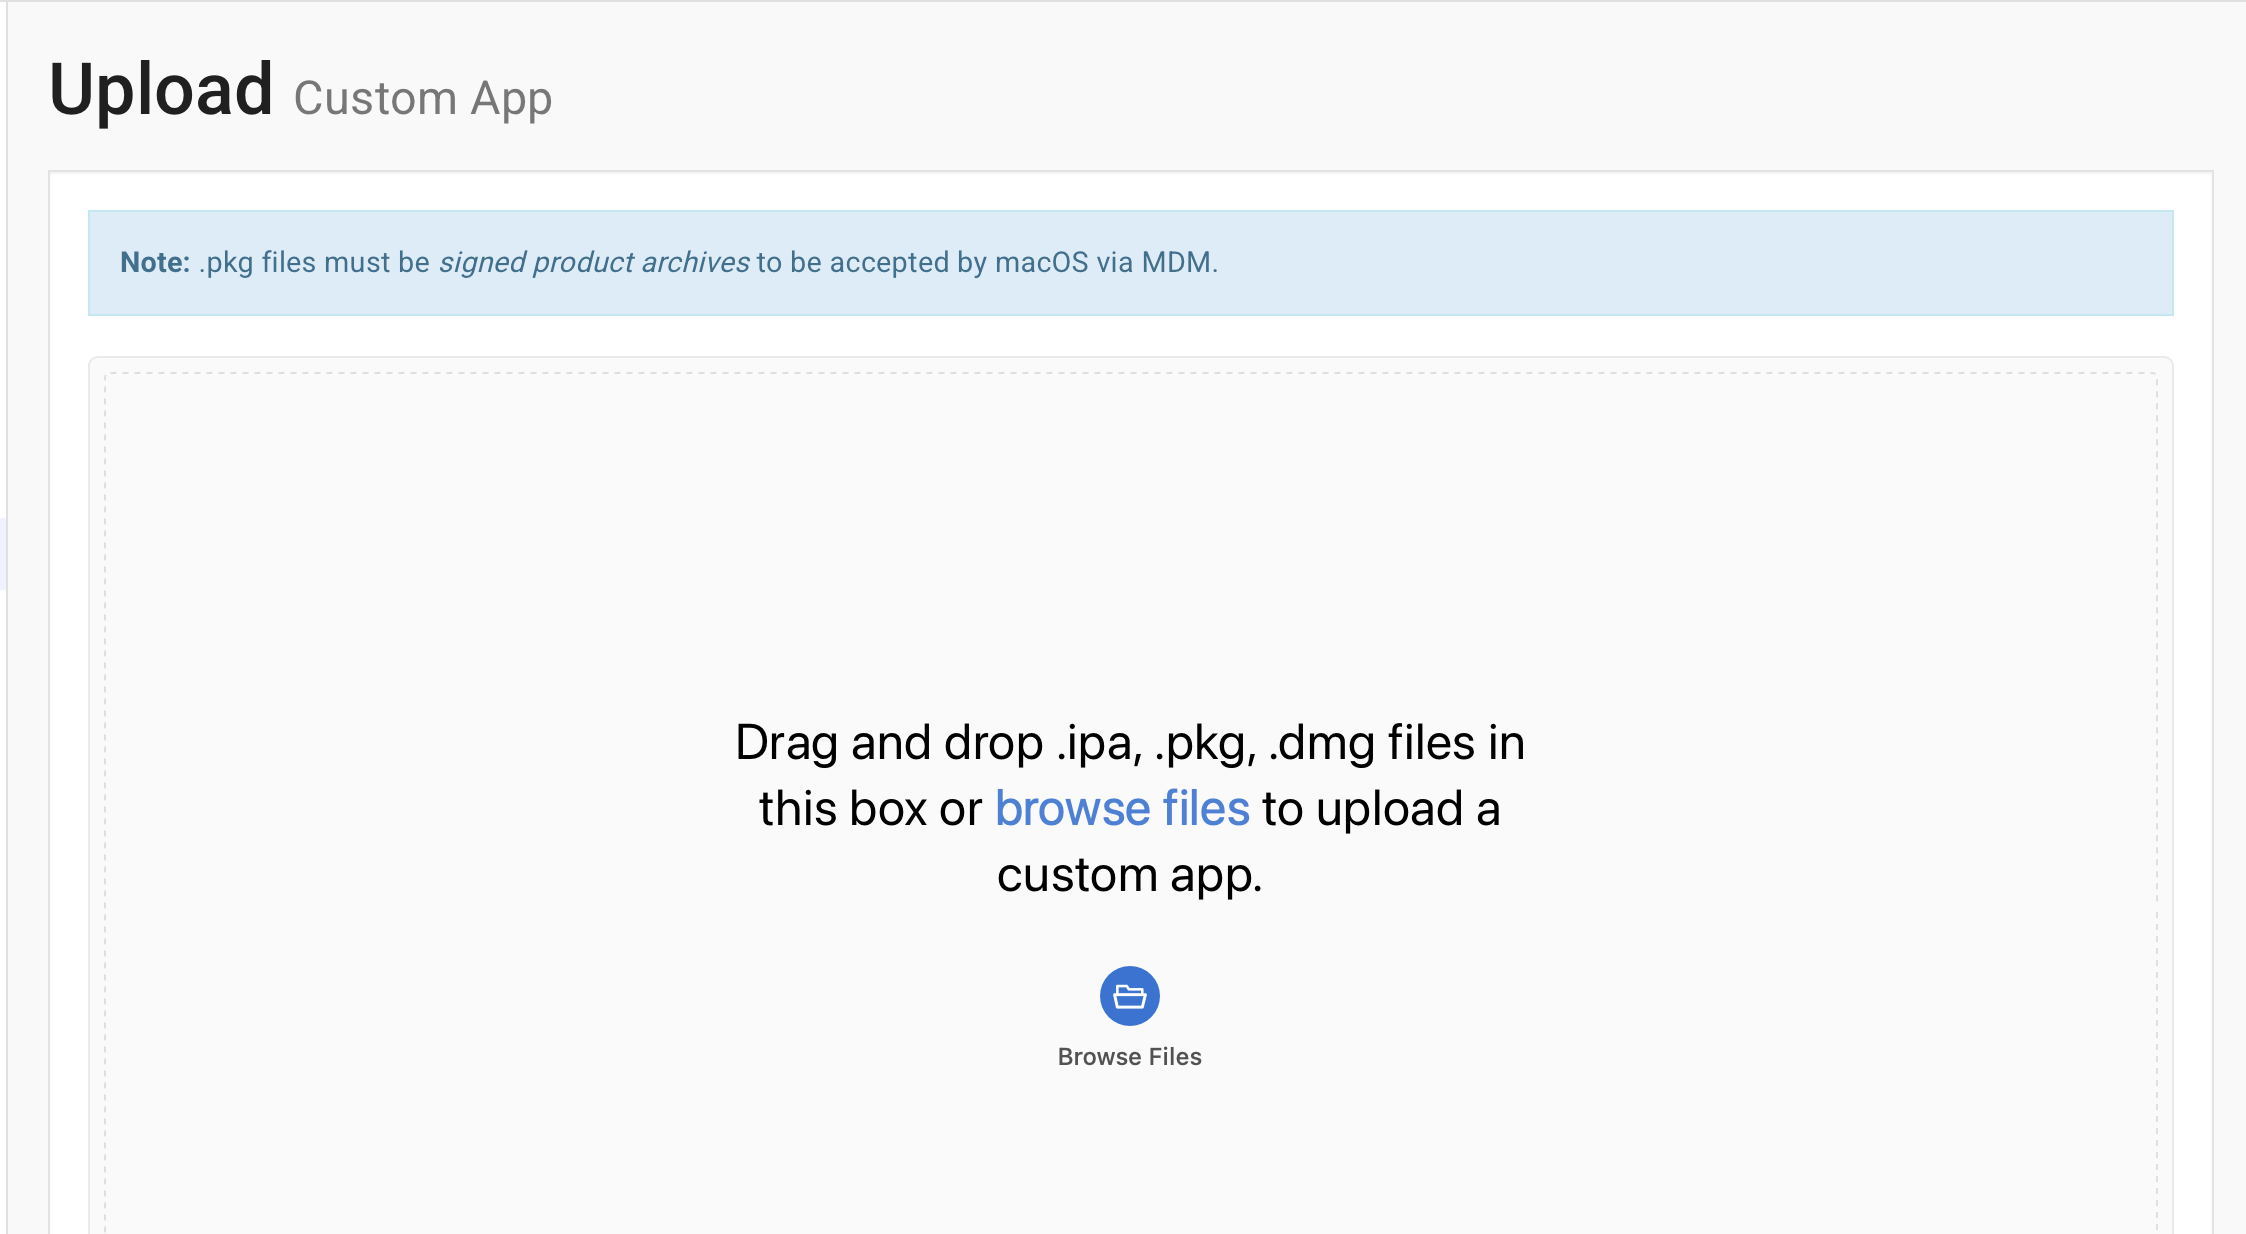
- Upload the SafeDNSDaemon package downloaded earlier:

After uploading, SafeDNSDaemon appears in the app catalog. - Assign the daemon to devices: Go to Groups, select the target device group, open the Apps section, and add SafeDNSDaemon.
- Save and deploy: Click Review -> Save Changes. Then open Group Actions and select Install Apps and Media to deploy the daemon to the target devices.
Verify the installation
You can confirm that SafeDNSDaemon is working in either of these ways:
- Check the safedns-daemon.log file on the target Mac.
- Open the SafeDNS dashboard and confirm that the newly registered devices are displayed.
Running the SafeDNS Uninstaller script
Use this guide to upload the SafeDNS Uninstaller.sh file to uninstall SafeDNS Endpoint Lite
1. Download the file
Download link: SafeDNS Uninstaller.sh
2. Upload the script to SimpleMDM
- Go to Scripts

- Click on Create Script

- Give it a name, for example SafeDNS_uninstaller, upload the SafeDNS Uninstaller.sh file, and click Save.
3. Run the script on target devices
- Go to Jobs > Create Job.

- Select the SafeDNS Uninstaller.sh file downloaded earlier, choose the target devices or device groups, configure the run option, and run the job.