resolution\_type: GETDNS\_RESOLUTION\_STUB dns\_transport\_list: GETDNS\_TRANSPORT\_TLS tls\_authentication: GETDNS\_AUTHENTICATION\_NONE tls\_query\_padding\_blocksize: 128 edns\_client\_subnet\_private: 0 idle\_timeout: 100000 listen\_addresses: - 127.0.0.1@53 round\_robin\_upstreams: 1 upstream\_recursive\_servers: - address\_data: 195.46.39.41 tls\_auth\_name: "dns-s.safedns.com" tls\_pubkey\_pinset: - digest: "sha256" value: kbv1ODr8gP7FV9/h2lp5t3sP4TdYZEwqUYj0mk0IBzg=
5\. Run the following command to replace the default DNS server with a local Stubby:PowerShell -ExecutionPolicy bypass -file "**C:\\Program Files\\Stubby\\stubby\_setdns\_windows.ps1**"
6\. Run the **stubby.bat** file [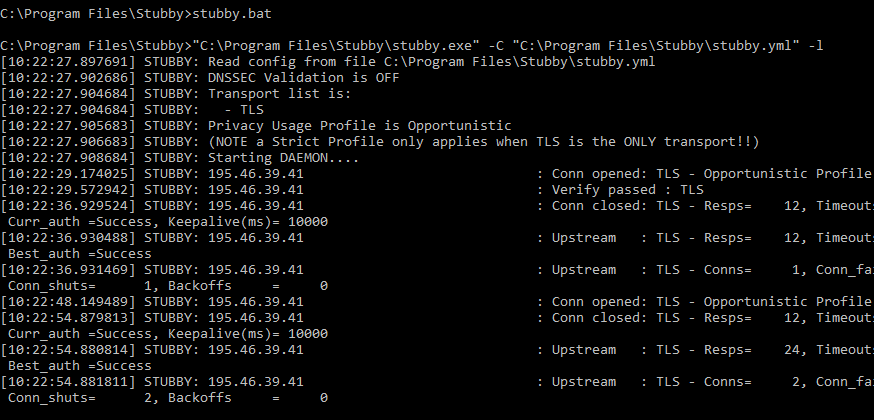](https://docs.safedns.com/uploads/images/gallery/2022-08/XsSPiGAE7UCI4iFl-4-dns-over-tls-setup-guide.png) 7\. Check the filtering. --- #### Linux (Ubuntu) 1\. Install the Stubby package from a repository:$ sudo apt install stubby
2\. Set the configuration file **/etc/stubby/stubby.yml** as follows:resolution\_type: GETDNS\_RESOLUTION\_STUB dns\_transport\_list: - GETDNS\_TRANSPORT\_TLS tls\_authentication: GETDNS\_AUTHENTICATION\_NONE tls\_query\_padding\_blocksize: 128 edns\_client\_subnet\_private : 0 idle\_timeout: 100000 listen\_addresses: - 127.0.0.2@53 round\_robin\_upstreams: 1 upstream\_recursive\_servers: - address\_data: 195.46.39.41 tls\_auth\_name: "dns-s.safedns.com" tls\_pubkey\_pinset: - digest: "sha256" value: kbv1ODr8gP7FV9/h2lp5t3sP4TdYZEwqUYj0mk0IBzg=
3\. Change DNS in **/etc/resolv.conf** file to **127.0.0.2**:nameserver 127.0.0.2
4\. Start the filtering serviceservice stubby start
5\. Check the filtering. --- #### MacOS 1\. [Download](https://dnsprivacy.org/dns_privacy_daemon_-_stubby/installation/macos_homebrew/) and install the Stubby Manager package. If you get a security alert, click on "**Open Anyway**" in the security settings. [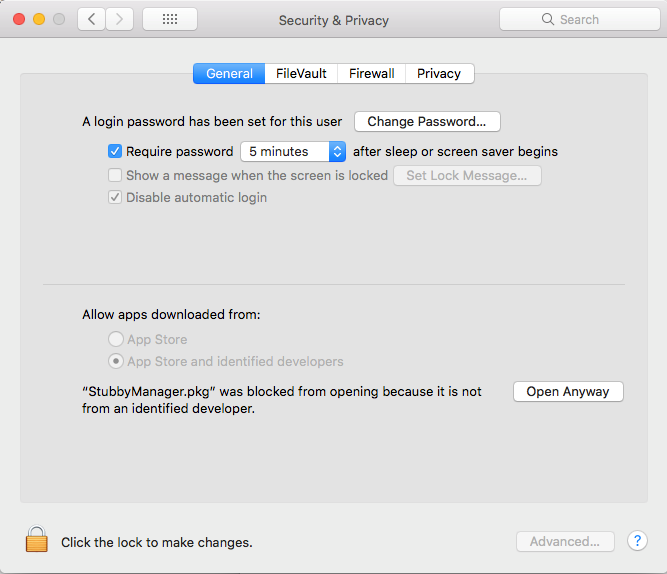](https://docs.safedns.com/uploads/images/gallery/2022-08/bXud5Q8gZWwB4tfL-5-dns-over-tls-setup-guide.png) 2\. Launch a Stubby Manager app after installation and click the "**Advanced**" button. [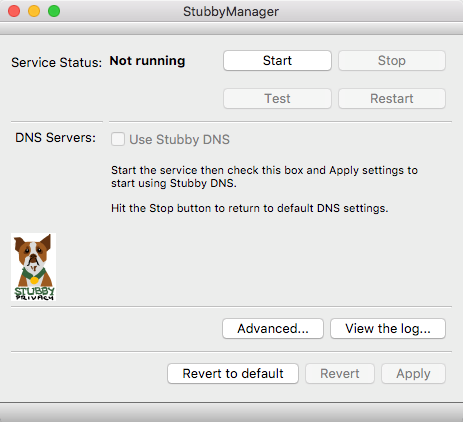](https://docs.safedns.com/uploads/images/gallery/2022-08/hTyr6BBhVgeFD6VA-6-dns-over-tls-setup-guide.png) 3\. Set the configuration file as follows:resolution\_type: GETDNS\_RESOLUTION\_STUB dns\_transport\_list: - GETDNS\_TRANSPORT\_TLS tls\_authentication: GETDNS\_AUTHENTICATION\_NONE tls\_query\_padding\_blocksize: 128 edns\_client\_subnet\_private : 0 idle\_timeout: 100000 listen\_addresses: - 127.0.0.1@53 round\_robin\_upstreams: 1 upstream\_recursive\_servers: - address\_data: 195.46.39.41 tls\_auth\_name: "dns-s.safedns.com" tls\_pubkey\_pinset: - digest: "sha256" value: kbv1ODr8gP7FV9/h2lp5t3sP4TdYZEwqUYj0mk0IBzg=
4\. Apply the settings and click **"Start"**. 5\. Open **"Network Properties"** and set **127.0.0.1** as the DNS server. [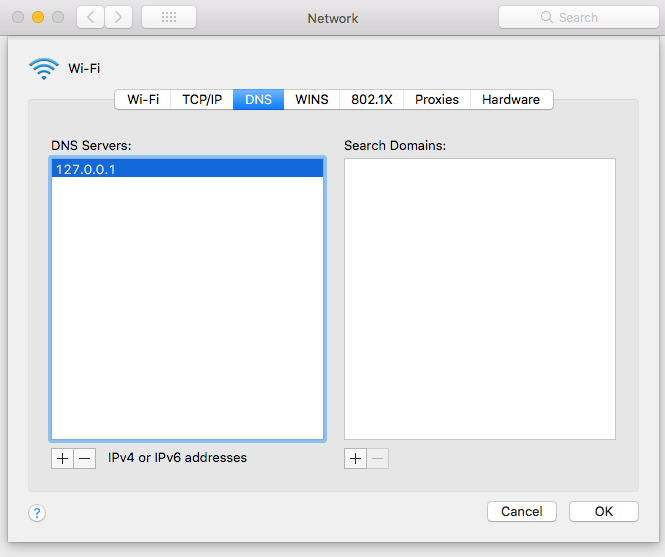](https://docs.safedns.com/uploads/images/gallery/2022-08/aEqeug0rbnRICY5L-7-dns-over-tls-setup-guide.png) 6\. Check the filtering.