
Access from External Network without NAT
Access from LAN to External Network without NAT
If necessary (as a rule, when SafeUTM is located inside a LAN, and not on the border with the Internet), it is possible to organize direct access to some resources of networks external to SafeUTM without using NAT.
For example, let's analyze the firewall configuration for non-NAT access to IP address: 10.0.0.1 (in general, it can also be a network or a range of IP addresses).
- Turn off parameter Automatic Ethernet SNAT in Traffic Rules -> Firewall.
- In the firewall, in the SNAT table, create a rule with action Do not perform SNAT for this destination IP address.

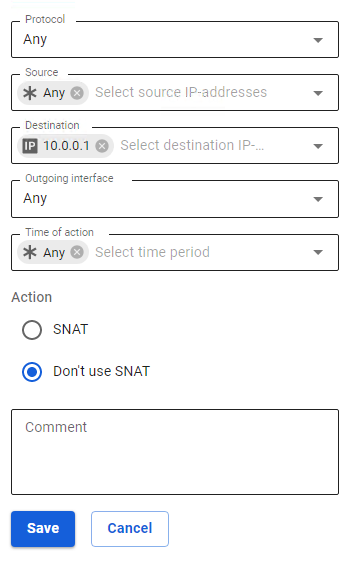
- With the next rule, create SNAT rules for your local network (so that other hosts work via NAT).

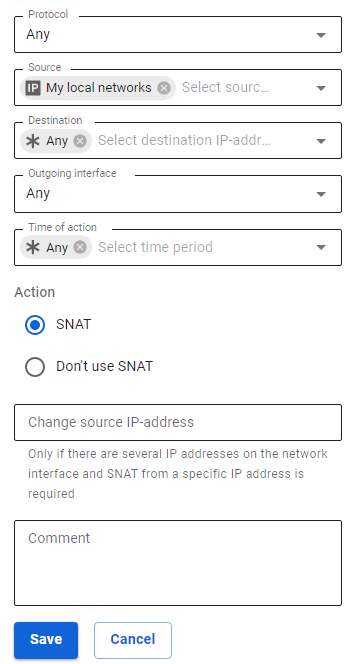
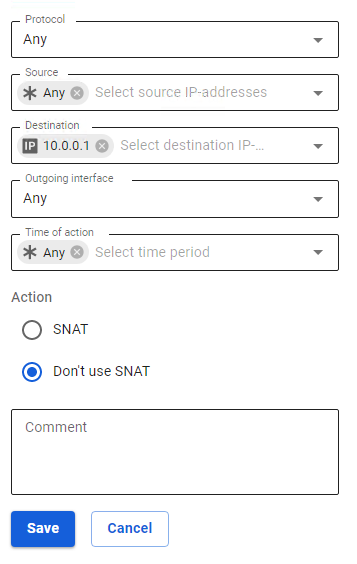
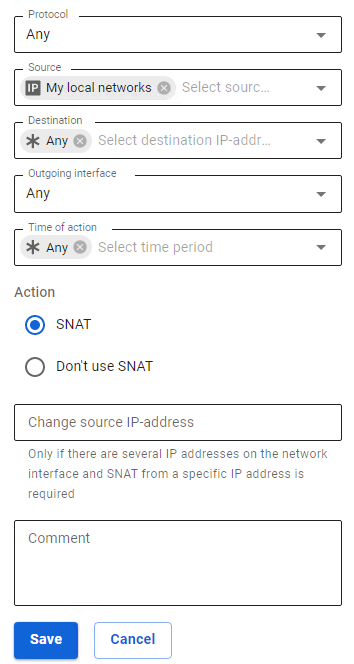
The final firewall rules look like this: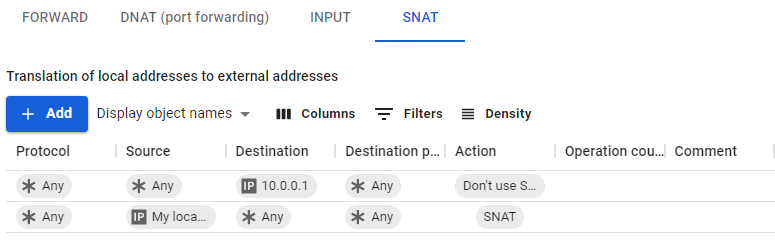

On LAN devices, SafeUTM must be used as the main gateway, or the necessary route to external IP addresses through SafeUTM must be prescribed. Also, LAN devices must be authorized on UTM. On devices from an external network (in relation to SafeUTM), SafeUTM must also be used as the main gateway, or there must be a route to the local network via SafeUTM.
Access from External Network to LAN without NAT and Filtering
Attention! Consider the risks of such access from the point of view of information security. Do not grant access to networks and hosts whose security you are not sure of.
If necessary, you can allow access from hosts or from networks located in an external (relative to SafeUTM) network to a local network with direct access to local IP addresses.
For example, let's analyze the firewall configuration allowing host 10.0.0.1 to access LAN.
1. In the UTM console (SSH access), enter the command: mcedit /usr/bin/ideco-firewall-static
2. Between the lines:
iptables -A FORWARD -m state --state INVALID -j smart_drop
iptables -A FORWARD -j forward_sys_rules
Enter lines:
iptables -A FORWARD -d 10.0.0.1 -j ACCEPT
iptables -A FORWARD -s 10.0.0.1 -j ACCEPT
3. Save the file.
4. Restart SafeUTM.
Attention! After updating SafeUTM, in some cases the procedure of this manual configuration will have to be repeated.