Network Interfaces
- Network Interfaces
- Configuring Local Ethernet
- Configuring External Ethernet
- Configuring PPTP Connection
- Configuring L2TP Connection
- Configuring PPPoE Connection
- Connection via 3G and 4G
Network Interfaces
A detailed description of creating and configuring each type of network interface is described in the following instructions:
All created interfaces are presented in the form of a table: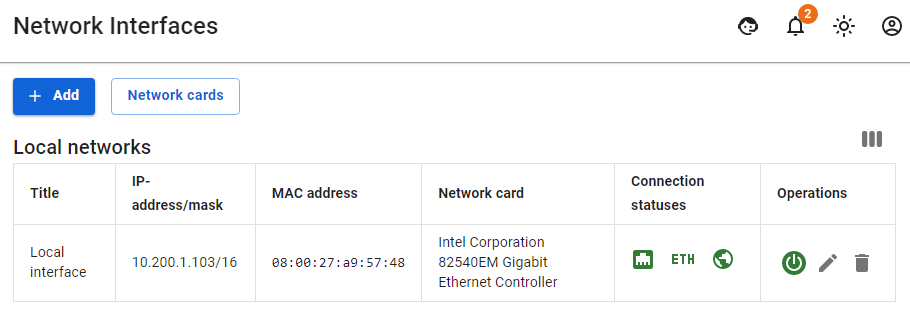
In the edit mode, it becomes possible to change the name, network card (by clicking the pencil button), and configuration settings (manually or automatically):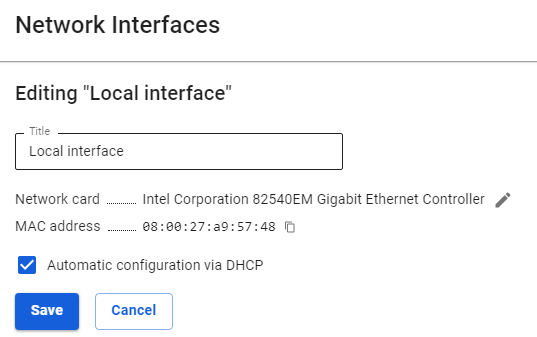
If the Network card is already in use by any interface, then UTM will display an error window "NIC/VLAN tag combinations must be unique".
When migrating UTM from one physical machine to another (disk transfer or backup restore on new hardware), the settings of all network interfaces specified before the migration will be restored. Use the trash bin button to remove unnecessary interfaces.
Example: the original version of UTM 13.X -> migrated UTM to new hardware -> configured new hardware -> upgraded -> in the Network interfaces section, old (before migration) and new (after migration and configuration) network interfaces will be displayed.
Configuring Local Ethernet
Manual and automatic configuration using the DHCP protocol.
Be careful!
If you select Local Ethernet and set it as External Ethernet, you will not be able to access the Internet.
Manual Configuration
To configure the connection in the web interface, follow these steps:
1. Go to the menu Services -> Network Interfaces.
2. Click on the icon (+) in the upper right corner of the window and select Local Ethernet.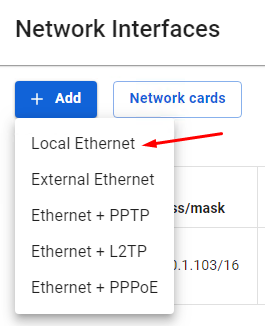
3. Select a network card.
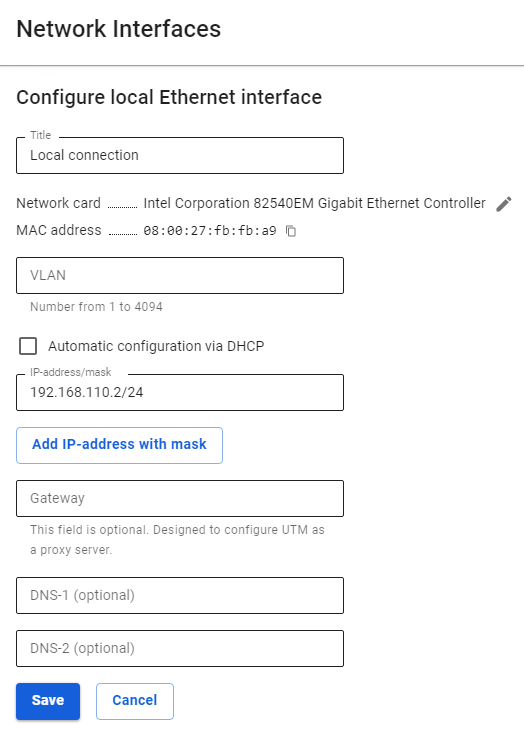
4. Fill in the fields listed below:
- Title - The name you will use to identify the interface in the future. Maximum 42 characters.
- Network card - The network adapter that will be used to connect.
- VLAN tag - VLAN ID. Such network interface is considered a VLAN interface. Also, one Ethernet interface can be created without specifying VLAN belonging to this network segment that will receive untagged traffic. Regular Ethernet interfaces, without specifying the VLAN ID, are created on the physical interface only in a single copy. The field is filled in only if the network card is already in use.
- Automatic configuration via DHCP - It is used if your Internet provider supports the ability to automatically configure the Ethernet interface using the DHCP protocol.
- IP address/mask - You can assign multiple IP addresses to the interface. At least one IP address must be specified.
- Gateway - Gateway IP address.
- DNS - Two fields are available to specify the DNS server (optional).
The Gateway field in the Local interface is set only if:
- There is no External UTM interface;
- UTM is only used as a proxy.
Configuration example:

Automatic Configuration
It is used if your Internet provider supports the ability to automatically configure the Ethernet interface using the DHCP protocol.
Configuration example:


Configuring External Ethernet
Manual and automatic configuration using the DHCP protocol.
Usually, all necessary information for configuration is contained in the contract with your Internet provider.
Manual Configuration
To configure the connection in the web interface, follow these steps:
1. Go to the menu Services -> Network Interfaces.
2. Click on the icon (+) in the upper right corner of the window and select External Ethernet.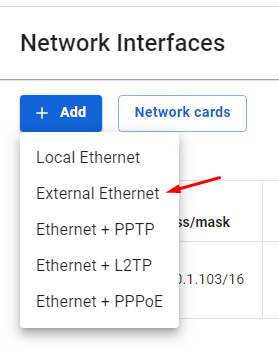
3. Select a network card.
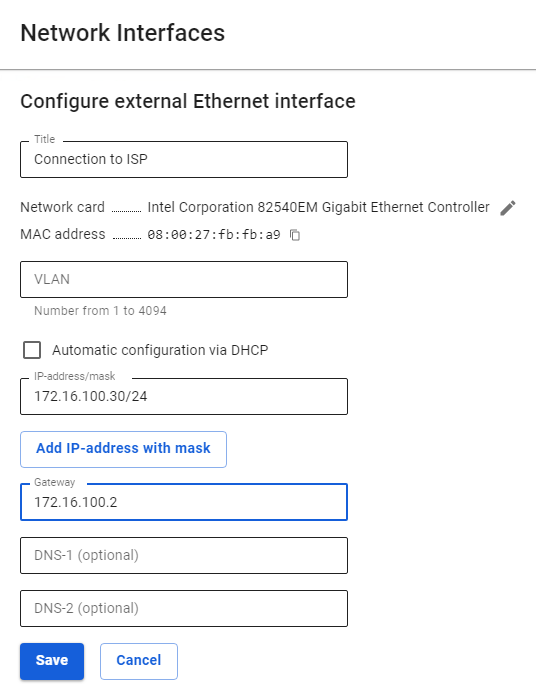
4. Fill in the fields listed below:
- Title - The name you will use to identify the interface in the future. Maximum 42 characters.
- Network card - The network adapter that will be used to connect.
- VLAN tag - VLAN ID. Such network interface is considered a VLAN interface. Also, one Ethernet interface can be created without specifying VLAN belonging to this network segment that will receive untagged traffic. Regular Ethernet interfaces, without specifying the VLAN ID, are created on the physical interface only in a single copy. The field is filled in only if the network card is already in use.
- Automatic configuration via DHCP - It is used if your Internet provider supports the ability to automatically configure the Ethernet interface using the DHCP protocol.
- IP address/mask - You can assign multiple IP addresses to the interface. At least one IP address must be specified.
- Gateway - Gateway IP address.
- DNS - Two fields are available to specify the DNS server (optional).
Configuration example:

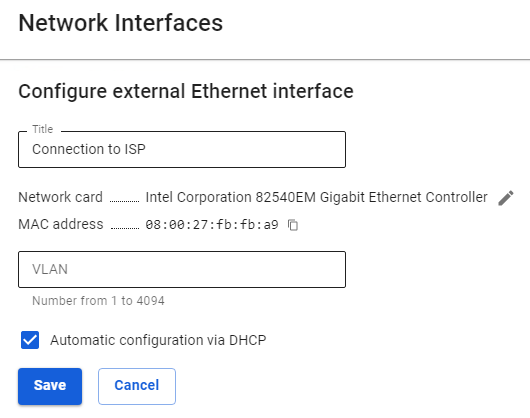
Automatic Configuration
It is used if your Internet provider supports the ability to automatically configure the Ethernet interface using the DHCP protocol.
Configuration example:

Configuring PPTP Connection
Connection via PPTP protocol is used by Internet service providers in order to provide a more reliable authorization.
To configure such a connection in the web interface, follow these steps:
|
Parameter |
Description |
|
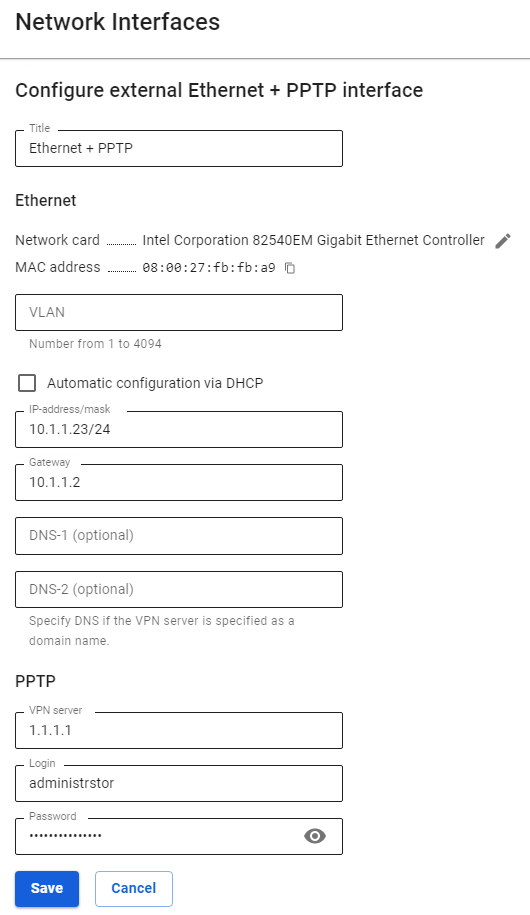
Title |
The name you will use to identify the interface in the future. Maximum 42 characters. |
|
Network card |
The network adapter will be used to connect to the Internet provider. |
|
VLAN tag |
The VLAN ID in which UTM will be present. Such network interface is considered a VLAN interface. Fill only in the case a network card is already in use. |
|
Automatic configuration via DHCP |
Used if your Internet provider supports the ability to automatically configure the Ethernet interface using the DHCP protocol. |
|
IP address/mask |
You can assign multiple IP addresses to the interface. At least one IP address must be specified. |
|
Gateway |
Gateway IP address. |
|
DNS |
There are two fields available to specify the DNS server. Optional fields. |
|
VPN Server |
IP address or domain name of the PPTP server. |
|
Login |
Username for the PPTP connection. |
|
Password |
Password for the PPTP connection. |
5. Make sure the entered values are correct and click Save.
Configuration example:

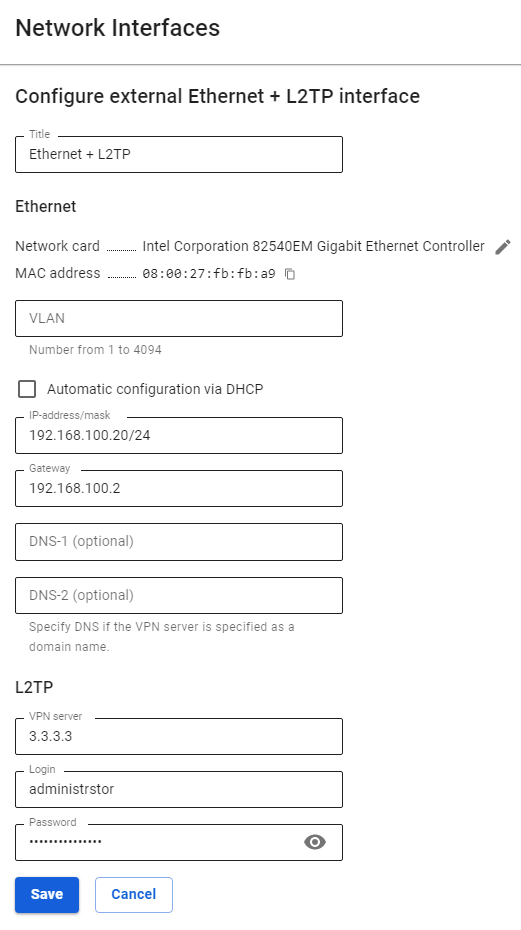
Configuring L2TP Connection
Connection via L2TP protocol is sometimes used by Internet service providers in order to provide more reliable authorization.
To configure such a connection in the web interface, follow these steps:
|
Parameter |
Description |
|
Title |
The name you will use to identify the interface in the future. Maximum 42 characters. |
|
Network Card |
The network adapter will be used to connect to the Internet provider. |
|
VLAN tag |
The VLAN ID in which UTM will be present Such network interface is considered a VLAN interface. Fill in only if the network card is already in use. |
|
Automatic configuration via DHCP |
Used if your Internet provider supports the ability to automatically configure the Ethernet interface using the DHCP protocol. |
|
IP address/mask |
You can assign multiple IP addresses to the interface. At least one IP address must be specified. |
|
Gateway |
Gateway IP address. |
|
DNS |
Two fields are available to specify the DNS server (optional). |
|
VPN Server |
IP address or domain name of the L2TP server. |
|
Username |
User name for the L2TP connection. |
|
Password |
Password for the L2TP connection. |
- Make sure that the entered values are correct and click Save.
Configuration example:

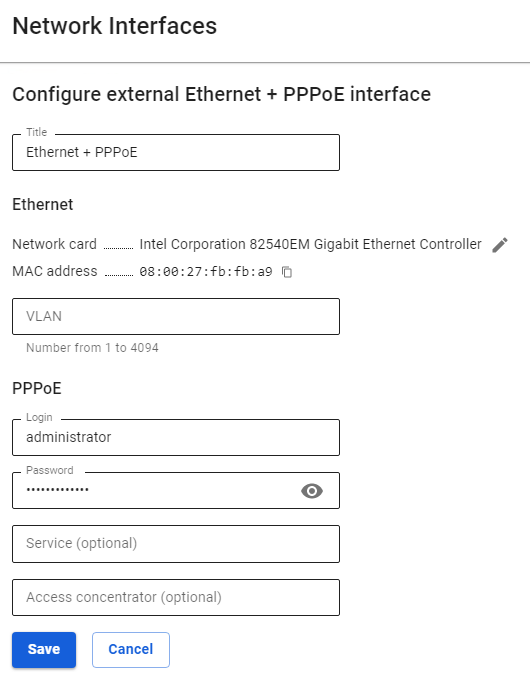
Configuring PPPoE Connection
Connection via PPPoE protocol is traditionally used by providers offering connection via xDSL.
To configure the connection in the web interface, follow these steps:
|
Parameter |
Description |
|
Title |
The name you will use to identify the interface in the future. Maximum 42 characters. |
|
Network card |
The network adapter will be used to connect to the Internet provider. |
|
VLAN tag |
The VLAN ID in which UTM will be present Such network interface is considered a VLAN interface. Fill in only if the network card is already in use. |
|
Login |
Username for PPPoE connection. |
|
Password |
Password for PPPoE connection. |
|
Service |
Service ID. If you don't know what to enter, leave the field empty. |
|
Access concentrator (Hub) |
Hub ID. If you don't know what to enter, leave the field empty. |
- Make sure the entered values are correct and click Save.
Configuration example:

Connection via 3G and 4G
To connect to the networks of mobile operators, it is possible to use 4G routers with Ethernet interfaces.
The server also supports some models of USB modems, for example, Huawei E8372. When connected, the USB modem will be displayed in SafeUTM as a new Ethernet interface.