Report Designer
Setting up statistics in custom reports and sending ready-made reports to e-mail.
UTM provides the ability to create report templates and set up their distribution in .pdf format by e-mail.
My templates
This tab creates templates with statistics that can be viewed in a browser, saved as a .pdf, or sent via email.
Clicking the Add button will open the template settings menu.
Set the time period, report the name, and click Add Widget. One template can contain multiple widgets.
Widget setup:
- In the Grouping line, select the object for which statistics will be collected. If you select a Specific object (for example, a Specific user or a Specific group), then an additional line of Objects will appear, where you can select multiple objects;
- In the Widget line, specify what information you want to see on the selected object;
- Set Display settings.
After you finish customizing the template, click Create.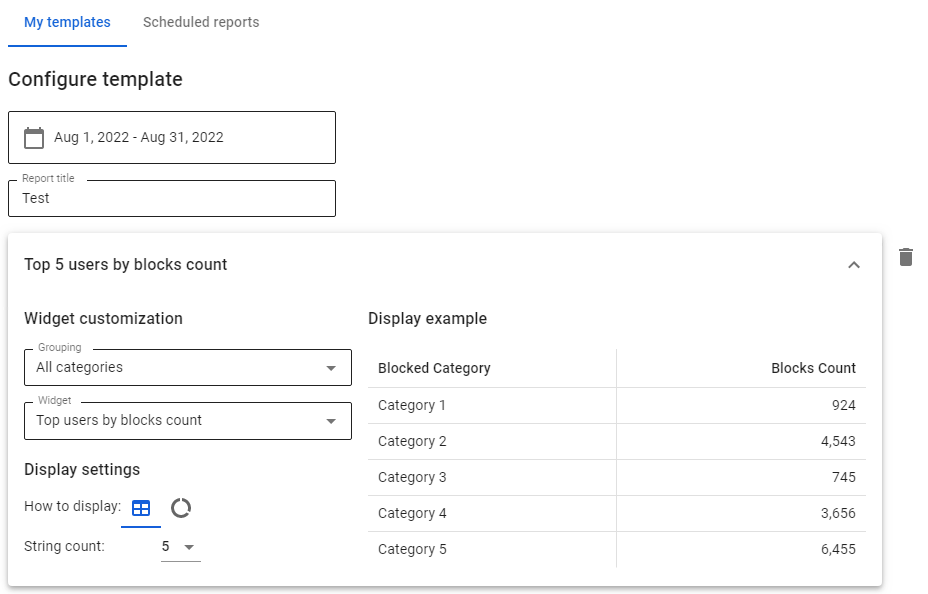
Scheduled reports
This tab provides the ability to create/edit settings for sending email campaigns.
To create a setting, click Scheduled Reports -> Add in the upper left corner. In one setting, you can specify several e-mail recipients (the Add recipient button) and several reports (the Add report button).
Reports will be sent to:
- Once a day - sending will occur the next day after saving if the sending time is less than the current one on the server.
- Once a week - specify the day and time of sending.
- Once a month - specify the day and time determined by the account or every 1st day of the month. If the 31st is selected, but there are fewer days in the month, then the last day of the month is selected.
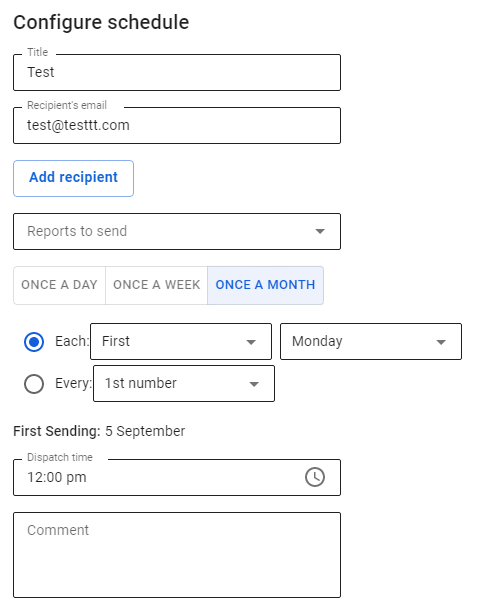

When you click on the Create button, UTM will save all user send time settings in all filters (once a day, once a week, and once a month), but the template will only be sent during the period selected by the user.
For example:
1. When creating a report, the time period is set:
- Once a week;
- Day of the week - Thursday;
- Click Create.
2. Proceed to edit the report by clicking the Edit button and changing the time period settings:
- Once a month;
- Every other Wednesday;
- Click Save.
3. Go back to editing the report and select Once a month, the settings created in step 1 will open.
Example: You want to set up sending a report with information about blocked sites for all users every first day of the month.
The first thing to do is to create a report template based on which statistics will be collected for sending:
1. Click Add in the My Templates tab;
2. Select the time period for which the report should be generated from the proposed filters or specify the dates by clicking Select a date;
3. Specify the name of the report (line Report name);
4. Click the Add Widget button;
5. Fill in the lines:
- Grouping - select All users;
- Widget - select Top blocked sites;
6. Specify Display Settings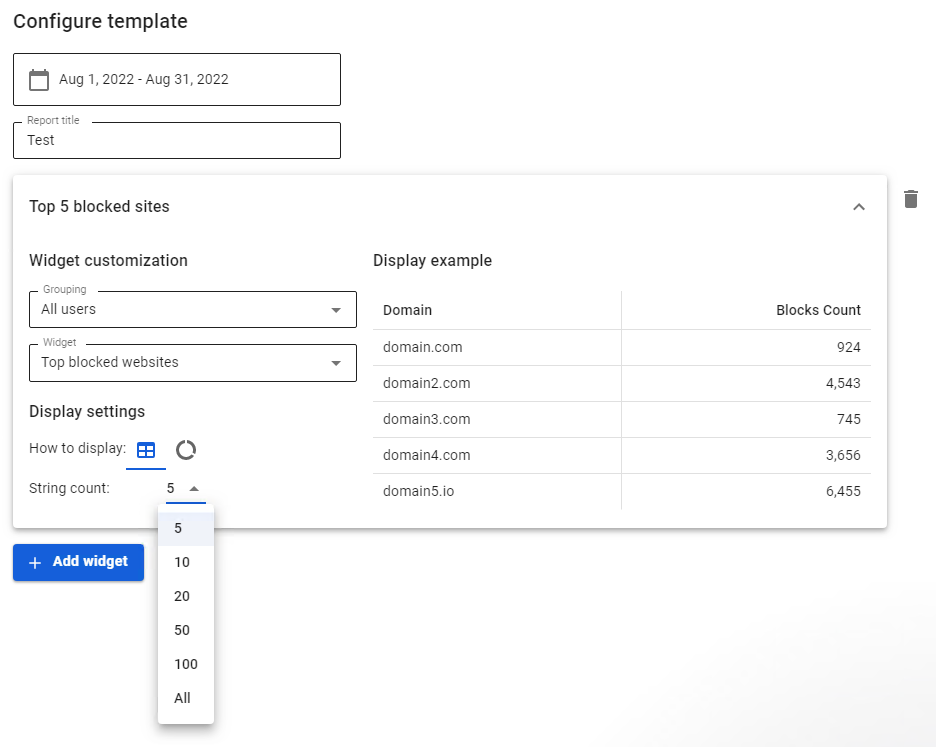 7. Save the template by clicking the Create button.
Create a rule by which the report template will be sent to email:
1. Click Add in the Scheduled Reports tab;
2. Fill in the lines:
- Name - any name that will help you identify the schedule rule;
- Recipient's email - e-mail of the recipient of the report. If you need to send a report to several recipients, specify additional addresses by clicking the Add recipient button;
3. Select the required template in the drop-down list in the line;
4. Specify the date/day and time settings for sending the report to the recipient.