Data Backup and Recovery
Backup
Providing users with stable access to the Internet is the main task solved by the Internet gateway. However, sometimes there are situations that lead to system failures and subsequent disruption of Internet access. Depending on the complexity of the failure, it may be necessary to completely reinstall the Internet gateway and restore data from backups. In this section, you will find a description of the backup-creating process for the SafeUTM Internet gateway.
The Internet gateway supports the following types of automatic backups:
- To a network file storage via FTP
- To a network file storage via NetBIOS protocol
- To a local hard drive
To set up automatic backups, go to Server Management -> Backup -> Settings. A backup copy is created every day at the hour specified in the settings (it is recommended to choose the nighttime to create a backup).
You can store backups for a week or a month.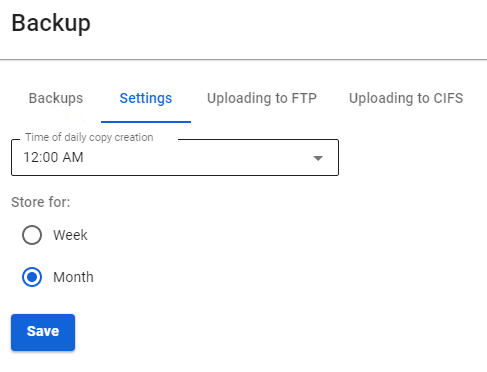
Backup to Remote File Storage via FTP or to Network File Storage using NetBIOS Protocol (CIFS)
To create a setting, go to Server Management -> Backup -> Upload to FTP server/Upload to CIFS shared folder, check the box Enable uploading to FTP server/to CIFS shared folder, and fill in the appropriate fields.
The Server Address line specifies the IP address or domain of the remote FTP/NetBIOS server that will host the database copies.
The path to the directory must be specified in UNIX format.
For example, in Windows OS, the directory is opened by the following path \\192.168.1.1\dir_1\dir_2\backup, so you need to enter dir_1/dir_2/backup in the Directory path field.
Using the FTP and NetBIOS(CIFS) protocols, only automatically created backups are uploaded at the frequency specified in the Settings tab.
Backup to Local Hard Drive
It is possible to upload a backup copy from the server or from a computer to the server using the web interface or the local menu.
The backup management interface in the web interface is shown in the screenshot below.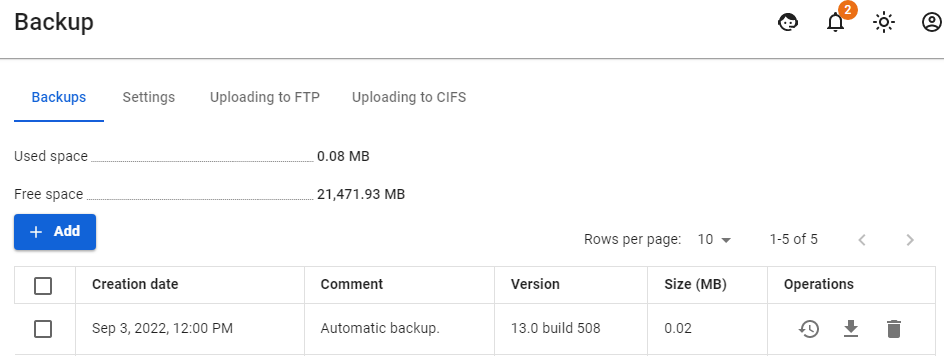
Managing backups via the local menu
- To create a new backup via the SafeUTM local menu, select 9 and press Enter. Next, enter a comment for the backup and press Enter.
An example of creating a backup via the local menu is shown in the screenshot below: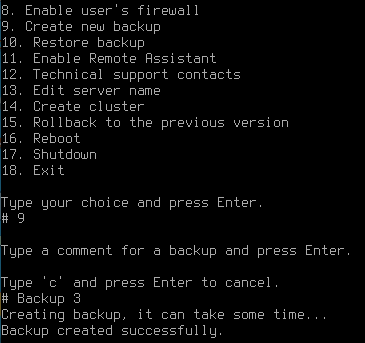
- To restore the configuration from the backup, select 10 and press Enter. Select a backup copy from the list (if there are several copies) by entering the item of the desired copy, and pressing Enter. To restore from a backup, you need to reboot the server. Type y and then Enter to reboot.
An example of restoring from a backup via the local menu is shown in the screenshot below: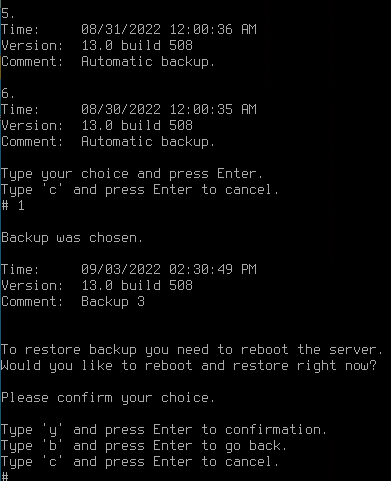
When migrating UTM from one physical machine to another (disk transfer or backup restore on new hardware), the settings of all network interfaces specified before the migration will be restored. Use the trash button to remove unnecessary interfaces.
Example: the original version of UTM 13.X -> migrated UTM to new hardware -> configured new hardware -> upgraded -> in the Network interfaces section, old (before migration) and new (after migration and configuration) network interfaces will be displayed.