Firewall
Principle of Operation
One of the main means of traffic management on the server is a firewall. It helps to limit user traffic:
- From LANs to external ones via the server.
- Between different LANs of the server.
- To the SafeUTM server.
The principle of operation for a firewall is as follows: it analyzes headers of packets passing through the server interfaces. This low-level task is solved by a gateway based on the TCP/IP protocol stack. This is why a firewall is well-suited for determining global traffic management rules for network protocols, ports, belonging to certain IP networks, and other criteria based on values of fields in network packet headers.
The firewall is not designated to solve problems related to controlling access to internet resources based on URL address, domain name, or website content type. These higher-level tasks usually related to web traffic are solved with the help of the Content Filter module.
The firewall is configured in the web interface section Traffic Rules -> Firewall.
SafeUTM has pre-configured and automatically enabled system rules. They provide protection for proxy and reverse proxy, mail server services, and others. As a rule, it is not necessary to additionally configure protection for the SafeUTM server with the help of user-defined rules. Use them to filter LAN traffic and publish resources. Even when the user firewall is disabled in the web interface, system rules continue to work.
In case incorrect rules have been created (for example, access to the SafeUTM web interface has been prohibited), you can disable the user firewall from the local server menu. To do this, select Disable user's firewall, enter 8, and press Enter.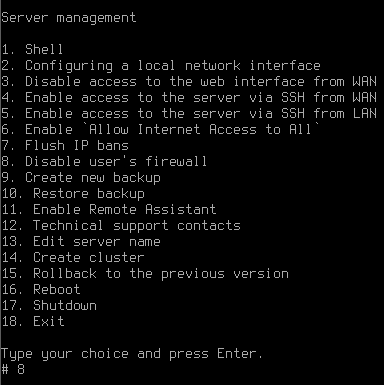
Automatic SNAT
NAT (Network Address Translation) is a mechanism in TCP/IP networks that allows you to convert the IP addresses of transit packets. Read more.
The Automatic local SNAT setting enables the automatic translation of the address for traffic going to the external interface in the firewall if the source is 10.0.0.0/8, 172.16.0.0/12 192.168.0.0/16 and addresses that are registered in the SNAT tab if the SNAT Action is selected. This way you don't have to create such rules manually and change them when you add or change local networks.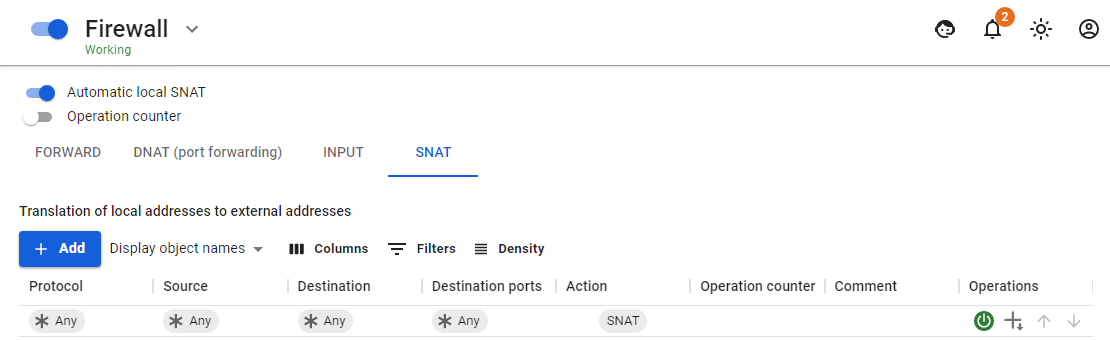
Disable this setting if there is a need for access from external networks (for example, DMZ) to SafeUTM LAN without NAT.
You can create SNAT rules manually for those who need them and disable them (by the "Not SNAT" rule) for those who need to be allowed into the network without network address translation.
Firewall Tables
Rules in the table have priority from top to bottom (i.e., the upper rule has priority over the lower one).
Before creating rules for networks, IP addresses, or IP address ranges, first, create them in the Objects section.
For the convenience of rule management, they are divided into four tables:
- FORWARD – rules in this table apply to traffic passing between the server interfaces, (i.e., the internet and LAN, as well as between LANs). This is the main table to which rules that restrict user traffic can be added.
- DNAT (port redirection) – the rules of this table are used to redirect ports from the external interface to certain resources in LAN. Such rules are often called port forwarding rules (port forwarding, portmapper).
- INPUT – a table for rules of incoming traffic to the server interfaces. As a rule, it is traffic for server services (for example, a mail server).
- SNAT – a table of rules for managing the translation of network addresses.
It is strongly NOT recommended to create a FORWARD or INPUT rule that blocks all traffic.
Protocols
When creating a rule, you need to select the data transfer protocol that the rule you are creating will apply to. If you select Any from the list of options, the rule will apply to all traffic.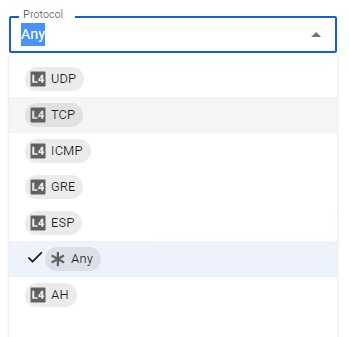
Descriptions of each protocol from the list
- UDP - It is one of the simplest transport layer protocols of the OSI model. Does not guarantee packet delivery. This allows for much more quick and more efficient delivery of data for apps that require high bandwidth or a short data delivery time.
- TCP - Performs the functions of a transport layer protocol of the OSI model. Unlike UDP, TCP guarantees packet delivery.
- ICMP - It is mainly used to transmit error messages and other exceptions that occur during data transmission.
- GRE - This protocol is used to encapsulate the network layer packets of the OSI model into IP packets. The number of the protocol in IP – 47. It is mainly used when creating a VPN (Virtual Private Network).
- AH - A protocol protecting transmitted data in IPsec. Provides identification, integrity check, and protection from information reproduction.
- ESP - A protocol protecting transmitted data in IPsec. Provides identification, integrity check, and protection from information reproduction. Unlike the AH protocol, ESP encrypts data. When working with ESP, both end systems use a common key to encrypt data.
Creating Firewall Rules
To create rules in the desired table, click the Add button in the upper left corner of the screen.
Specify the required parameters and actions for the rule and click the Save button. The rule will be added to the end of the list. If necessary, change its priority with the buttons.
When creating rules for filtering web traffic from local networks (80, 443 TCP ports), the Any object must be specified in the Incoming interface field for the rule to work properly. If a different incoming interface is specified, the rule will not process web traffic.
Firewall Rules
By default, ALLOW policy is used. If you do not create prohibiting rules, all ports and protocols for users will be allowed.
Firewall rules parameters:
- Protocol - Data transfer protocol (UDP/TCP/ICMP/GRE/ESP/AH or Any)
- Source - IP address of the source (src) of traffic passing through the gateway. IP addresses, IP address ranges, networks, or domains can be specified in the field. Data is taken from Objects specified by the user. Users and groups can also be used as a source (when changing their IP addresses, the firewall will automatically take it into account).
- Destination port - Specified when creating a rule with TCP/UDP protocols. It can be a single port, a list of ports, or a range of ports defined in Objects.
- Incoming interface - UTM interface that traffic will come into.
- Outgoing interface - UTM interface that traffic will come out of.
- Time of action - The duration period of the rule. Time intervals (for example, working hours) are specified, which are defined in Objects.
- Action - Allows or prohibits traffic.
- Comment - Any text explaining the purpose of the rule. Maximum 255 characters.
Actions
The values of the Action parameter:
- Deny - Prohibits traffic
- Allow - Allows traffic
- DNAT - Translates destination addresses, thus redirecting inbound traffic. Below, in the field Change destination IP address, you can specify one IP address or range (when specifying a range of IP addresses, the packet will be redirected to any of them). Similarly, if you specify TCP or UDP when creating the rule, the field Change destination port will appear. With this feature, you can transparently redirect inbound traffic to another address or port.
- Don't use DNAT - Cancels DNAT for traffic meeting the rule criteria.
- SNAT - Translates source addresses
- Don't use SNAT - Cancels SNAT for traffic meeting the rule criteria.
Examples of Rules and Techniques
Port mapping, DNAT, server publishing in LAN
Examples of these settings are described in detail in the corresponding articles in the Publishing Resources section.
Blocking various resources by means of a firewall
Issues of blocking various resources – remote control software (AmmyAdmin and TeamViewer), messengers, and other software are described in the Blocking Popular Resources section.
Access to the terminal server for a specific user
1. In the Forward tab, click Add
2. Fill in the following fields:
- Protocol - select TCP
- Source - select a user or user group
- Destination - specify the address of the terminal server
- Destination ports - specify port 3389
- Action - Allow

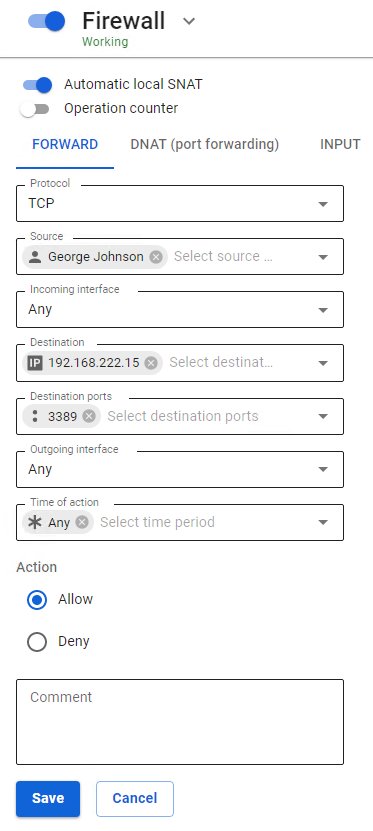
3. Click Save.