Quotas
In SafeUTM, it is possible to use traffic limits for users.
For each quota, you can define its validity period (hour, day, week, month, quarter). It can be assigned to users or groups in the user tree in a separate tab Quota. Also in this tab, you can increase and view available traffic for the current period of time and find out when the quota will be reset.
If the quota is assigned to a group, then by default it is assigned to all users of the group, as well as to nested groups. The quota inherited from the group can be changed in the priorities of the nested user or group.
If the quota is exceeded, users get into the object Quota Exceeded. However, by default, no limits apply to such users. This is why you need to create a restricting rule for the object Quota Exceeded in one or more SafeUTM modules (firewall, content filter, application control, speed limit).
Setting up Quota
In order to set up the quota, follow these steps:
1. Go to Traffic Rules -> Quotas and click on Add.
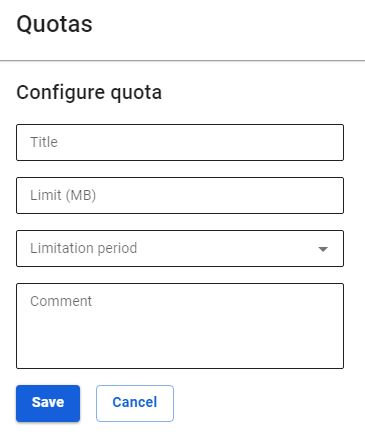
2. Fill in the required fields in the quota addition form:
- Title – enter a custom quota name.
- Limit (Mb) – set a limit of megabytes of traffic for the selected period.
- Limitation period – select the validity period for which the quota will be allocated.
- Hour - each hour
- Day - from 12:00 am to 11:59 pm
- Week - from 12:00 am Monday to 11:59 pm Sunday
- Month - from 12:00 am on the 1st day of the month to 11:59 pm on the last day of the month
- Quarter - beginning of quarters: January 1, April 1, July 1, October 1
- Check that all the data have been entered correctly and click on Save.
You can manage the quota using the buttons in the Operations column. You can enable, disable, edit and delete the quota.
Setting up User and Group
Setting up Group
The created quotas can be applied for groups of users in the tab Quota.
You can inherit a quota from the higher-level group, or select another quota by deactivating Inherit quota from group switch and selecting the required quota.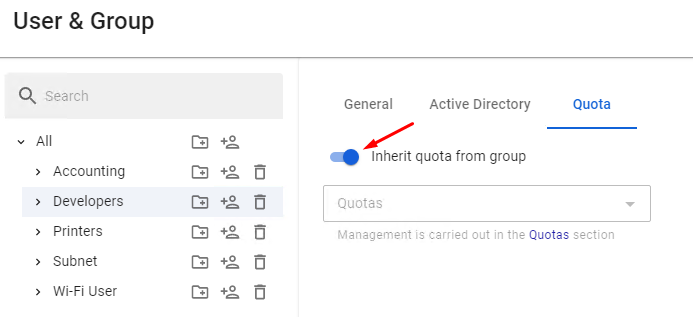
The group All has a separate switch Use quotas. This parameter allows you to extend the use of quotas to all users.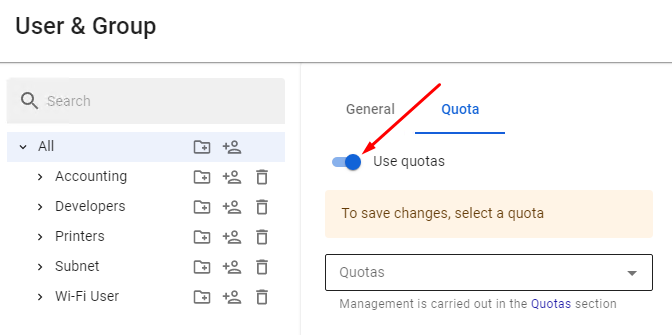
Setting up Users
The created quotas can be applied to users. You can manage quotas in the Quota tab of the selected user.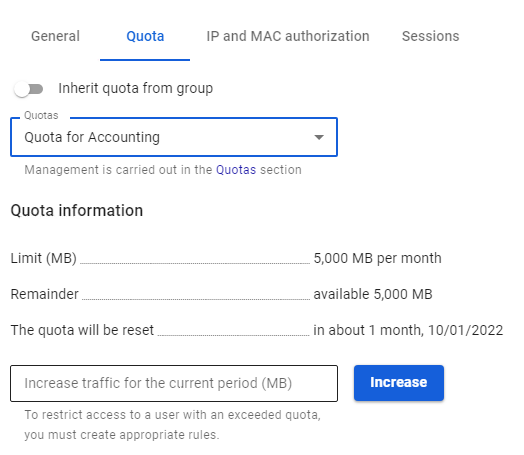
In this tab, you can set up inheritance from the group to which the user belongs, or allocate a personal quota to them.
If the quota is allocated to a user, you can view the information about it, i.e. the validity period, available traffic, and the date of quota reset. Here you can also increase it by specifying the required number of megabytes and clicking on Increase.
! In order to delete a quota, you need to disable it for all users and groups. Otherwise, if you try to delete it, a window will appear prohibiting such action. The window can be seen in the screenshot below: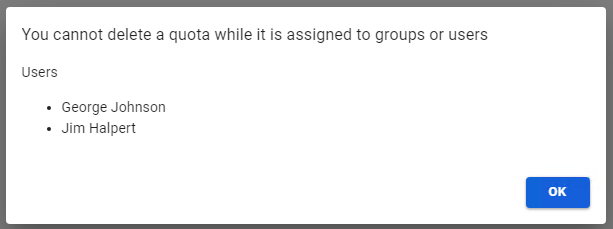
Example of Setting up Actions When Quota Is Exceeded
In the example below, we will consider a case when the users having exceeded the quota (those who have fallen into Quota Exceeded object) will be denied access to all social media and video hosting services along with the speed limited to 4 Mbps. However, one user will be allowed access even in case they exceed the quota, as the employee is a marketing specialist.
- First, you need to create a quota with a limit of 2,000 Mb per day.
- In all groups and all users in Quota, the tab turns the switch to the Inherit quota from group to the ‘enabled’ position. It needs to be done only if you changed the switch position because by default all groups and users are created with the switch in the ‘enabled’ position.
- Assign the created quota to the group All (all other groups and users will inherit the assignment of this quota).
- Create a rule in the content filter to restrict access to social networks and video hosting services for users who have exceeded the quota.
- Create a rule that allows one of the users' access to social networks even if they have exceeded the quota.
- Create a rule that limits the speed for all users that is in the object Quota Exceeded down to 4 Mbps.
