Creating a VPN connection in Windows 10
Before configuring a VPN connection, in the user tree, open the card of the required user and set the Allow remote access via VPN flag. To do this, go to the Users -> User & Group section:

Creating a VPN connection in Windows 10
1. Click on the network connection icon in the system tray, and in the window that appears, select Network & Internet settings: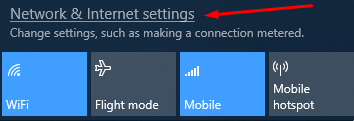
2. Go to VPN and click Add a VPN connection: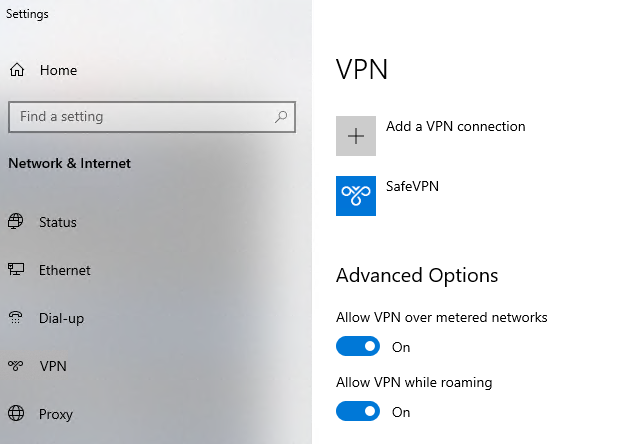
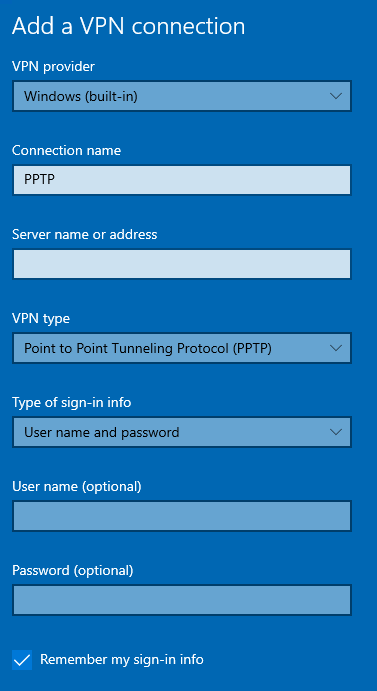
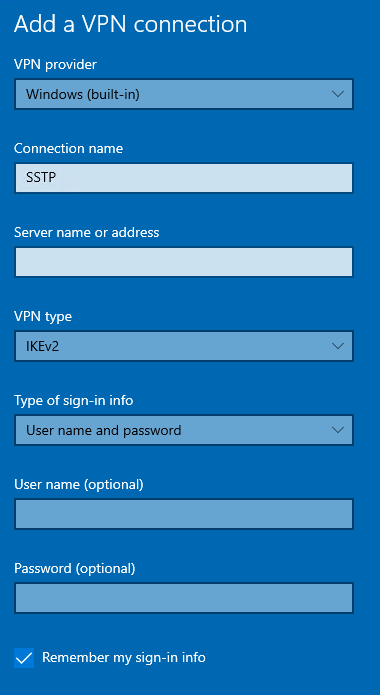
3. Fill in the following fields and click Save:
For PPTP
- Connection name - the name of the connection being created;
- Server name or address - VPN server address;
- VPN type - PPTP protocol;
- Login data type - Username and password;
- Username - the name of the user who is allowed to connect via VPN;
- Password - user password.

When setting up a VPN connection from the Internet, the following parameters must be specified in the VPN connection properties:
- Go to Settings of adapter parameters.
- Right-click on the created connection and select Properties.
- Go to the tab Security and install:
- Data encryption – mandatory (disable if there is no encryption).
- Extensible Authentication Protocol (EAP) – Microsoft Protected Password (EAP MSCHAPV2).
For L2TP/IPsec with the shared key
Important: L2TP IPsec clients behind the same NAT may experience connectivity issues if there is more than one. Instructions can help solve the problem. We recommend using IKEv2 IPSec instead of L2TP IPsec.
- Connection name - the name of the connection being created;
- Server name or address - VPN server address;
- VPN type - L2TP/IPSec protocol with shared key;
- Shared key - the value of the PSK string in the Users -> VPN connections -> L2TP/IPSec Connection section;
- Login data type - Username and password;
- Username - the name of the user who is allowed to connect via VPN;
- Password - user password.
When setting up a VPN connection from the Internet, you need to specify the following parameters in the VPN connection properties:
- Go to Adapter Options Settings;
- Right-click on the created connection and select Properties;
- Go to the Security tab and set:
- Data encryption - mandatory (disable if no encryption)
- Extensible Authentication Protocol (EAP) - Microsoft Secure Password (EAP MSCHAPV2)
If you are creating a VPN connection to UTM via port forwarding, we recommend following these steps:
- Open Registry editor.
- Go to
HKEY_LOCAL_MACHINE\SYSTEM\CurrentControlSet\Services\PolicyAgentand create a DWORD parameter named AssumeUDPEncapsulationContextOnSendRule and set it to 2. - Restart Windows.
Possible problems
- The user's username or password is incorrect. Often, when reconnecting, it is suggested to specify the domain. Try to create alphanumeric passwords, preferably in Latin letters, for your accounts. If there are doubts, temporarily set the username and password as "user" and "123456".
- In order for the packets to go through the VPN tunnel, you need to make sure that in the settings of this connection the box Use primary gateway in remote network is checked in Configuring adapter settings -> Right-click on the connection -> Properties -> Network -> Properties of the option "Internet Protocol version 4 (TCP/IPv4)" -> Advanced. If it is not necessary to route all packets to this interface, then the route must be written manually.
- The connection takes place via DNAT, i.e. the external interface of SafeUTM does not have a "white" IP address, and the ports necessary for operation (500 and 4500) are "forwarded" to the external interface of the device located in front of SafeUTM and having a "white" IP address. In this case, the VPN connection will either not be established at all, or there will be periodic interruptions. The solution is to exclude the device before SafeUTM and specify a "white" IP address on the external interface of SafeUTM, to which L2TP/IPsec connections will eventually be made. Otherwise, use the SSTP protocol, because it is easier to publish it using port forwarding.
- If you reconnect via L2TP in Windows 10 OS, but use the invalid PSK key (by entering it in the advanced parameters [screenshot below]), the connection will still be established successfully. This is due to the features of the OS.
Make sure that the local network (or address on the network card) on the remote machine does not overlap with your organization's LAN. If it does, there will be no access to your organization's network (traffic through the routing table will go to the physical interface, not to the VPN). The address needs to be changed.
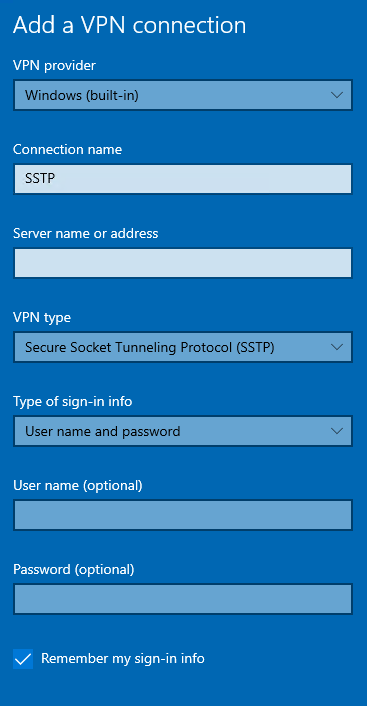
For SSTP
- Connection name - the name of the connection being created;
- Server name or address - VPN server address in the format VPN_server_address:port;
- VPN type - SSTP protocol;
- Login data type - Username and password;
- Username - the name of the user who is allowed to connect via VPN;
- Password - user password.

For IKEv2
- Connection name - the name of the connection being created;
- Server name or address - VPN server address;
- VPN type - IKEv2 protocol;
- Login data type - Username and password;
- Username - the name of the user who is allowed to connect via VPN;
- Password - user password.

When setting up a VPN connection from the Internet, you need to specify the following parameters in the VPN connection properties:
- Go to Adapter Options Settings;
- Right-click on the created connection and select Properties;
- Go to the Security tab and set:
- Data encryption - mandatory (disable if no encryption)
- Extensible Authentication Protocol (EAP) - Microsoft Secure Password (EAP MSCHAPV2)
4. Activate the connection by left-clicking on the created connection and selecting Connect: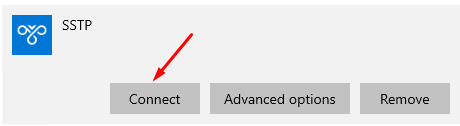
5. To disconnect, click Disconnect. If you need to change the created connection, click Advanced Parameters -> Edit.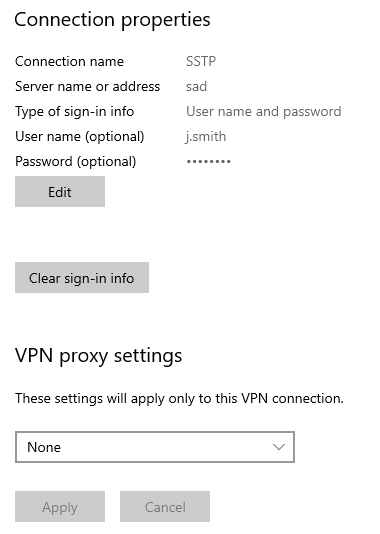
VPN connection errors
If a VPN connection using IPsec protocols in Windows is automatically terminated after 7 hours and 45 minutes and a "Group policy mapping" error or error 13868 occurs when connecting via IKEv2.
To restore the connection, the following actions are suitable:
1. Reconnect. In this case, the connection will be restored, but after 7 hours and 45 minutes, it will be automatically disconnected again. If you do not want the connection to be terminated automatically, follow the steps from the following paragraph.
2. Make changes to the registry:
- Open the Registry editor.
- Follow the path
HKEY_LOCAL_MACHINE\SYSTEM\CurrentControlSet\Services\RasMan\Parameters - Right-click on the parameter NegotiateDH2048_AES256 and click Change.
- In the Value line, specify value 1:
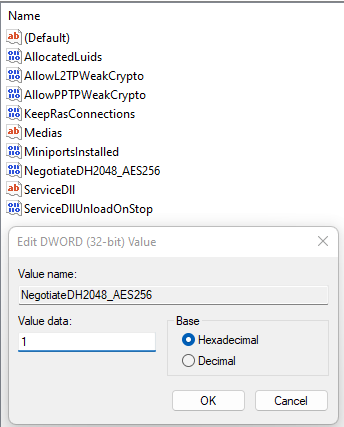
- Click OK.
- Restart Windows.

If there is no parameter named NegotiateDH2048_AES256, then create it. To do this:
- Right-click on the free registry space in Parameters and select Create -> DWORD
- Set the name NegotiateDH2048_AES256.
- Right-click on the created file and select Change
- In the Value line, specify value 1
- Click OK.
3. Restart Windows.
If you do not want Internet traffic to go to external resources through SafeUTM after connecting via VPN, then in the properties of the VPN connection Network / Internet Protocol TCP / IP version 4 / Advanced, uncheck Use the default gateway on the remote network. Next, to access computers behind SafeUTM, manually enter routes.