Creating a VPN connection in Windows 7
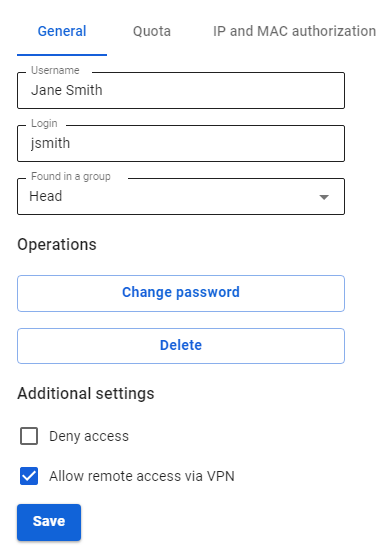
Before configuring a VPN connection, in the user tree, open the card of the required user and set the Allow remote access via VPN flag. To do this, go to the Users -> User & Group section.
Creating a VPN connection in Windows 7
L2TP IPsec clients behind the same NAT may experience connectivity issues if there is more than one. Instructions can help solve the problem. We recommend using IKEv2 IPSec instead of L2TP IPsec.
Before creating a VPN connection for SSTP, L2TP, and IKEv2 protocols, you must install the root certificate locally on the computer:
1. Download the Let's Encrypt root certificate from https://letsencrypt.org/certs/isrgrootx1.pem;
2. Click Start, find and run mmc.exe;
3. Click File -> Add or Remove Snap-in: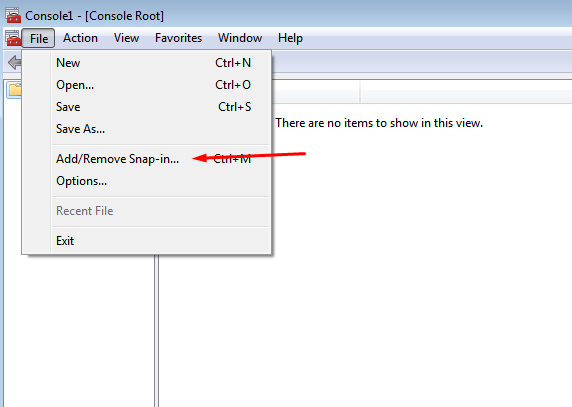
4. Select Certificates and click Add: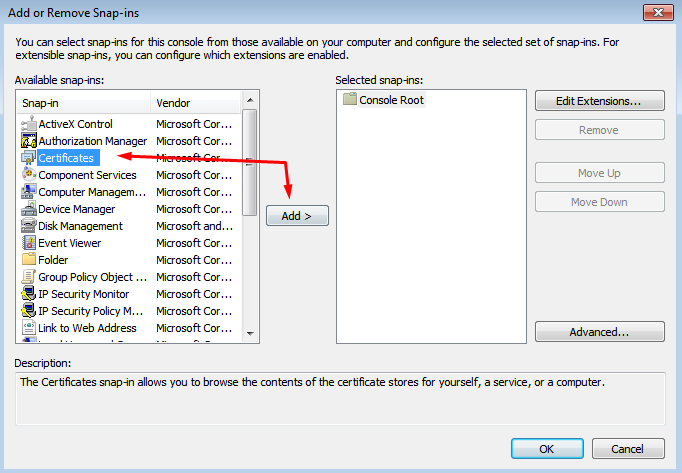
5. Set the flag in the computer account line, click Next -> Finish -> OK: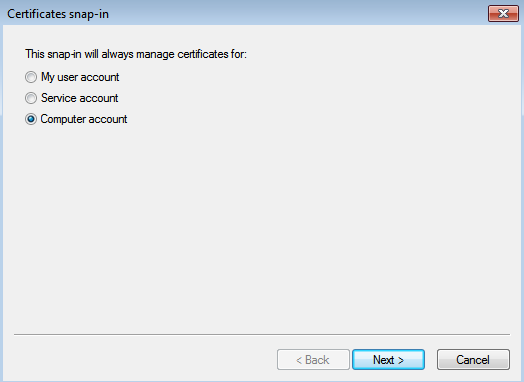
6. The Certificates (local computer) item will appear in the Console window:
- Select it and right-click on Trusted Root Certification Authorities;
- Next All tasks -> Import
- In the Certificate Import Wizard window, click Next -> Browse -> Select the one you downloaded in step 1 -> Next -> Next -> Finish.
Create a VPN connection
1. Select Network -> Network and Sharing Center:
2. Click Set up a new connection or network: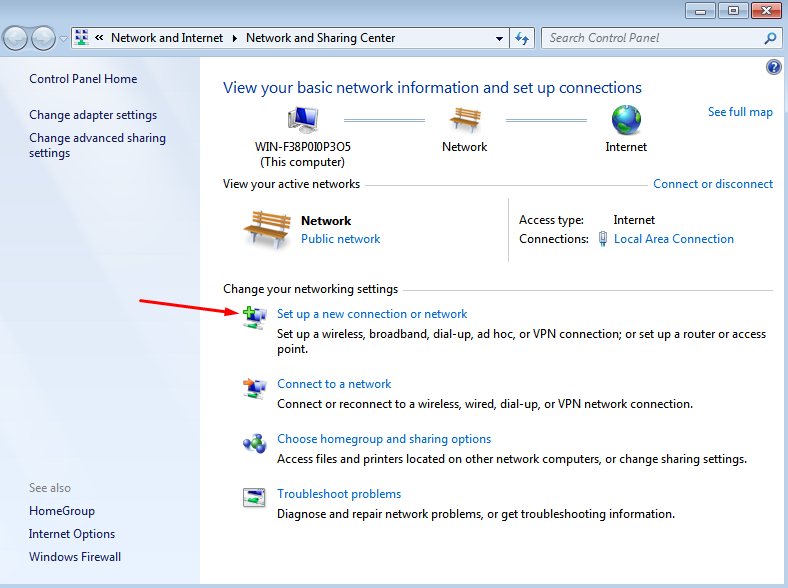
3. Select Connect to a workplace and Next: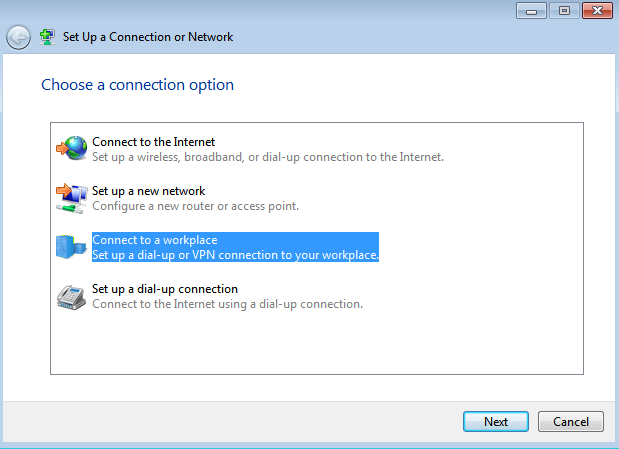
4. Click Use my internet connection (VPN) and fill in the following fields:
- Internet address - enter the name of the VPN server, for example, vpn.test.com
- Destination name - write an arbitrary name for the connection
Set the checkbox to Do not connect now, only install to connect in the future
5. In the Enter username and password window, fill in the appropriate fields;
6. Click Create, then Close;
7. In the Network and Sharing Center window, select Change adapter settings in the upper left corner: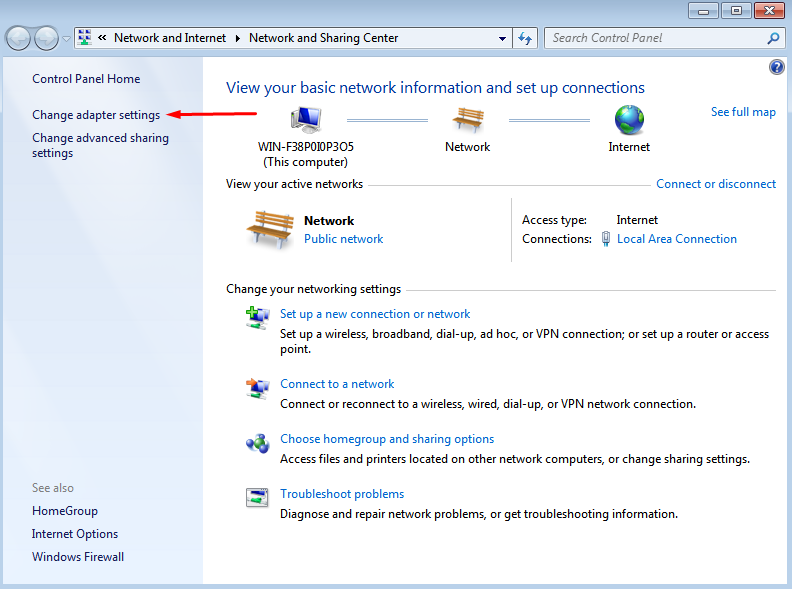
8. Right-click on the created connection, and select Properties:
9. In the window that opens, do the following:
- On the Network tab, uncheck all items except Internet Protocol Version 4
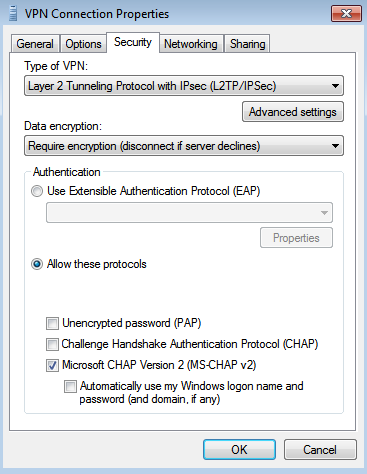
- On the Security tab:
- in the VPN type line, select the desired connection type
- in the Data encryption line, select mandatory (turn off if there is no encryption)
- in the Authentication line, select Allow the following protocols
- leave the flag only in the Microsoft CHAP protocol version 2 (MS-CHAP v2)
If necessary, fill in Additional properties
10. Click OK and close the Network and Sharing Center;
11. In the tray, click Network. A window will open with the created VPN connection;
12. Right-click on the connection and select Connect.
VPN connection errors
If a VPN connection using IPsec protocols in Windows is automatically terminated after 7 hours and 45 minutes and a "Group policy mapping" error or error 13868 occurs when connecting via IKEv2.
To restore the connection, the following actions are suitable:
1. Reconnect. In this case, the connection will be restored, but after 7 hours and 45 minutes, it will be automatically disconnected again. If you do not want the connection to be terminated automatically, follow the steps from the following paragraph.
2. Make changes to the registry:
- Open the Registry editor.
- Follow the path
HKEY_LOCAL_MACHINE\SYSTEM\CurrentControlSet\Services\RasMan\Parameters - Right-click on the parameter NegotiateDH2048_AES256 and click Change.
- In the Value line, specify value 1:
- Click OK.
- Restart Windows.

If there is no parameter named NegotiateDH2048_AES256, then create it. To do this:
- Right-click on the free registry space in Parameters and select Create -> DWORD
- Set the name NegotiateDH2048_AES256.
- Right-click on the created file and select Change
- In the Value line, specify value 1
- Click OK.
3. Restart Windows.
3. Restart Windows.
If you do not want Internet traffic to go to external resources through SafeUTM after connecting via VPN, then in the properties of the VPN connection Network / Internet Protocol TCP / IP version 4 / Advanced, uncheck Use the default gateway on the remote network. Next, to access computers behind SafeUTM, manually enter routes.