User & Group
Creating, deleting, and moving user accounts.
General
To manage groups and accounts in the user tree, there are corresponding buttons on each group:
|
Symbol |
Description |
|
|
Create user account |
|
|
Create group |
|
|
Delete user account or group |


Creating User Account
To create an account in a certain group, click Create User Account in it. The control element symbols are illustrated in the table above.
The second way to create a user in a group is to select the designated group and click Create User in the right part of the window in the General tab.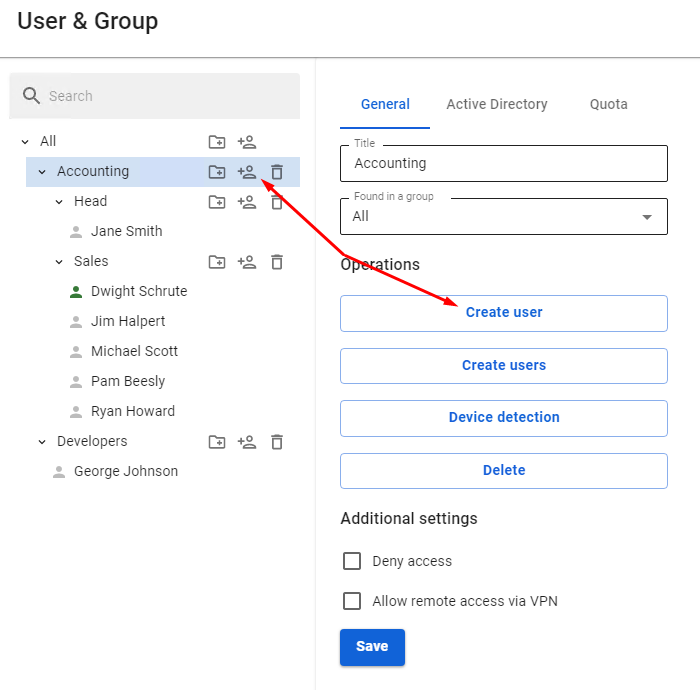
Next, you will see a window for creating a user account, where you need to define a number of parameters. The form for creating a user account is shown below.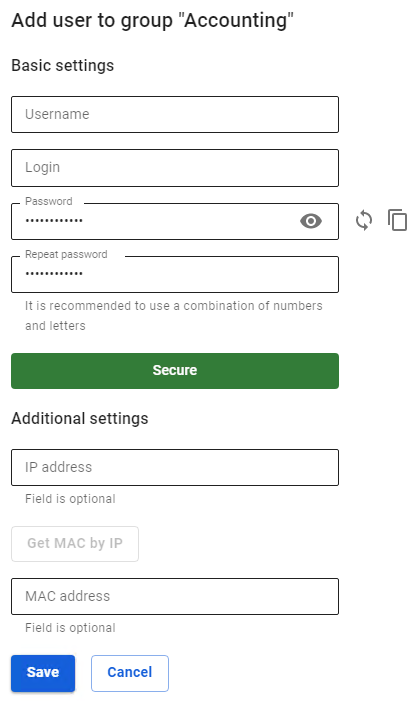
Login must be entered in lowercase Latin characters, for example, j.smith
Recommendations for creating password complexity: minimum length - 10 characters; use of lowercase and uppercase Latin characters; use of numbers and special characters. You can generate a password.
When you fill in the Additional settings, a corresponding rule will be created in the user card in the IP and MAC authorization tab and in the Authorization -> IP and MAC authorization section.
If this IP address or MAC address is used in DHCP server rules, then the DHCP server rule will be in priority.
For accounts imported from MS Active Directory (AD), password verification is carried out by means of AD. Active Directory user authorization is configured in the corresponding section.
You cannot create a user in the Active Directory group from SafeUTM. If you need to add an additional user to the Active Directory group, you must do so in the user tree on the domain controller.
It is impossible to view or restore the account password, only changing is allowed.
After you have entered all required parameters, click Save. An account will be created that will automatically get all the values of some parameters of the group in which it was created.
Creating Group
To create a group, you need to click on the corresponding control symbol to the right of the group name (you can create both a tree root group and a child group).
A window will open, in which you will need to type in the name of the new group and click Save. An example of adding a group can be seen below: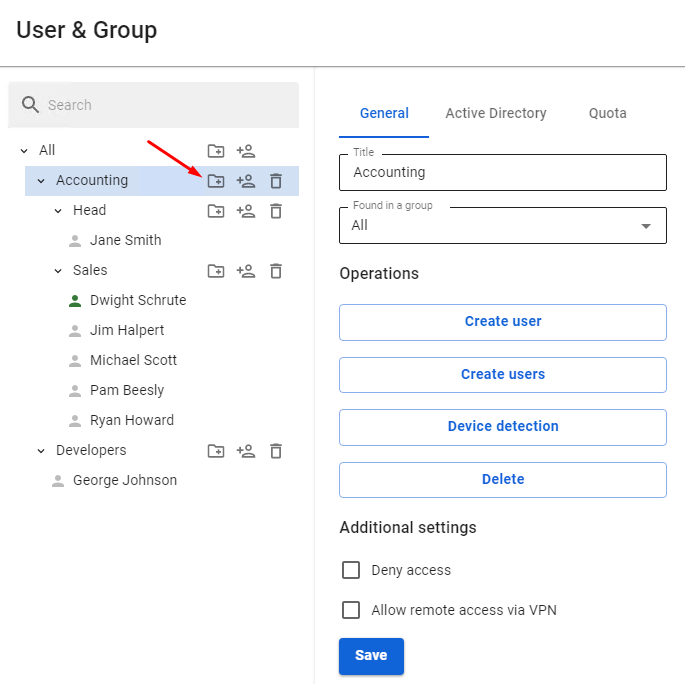
Mass Creation of Users with Authorization by IP
Mass creation of users for authorization by IP is possible. You can find out more in the article about this kind of authorization.
Alternatively, you can use Netscan to create them automatically when you try to access the internet.
Deleting Group or User Account
To delete a user account, select the user and click on the corresponding symbol. You can also select the user and click Delete in the General tab.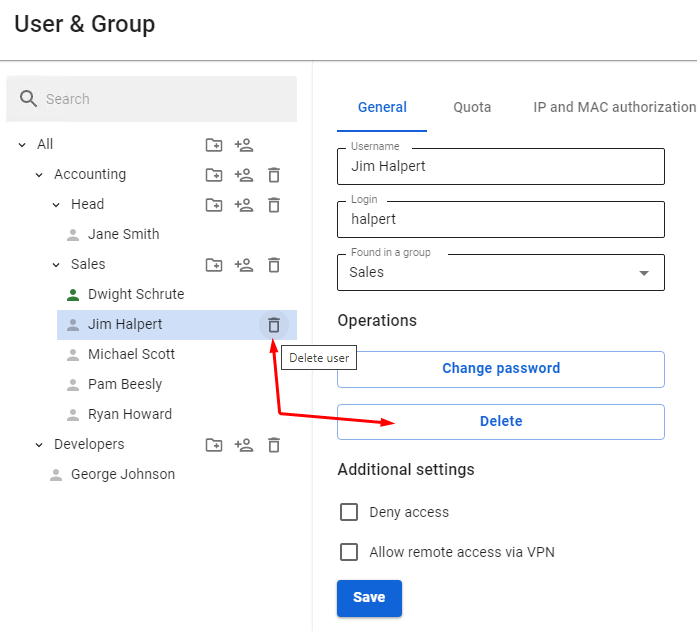
Deleting a group is done the same way.
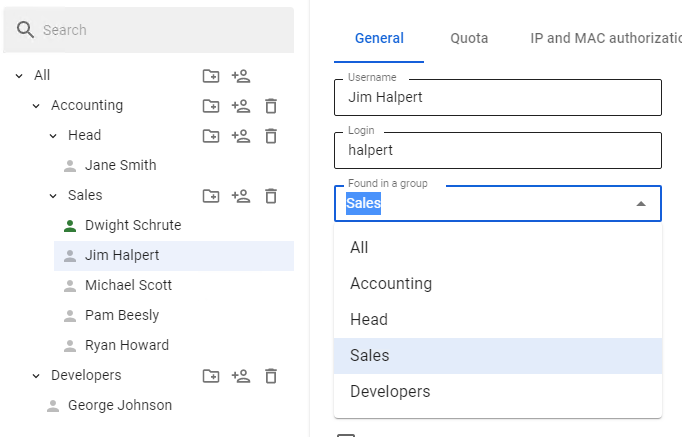
Moving User Account or Group
To move a user account to another group, select this user in the General tab and find Found in a group field. From the drop-down list, select the group to move the user into and click Save.