Authorization by IP address
Configuring Authorization by IP
If the device is a router and SNAT is enabled on it, then when its external IP is authorized in UTM, all users behind this router will gain Internet access.
Users who are behind the router in the local UTM network cannot be authorized using the IP address - MAC address bind, since the router does not handle L2-level traffic.
If authorization by IP address is configured, this IP will not be issued by DHCP.
1. Create a user that will be authorized by IP in SafeUTM or import a user from Active Directory.
2. Go to Users -> Authorization -> IP and MAC authorization.
3. Create a binding rule IP address <--> User, as shown in the screenshot.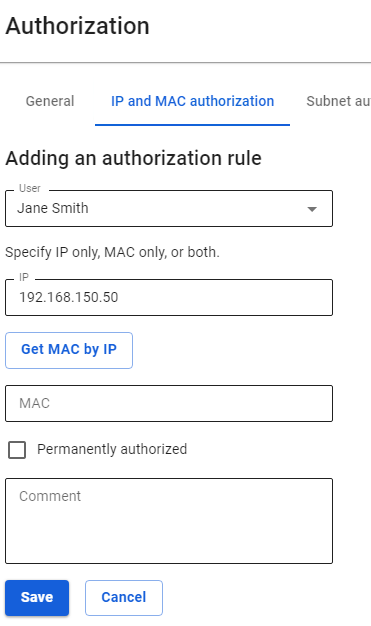
The user's IP address is to be used when creating a session. The computer/device's IP address must match the one specified in the rule.
If the user is network equipment (video cameras, servers, etc.), it is recommended to select Permanently Authorized, in which case the user session will be created after the UTM is turned on, and the network equipment does not need to make a web request. For such equipment, it is recommended to configure a static IP address or DHCP with an IP address binding.
This is required, for example, for resources published via DNAT.
After the user makes a web request, a session with the IP authorization type will automatically be created on UTM in Monitoring -> Authorized Users.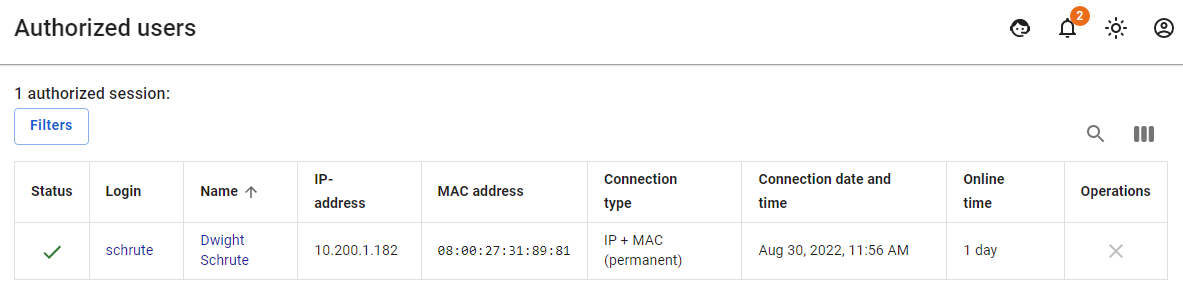
For sessions with an IP authorization type, the MAC address field is not filled in, because, with this type of authorization, there is already an IP address required to create an authorization session.
You can use device search to automatically create users when they try to access the Internet. To do this, see the Netscan article.
Only one device can be authorized under one user by IP address (simultaneously with this type of authorization, two more devices can be authorized under one user by any other authorization method).
Adding Group of Devices with Authorization by IP
You can add users from a range of IP addresses (for example, a network distributed by access points to wireless devices over Wi-Fi). To do this, you need to follow these steps:
- Create a new group in the user tree.
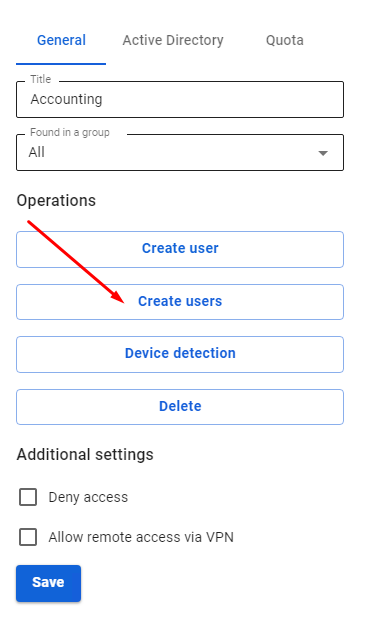
- Select a group from the user tree to which you want to add devices.
- In the General tab, click Create Users.
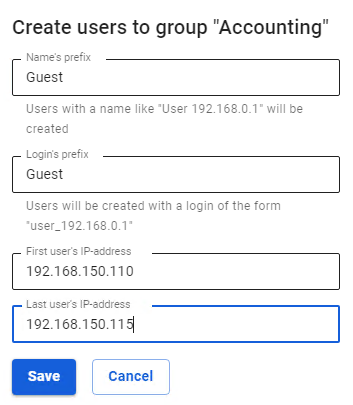
A window opens with the settings of the users created. Fill in the following fields:
- Name Prefix. Users will be created with names of the type "User IP address ".
- Login prefix. Users will be created with logins of the type "user_ip-address ".
- IP addresses of the first and last users.

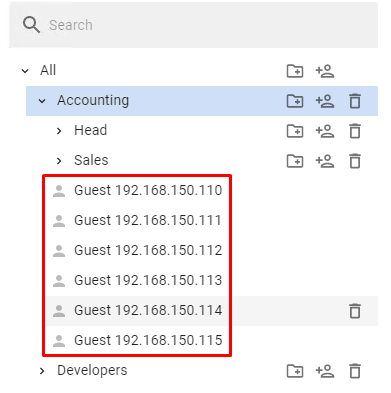


If some IP addresses from the range are already used by other SafeUTM users, they will be skipped during creation, and as a result, fewer users will be created than addresses in the range.
Users will be created with the settings of the created group and an IP address from the range. In addition to the user tree, in the section Users -> Authorization -> IP and MAC authorization for each user, a binding rule IP address <--> User will be created automatically, as shown in the screenshot: