OSPF
SafeUTM 13 supports OSPF (Open Shortest Path First), a routing protocol based on the state of channels. A channel is a router interface or network segment that connects two routers. The state data of these channels is called the channel state.
The use of this module is best suited for networks that have network load balancing and channel redundancy.
An example of topology using OSPF is shown in the diagram below:
The principle of routing according to the state of the channel
1. Establishing adjacency relationships with neighboring devices
A router using OSPF sends greeting packets to identify all neighboring devices within these channels. If there is a neighboring device, the router tries to establish an adjacency relationship with it.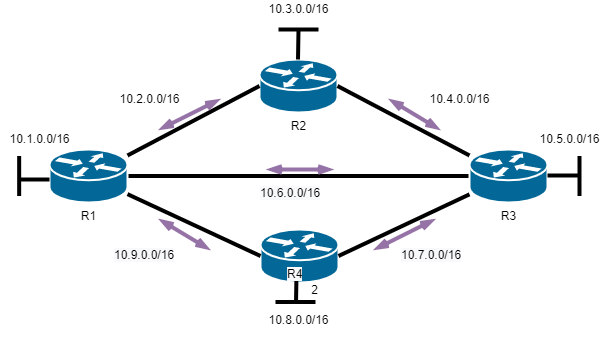
2. Exchanging channel state announcements
After the adjacency is established, the devices exchange channel state announcements (LSAs). LSAs contain information about the state and cost of each channel with a direct connection.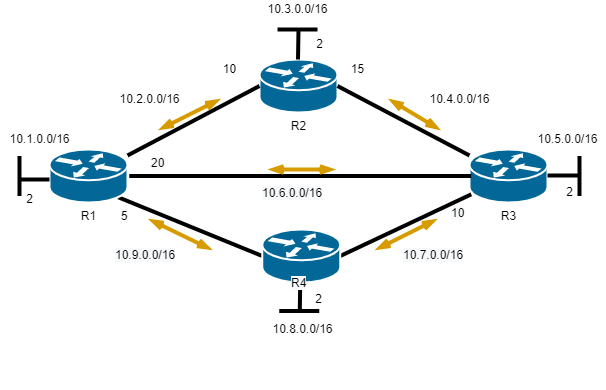
3. Creating a communication state database
Based on the LSA announcement, routers collect a database that contains data about the network topology in the area.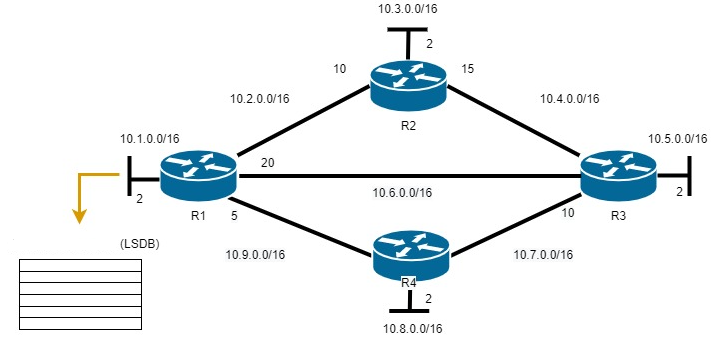
4. Executing the SPF algorithm
Then the SPF algorithm is executed on the devices, resulting in the creation of a tree of shortest paths.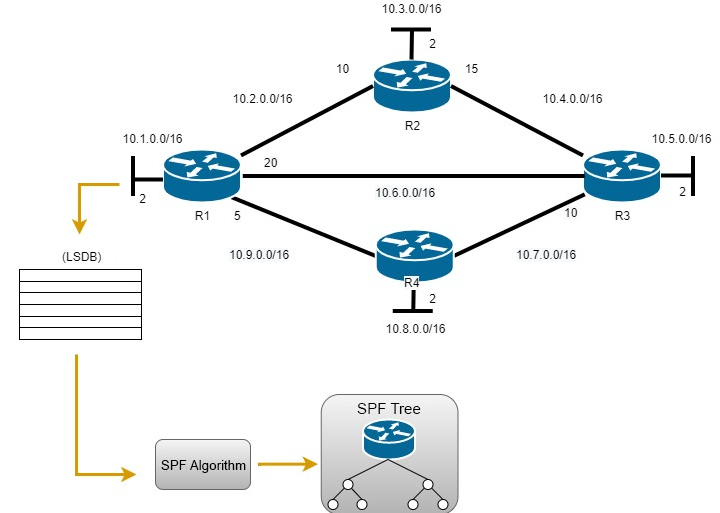
5. Choosing the best route
Based on the SPF tree data, the best paths for the IP routing table are proposed. A route is added to the routing table if there is no route source to the same network with a smaller administrative distance, for example, a static route. Routing decisions are made based on entries in the routing table.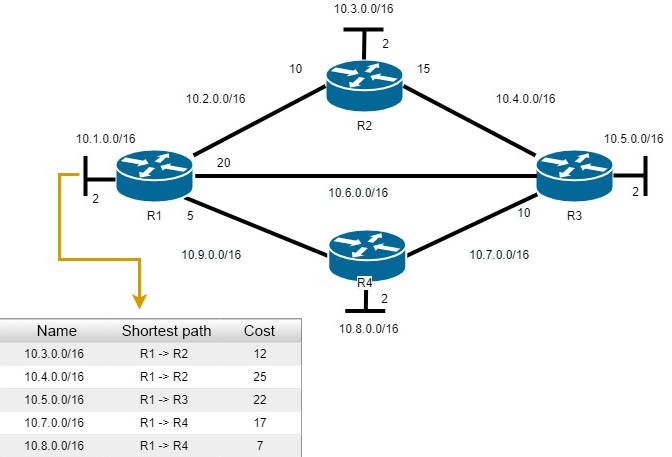
Setting up SafeUTM
To configure OSPF on UTM, follow these steps:
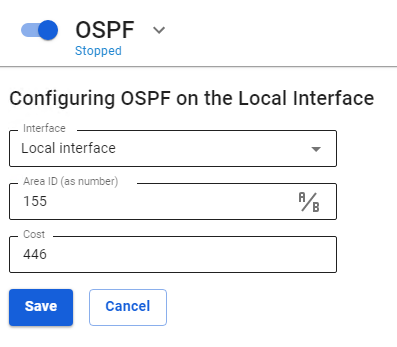
- In the UTM web interface, go to Services -> OSPF and click Add.
- Fill in the following fields:
- Interface - select the local interface connected to the router.
- Area ID - enter the zone number (for small networks, enter zone 0). The name of the zone can be entered as a number or IP address by clicking the icon A/B.
- Cost - enter the cost of the route. - Click Save.
Setting up MikroTik
1. Install and boot up RouterOS:
- Select the Routing with X
- Specify the necessary interfaces but WITHOUT static routes.
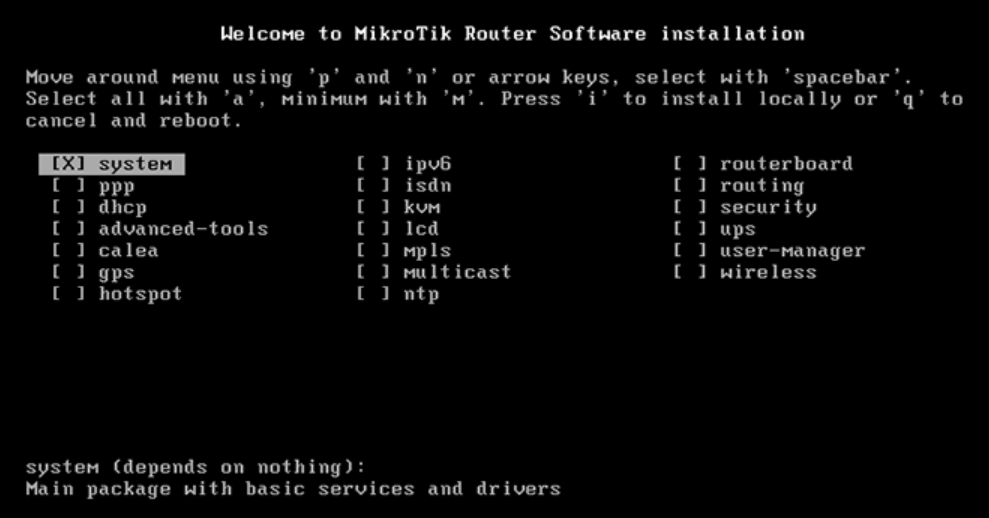
- To start the installation enter "i" and press Enter.
- You will see the warning "All data on the disk will be erased. Continue?". Enter y and press Enter:

2. After the RouterOS is installed, reboot the router by pressing Enter: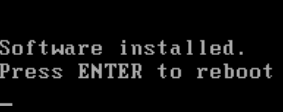
3. Default login is "admin", password is an empty field.
4. Set the admin login/password.
5. Run the following command: routing ospf area add area-id=х.х.х.х default-cost=1 disabled=no inject-summary-lsa=no name=area1 type=default where x.x.x.x - the name of the zone that was specified when setting up SafeUTM within the network;
6. To transfer any other networks to neighboring devices via dynamic routing, enter the following command: routing ospf network add network=(other subnets)/24 area=area1
7. Repeat the command from step 6 to add each subnet.
8. To display the routing table, enter the command: ip route print

