PPTP VPN
Using the PPTP protocol, you can connect Branches that use outdated routers supporting only PPTP to the Head Office (if the device supports IPsec, it is recommended to use PPTP).
If possible, use a more reliable and secure protocol for connecting branches - IPsec. For details on setup, see the article Connecting devices.
For SafeUTM communication with SafeUTM, also use IPsec (see article Branches and Head Office).
The setup process consists of two stages:
- Server preparation and configuration of local networks.
- Creating VPN tunnels and configuring routing.
Server Preparation and Configuration of Local Networks
To combine local office networks, you need to ensure the uniqueness of the IP address space in them. Each office should have its own unique network. Otherwise, when creating a VPN tunnel, you may encounter incorrect routing.
Below is an example of combining networks of two offices. Configure your network and SafeUTM security gateway according to the data in the table below:
|
Parameter |
Office No1 (SafeUTM) |
Office No2 (Router) |
|
IP Address Space |
IP address: 192.168.0.0 Netmask: 255.255.255.0 |
IP address: 192.168.1.0 Netmask: 255.255.255.0 |
|
Local IP address |
IP address: 192.168.0.1 Netmask: 255.255.255.0 |
IP address: 192.168.1.1 Netmask: 255.255.255.0 |
Creating VPN tunnels and configuring routing
Internet gateway in Office No1
1. Create a user account, for example, "office2", on behalf of which the SafeUTM server in office No2 will connect to the SafeUTM server in office No1.
2. Allow the created account to have Allow remote access via VPN. This parameter can be activated in the section Users -> User & Group -> General by selecting the desired user.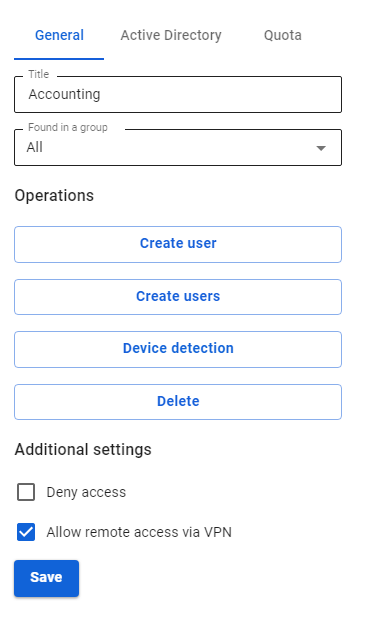
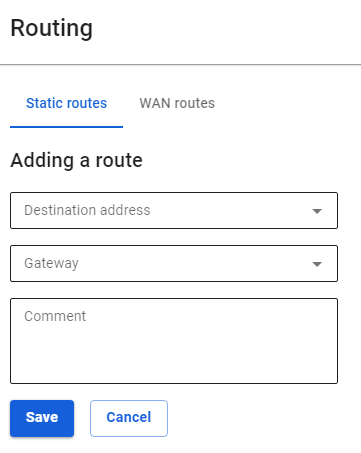
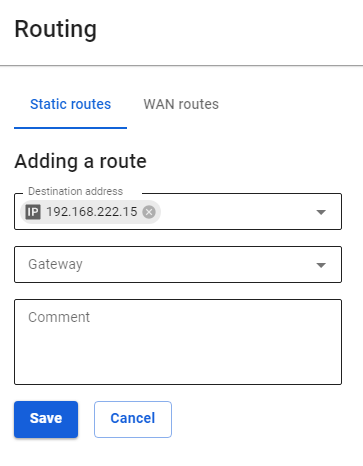
3. Add routes to the routing table. To do this, go to Services -> Routing -> Static routes and click the add button. We need to add the following route:
- Destination address:
192.168.1.0/255.255.255.0 - Gateway: user "office2"

Configuring the router in office No2
In the example, the settings are given for SafeUTM acting as a router. As a rule, routers from different manufacturers are configured similarly.
You need to create a VPN connection to a remote server and register a route to a remote network via a VPN connection. To do this, follow these steps:
- Create a new interface of the type Ethernet + PPTP. As a VPN server, specify the external IP address or domain name of office No1 and use the data of the account created on the server in office No1 (in our example, office2) as a username and password.
- Add routes to the routing table. To do this, in the web interface go to the section Services -> Routing and click the add button. Specify the required values and click Save. We need to add the following route:
Destination address:192.168.0.0/24Gateway: Select the Ethernet + PPTP interface that you have created.