Mikrotik Router Setup
Router with Static IP address configuration
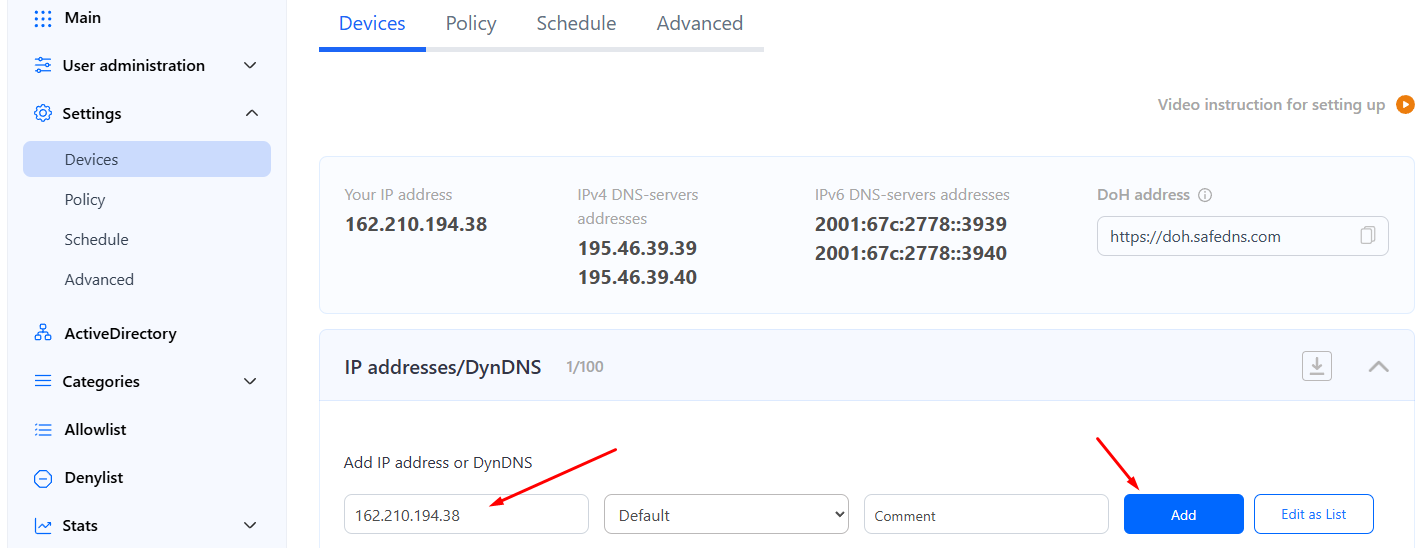
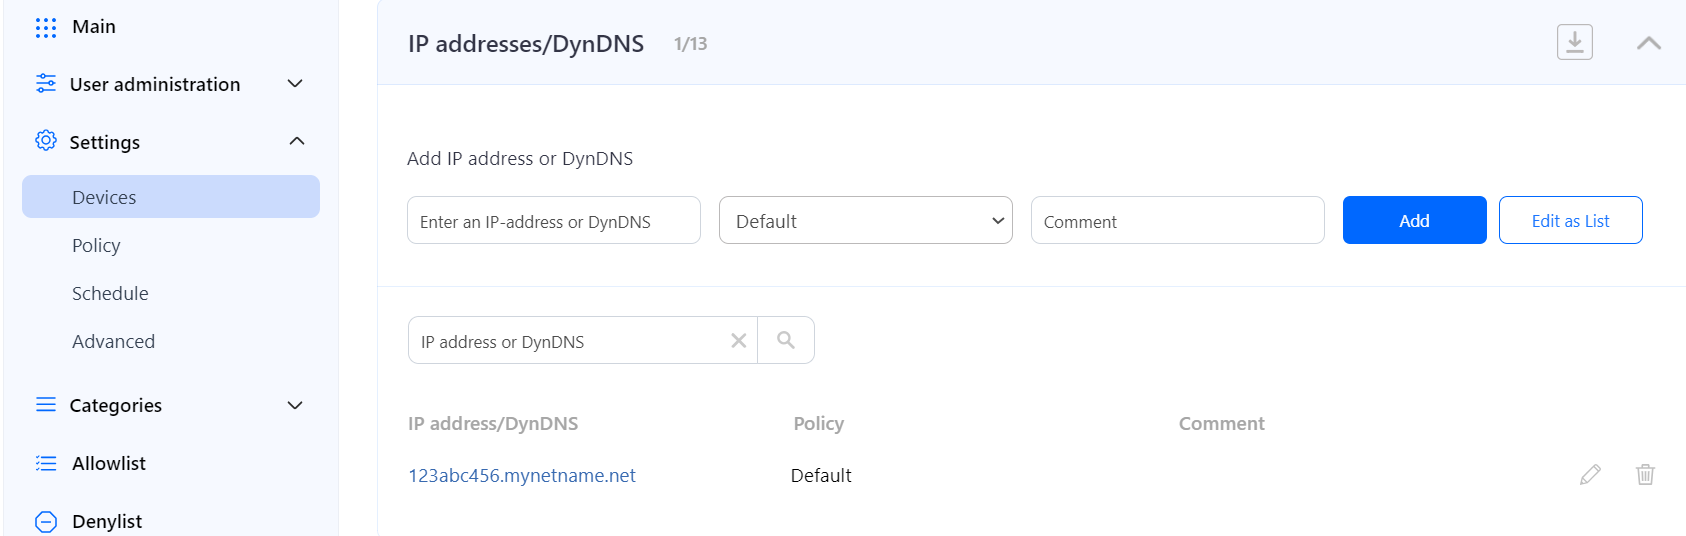
Go to SafeDNS Dashboard > Settings > Devices and copy your IP address to the "IP addresses / DynDNS" box, choose a policy, and click "Add".
2. Change your router’s DNS servers to SafeDNS addresses - 195.46.39.39 and 195.46.39.40
To do that, open the configuration page of the Mikrotik router, and browse the following option:
Menu > IP >DHCP Server > Networks
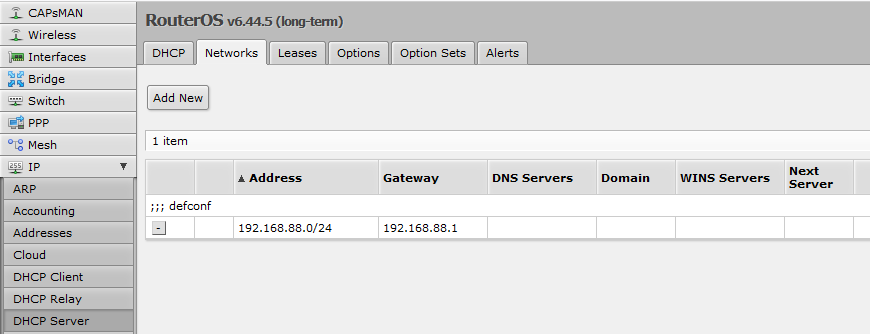
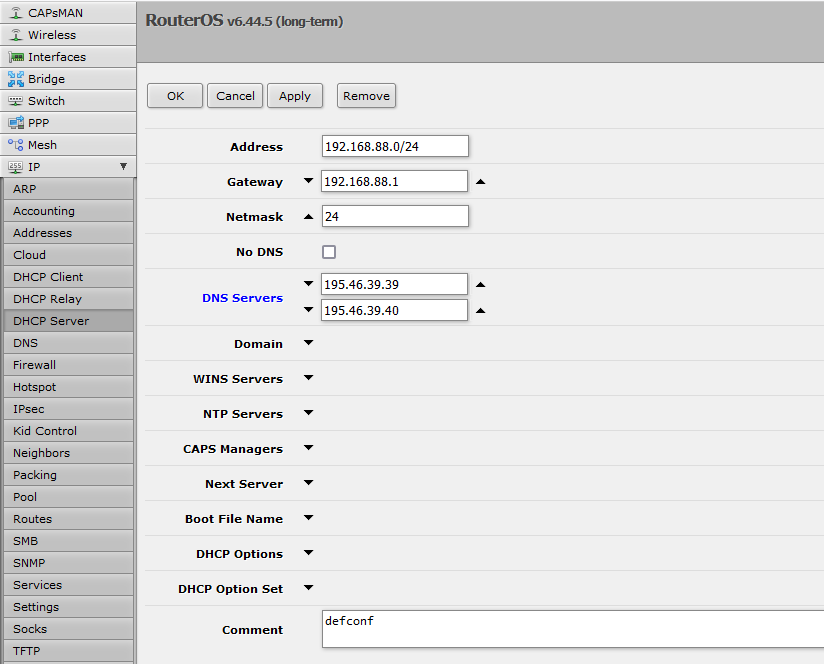
3. Select the “Network” used by the DHCP server and change/add the SafeDNS addresses - 195.46.39.39 and 195.46.39.40. Replace the DNS servers if there was configured any:
You have successfully configured your router.
Please note that settings take 5-7 minutes to apply.
Stats and filtering status update every 10 minutes.
Router with Dynamic IP address configuration
Mikrotik Routers has the embedded feature of the Dynamic DNS setup named VPN Access.
It can be activated easily from the router with no configuration needed on any DDNS service.
1. Open the main page of the router – the Quick Set Menu and scroll down to the VPN setup:
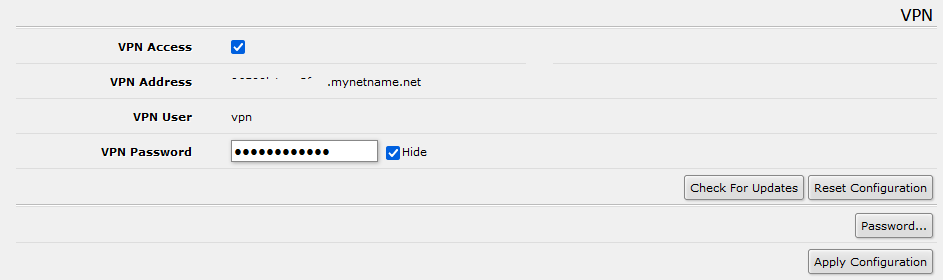
2. Activate the VPN access and set the VPN Password. Click the button Apply Configuration in order to save and activate the settings. Copy the VPN address to the clipboard.
3. Go to SafeDNS Dashboard > Settings > Devices paste the VPN address the "IP addresses / DynDNS" box, choose a policy, and click "Add".

Once added, you will see it in the DynDNS section of the Dashboard.
4. Change your router’s DNS servers to SafeDNS addresses - 195.46.39.39 and 195.46.39.40
To do that, open the configuration page of the Mikrotik router, and browse the following option:
Menu > IP >DHCP Server > Networks
5. Select the “Network” used by the DHCP server and change/add the SafeDNS addresses - 195.46.39.39 and 195.46.39.40. Replace the DNS servers if there was configured any:
You have successfully configured your router.
Please note that settings take 5-7 minutes to apply.
Stats and filtering status update every 10 minutes.
DoH setup
DoH is supported on all paid plans.
DoH links with policy are available on Education & Non-Profit, Pro, and Pro Plus plans only.
MikroTik router allows to set up DoH connection to SafeDNS.
DoH link without policy
With this setup, all devices connected to the network with IP address added in the SafeDNS Dashboard will be filtered with the selected policy.
If IP address of the router is changed, you need to add a new IP address in the SafeDNS Dashboard.
In the MikroTik router:
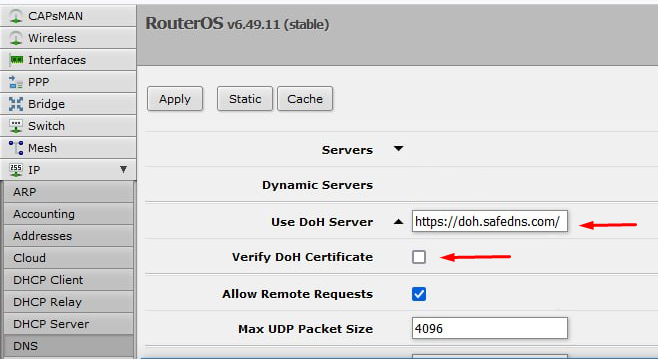
1. Navigate to IP > DNS, enter "https://doh.safedns.com/" in the Use DoH Server field, untick Verify DoH Certificate, and save the changes.
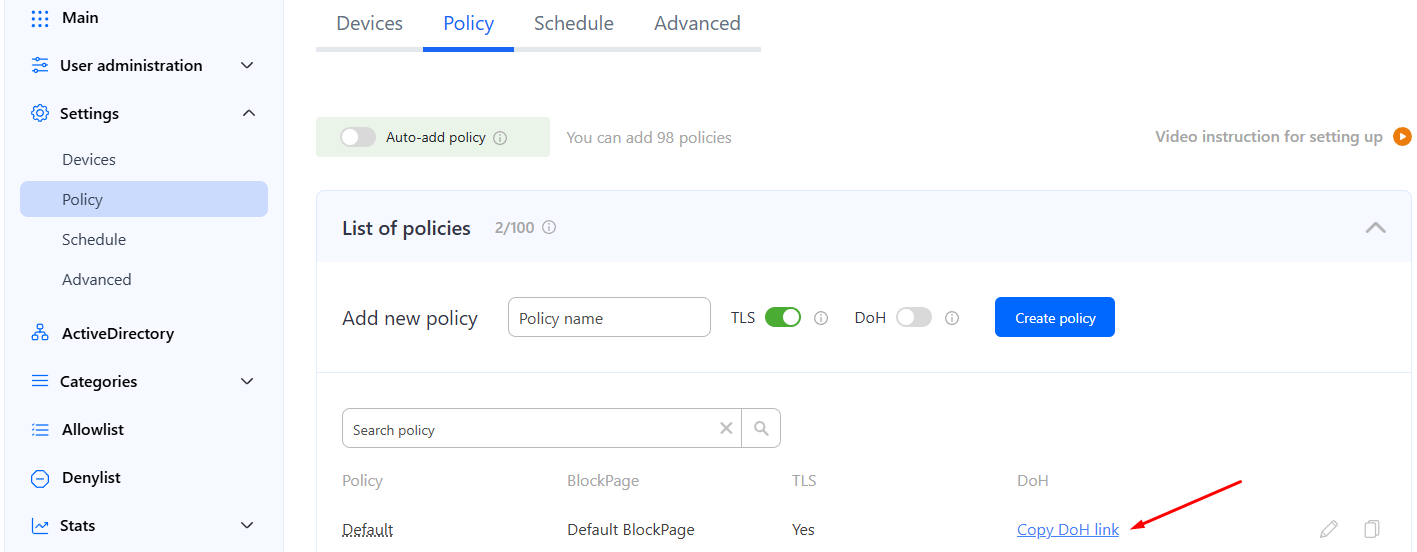
DoH link with policy
With this setup, all devices connected to the router will be filtered with the selected policy.
The Router is identified by the policy token in the link. If the IP address of the router changes, it will not affect the filtering.
2. In the MikroTik router, navigate to IP > DNS, enter the copied link in the Use DoH Server field, untick Verify DoH Certificate, and save the changes.
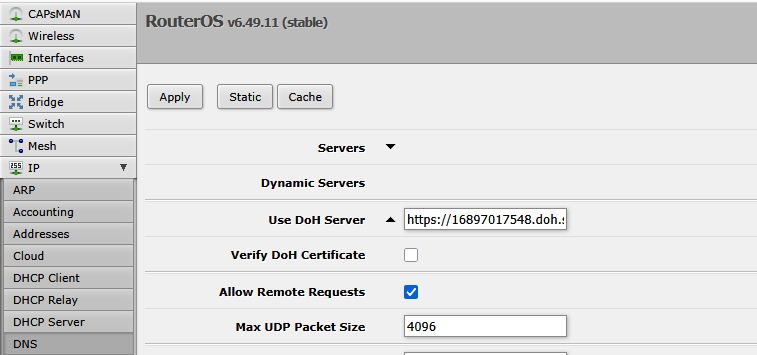
After that, all devices connected to the router will be filtered with the selected policy.