Starlink Router and Network Setup
Starlink provides internet access with unique networking characteristics, including dynamic IP addresses for all users and CGNAT (Carrier-Grade NAT) for most customers. Some Starlink plans offer a dedicated (but still dynamic) public IP.
This guide covers methods to configure DNS filtering on Starlink, depending on your setup:
-
Users with dedicated dynamic IPs.
-
Users behind CGNAT with shared IPs.
-
Universal solutions (DoH, VPN, or SafeDNS Agents) that work for all scenarios.
Starlink with a dedicated dynamic IP
1. Using Starlink Router
This method is suitable for testing the filtering service. However, it is not recommended for the final setup, because the filtering will stop working as soon as the IP changes.
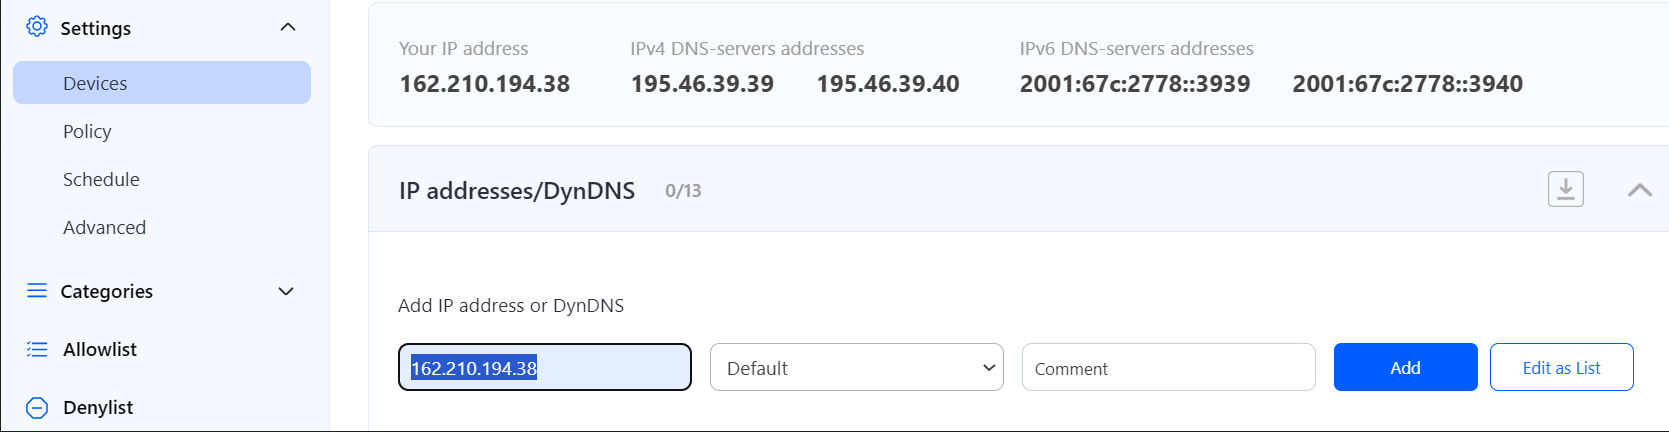
1. Go to SafeDNS Dashboard > Settings > Devices and copy your IP address to the "IP addresses / DynDNS" box, choose a policy, and click "Add".
2. Change your router’s DNS servers to SafeDNS addresses - 195.46.39.39 and 195.46.39.40
To change the DNS settings on a Starlink router, follow these steps:
-
Connect to the Starlink Network.
-
Open the Starlink app on your smartphone or tablet. If you don’t have the app, you can download it from the App Store (iOS) or Google Play Store (Android).
-
Log in to your Starlink account.
-
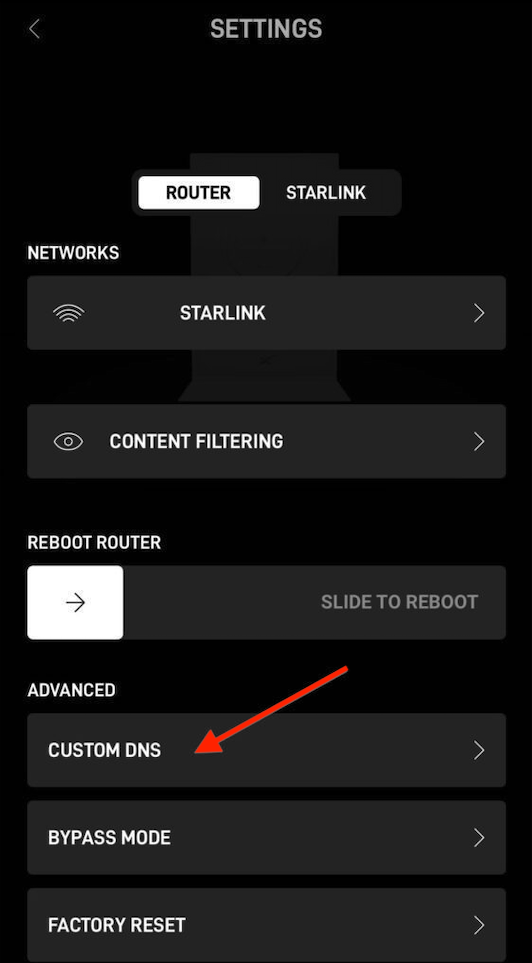
Navigate to SETTINGS > CUSTOM DNS.

- Toggle "Enable Custom DNS" on and enter SafeDNS addresses 195.46.39.39 and 195.46.39.40.
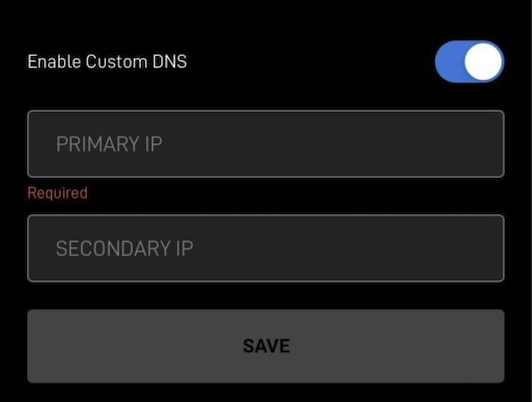
-
Save Changes.

Please note that settings take 5-7 minutes to apply.
Stats and filtering status update every 10 minutes.
2. Using a third-party router with DynDNS
This method is recommended for the final setup. It applies the filtering for all devices connected to the router, and also automatically updates the IP address when it changes.
- Enable Bypass Mode on the Starlink router.
- Connect a third-party router supporting DynDNS (most modern routers should support this feature).
- Configure DynDNS by following this general guide for routers with Dynamic IP address configuration.
3. Using DD Client on the end device (local DynDNS)
This method is a compromise between the methods above. It allows updating a dynamic IP automatically without using a third-party router.
You must install a DD Client on a device in the filtered network. Ideally, this device should be on and connected to the Internet most time. DD Client is available for most operating systems.
Please follow the DD Client guide.
Starlink behind CGNAT (shared public IP)
In rare cases, it might be possible to set up the filtering using the methods for dedicated IP setup. However, there is no guarantee that the filtering will work without interruptions. We strongly suggest using the universal solutions methods listed below.
Universal solutions (any Starlink configuration)
All methods listed here will work for both dedicated IP and shared IP cases.
1. Encrypted DNS (DoH or DoT) on a third-party router
This method is recommended for the final setup. It applies the filtering for all devices connected to the router.
- Enable Bypass Mode on the Starlink router.
- Connect a third-party router supporting DoH/DoT (not all routers support this feature).
- Follow the Encrypted DNS guide.
2. Encrypted DNS (DoH or DoT) on end devices
This method provides filtering for each end device where the DoH/DoT link is used.
Please follow the Encrypted DNS guide.
3. SafeDNS Agent
This method requires the installation of SafeDNS Agent on each end device that needs to be filtered.
Please follow the SafeDNS Agent guides:
4. OpenVPN
This method allows connecting to the SafeDNS server using VPN.
Please follow the general OpenVPN guide.