Mac Filtering Setup via OpenVPN
Please note, that this filtering option works via the third-party app OpenVPN.
If you encounter any issues, please contact our Technical Support.
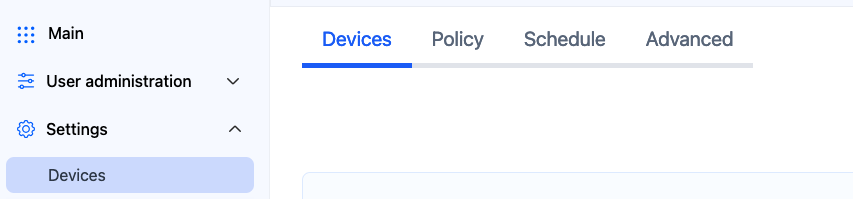
1. Open the SafeDNS Dashboard and navigate to Settings > Devices.
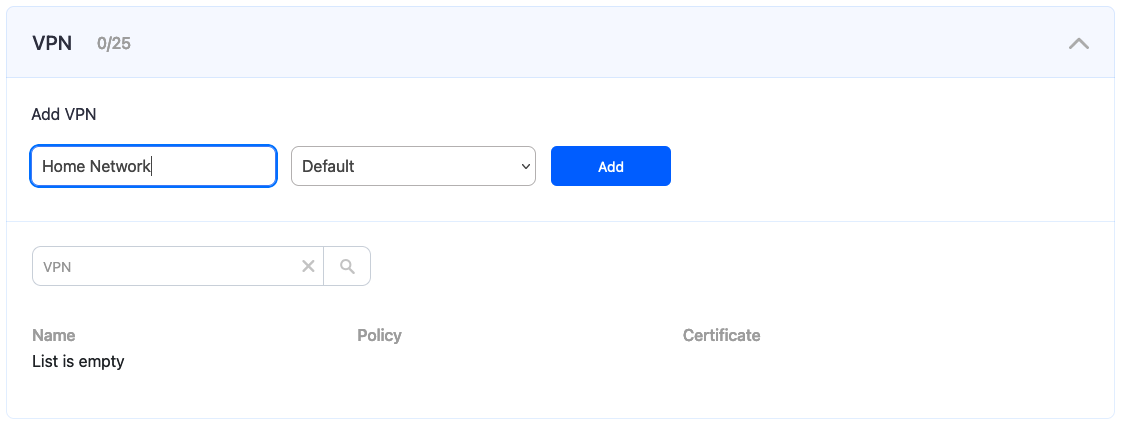
2. Scroll down to the VPN section, enter any name for a new VPN connection, and click Add.
Choose a filtering policy before adding a VPN connection, if needed.
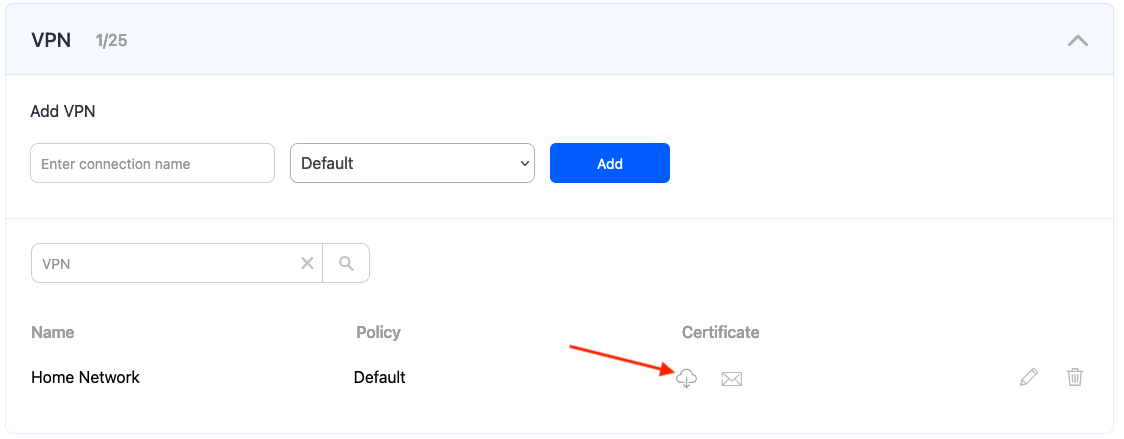
3. Upon creating the connection, two icons will appear in the "Certificate" column. One is for downloading the Certificate, and the other is for sending it by email. Press the "Cloud download" icon.
Multiple devices can use the same filtering policy, but each device should use its own VPN certificate.
You can also change the filtering policy of the created VPN connection by clicking on the pencil icon to the right. Please note, that you don't need to redownload your VPN certificate on your mobile device if you change its filtering policy.
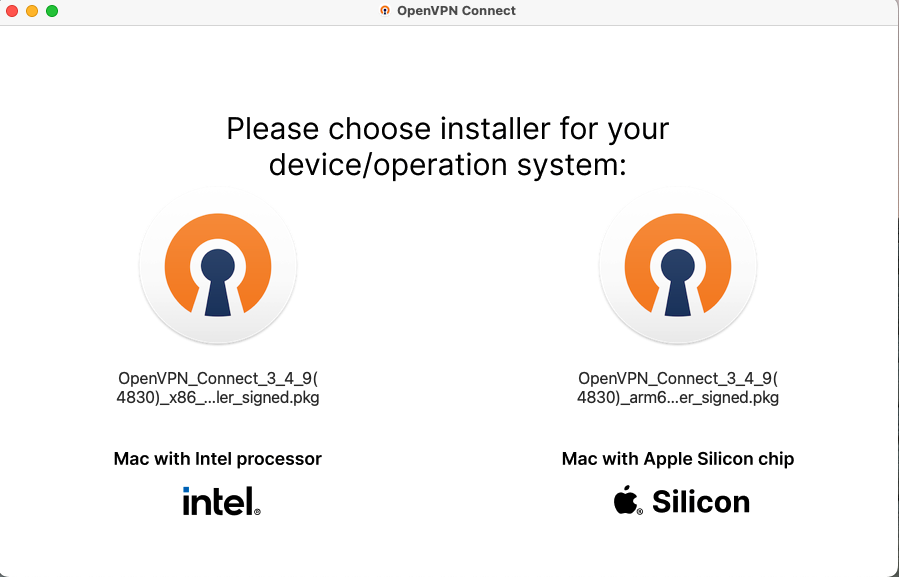
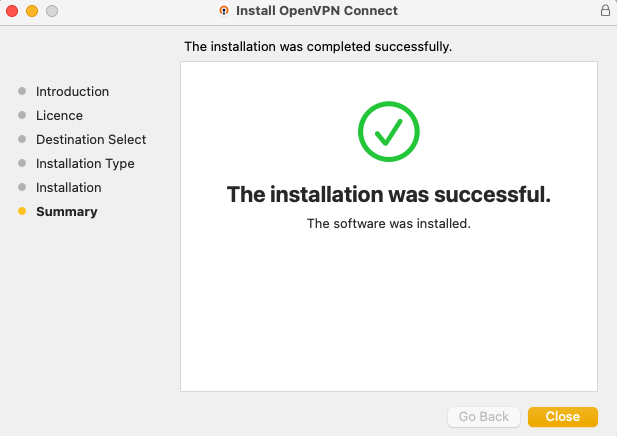
4. Download OpenVPN Connect.
5. Choose the installer for your Mac device.
6. Follow the on-screen instructions to finish the installation process.
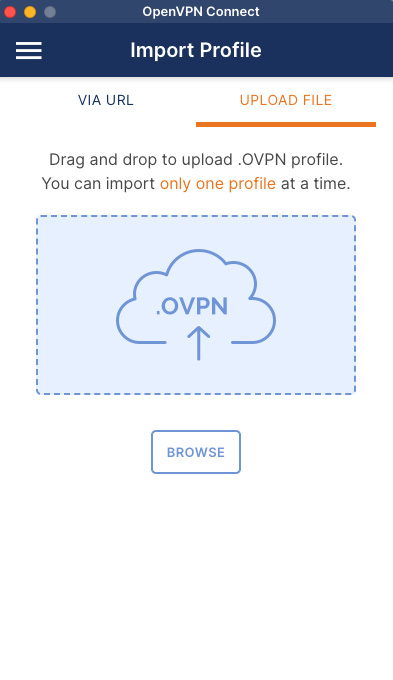
7. Select the Upload File menu and import the downloaded .ovpn certificate file.
The Certificate has the following name format: safedns-123456.ovpn
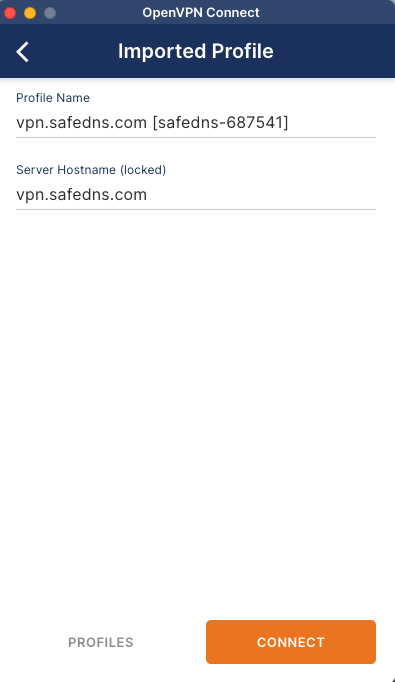
8. Click on the Connect button.
9. Wait until the VPN connection is established.
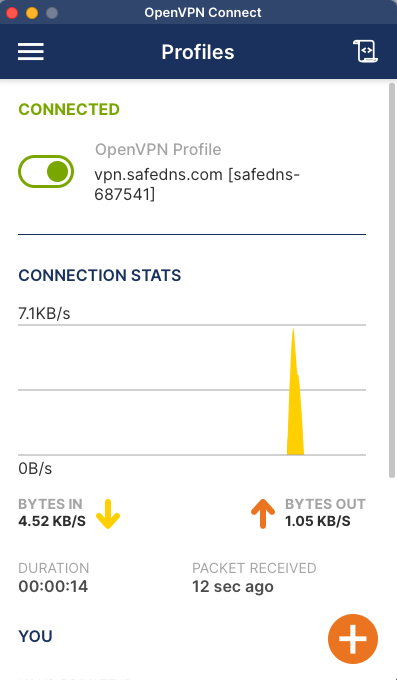
Your Mac is now filtered with the SafeDNS filtering policy.
Please note that settings take 5-7 minutes to apply.
Stats and filtering status update every 10 minutes.