NAT DNS Setup
This feature is not available for the Safe Home and Basic plans.
- Network Address Translation or NAT is frequently used in corporate networks. It allows network owners and administrators to:
• decrease the number of static IPs
• secure local networks
• prevent unwanted external access to the local hosts
• hide the entire internal network structure
NAT DNS is a SafeDNS service feature designed to apply different filtering policies to different networking hardware (routers, gateways, etc.) behind NAT with one public IP.
Your networking hardware should be set up according to the SafeDNS instructions.
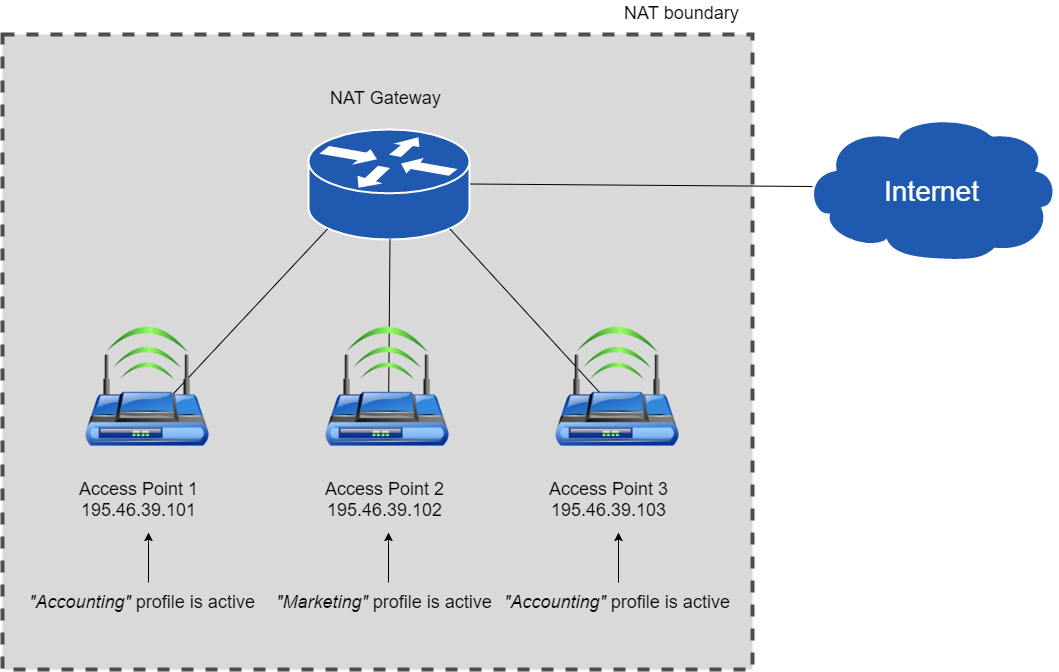
NAT DNS setup
- Enter the Dashboard > Settings. Assign the Public IP of a NAT device to one of the existing filtering policies under the “IP addresses / DynDNS” section. (to use NAT DNS you must have 2 or more policies).
- Manually or via DHCP set up the target DNSes on the end devices (routers or gateways behind NAT).
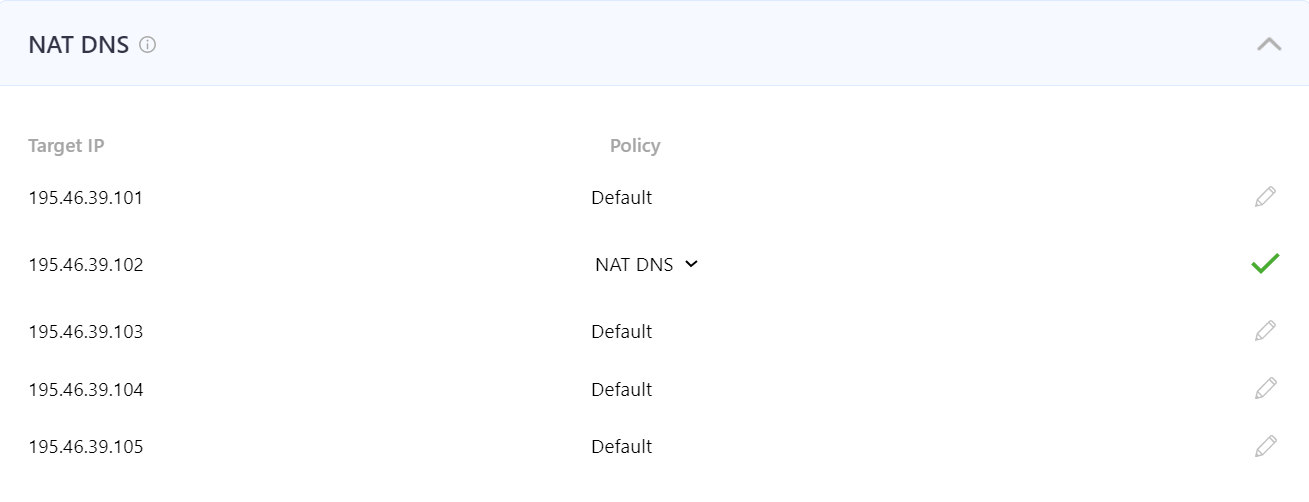
List of target DNS addresses:
195.46.39.101
195.46.39.102
195.46.39.103
195.46.39.104
195.46.39.105 - In the Dashboard > Settings, scroll down to the bottom, and assign policies to the Target IPs (one IP = one policy). Click on the green checkmark to apply settings.

After that, all devices behind NAT will be filtered by the chosen policy.
You can view the stats for each Target IP by selecting its policy in the Stats tab.
This feature works only for networks behind NAT. If you use a proxy server, the NAT DNS filtering option will not work, because in proxy server’s settings will be applied instead.
Please note that settings take 5-7 minutes to apply.
Stats and filtering status update every 10 minutes.