Unifi/Ubiquiti Router Setup
Router with Static IP address configuration
1. Go to SafeDNS Dashboard > Settings > Devices and copy your IP address to the "IP addresses / DynDNS" box, choose a policy, and click "Add".

2. Start the Unifi Controller Application and wait for the load. Once it is loaded, start the browser.
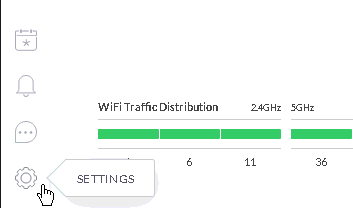
3. Open the Settings menu from the Dashboard:
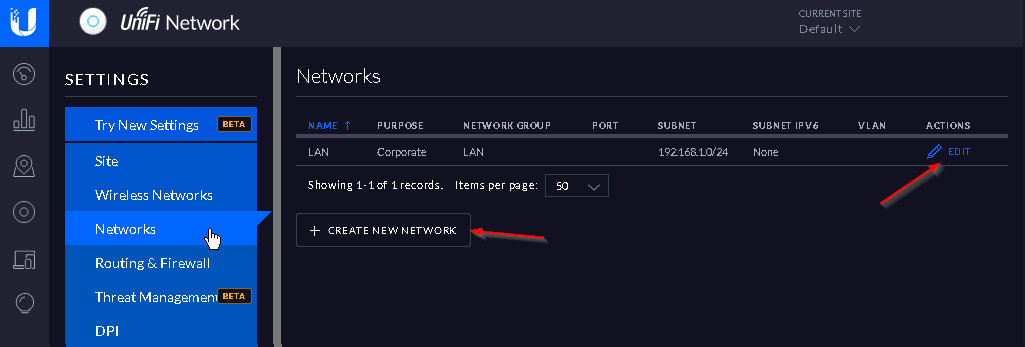
4. Browse the Networks menu and select the option either Create New Network or Edit. It depends on the requirements, if you are creating a new setup, there might be no networks created – then you need to create a new network. If you are starting to use SafeDNS on the existing network – then select the Edit option:
The following configuration can be used as an example of your Local Network setup.
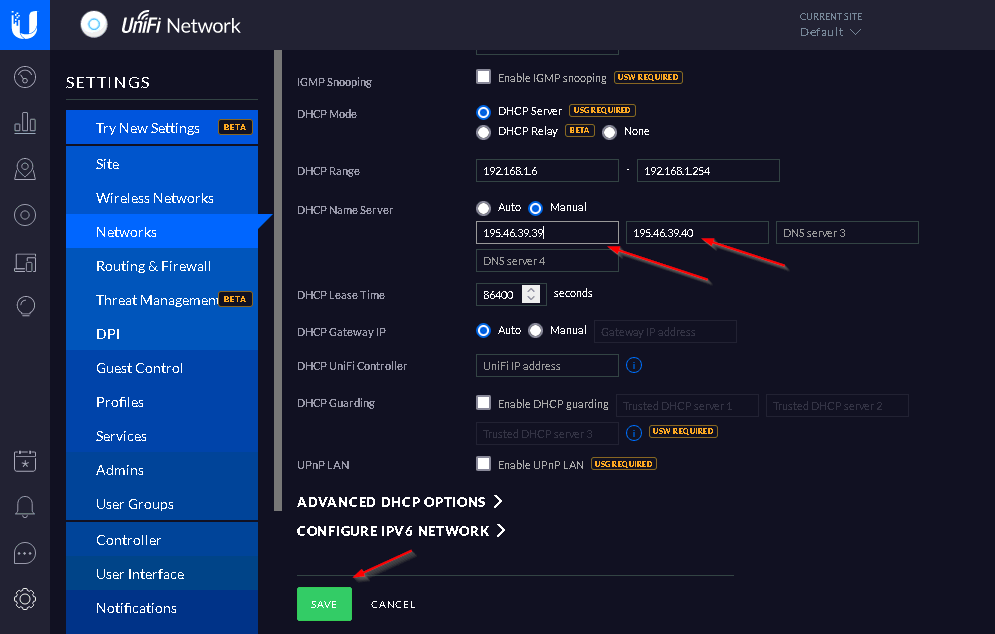
5. Set the following DHCP Name Server addresses: 195.46.39.39 and 195.46.39.40

6. After adding SafeDNS Name Servers, Press the Save button and wait for the provisioning process of the Unifi access points – it may take a while.
You have successfully configured your router.
Please note that settings take 5-7 minutes to apply.
Stats and filtering status update every 10 minutes.
Router with Dynamic IP address configuration
In case you have a Dynamic IP address, you need to configure the DynDNS/DDNS on the router using a third-party Dynamic DNS service.
1. In the router setting, go to DynDNS/DDNS settings.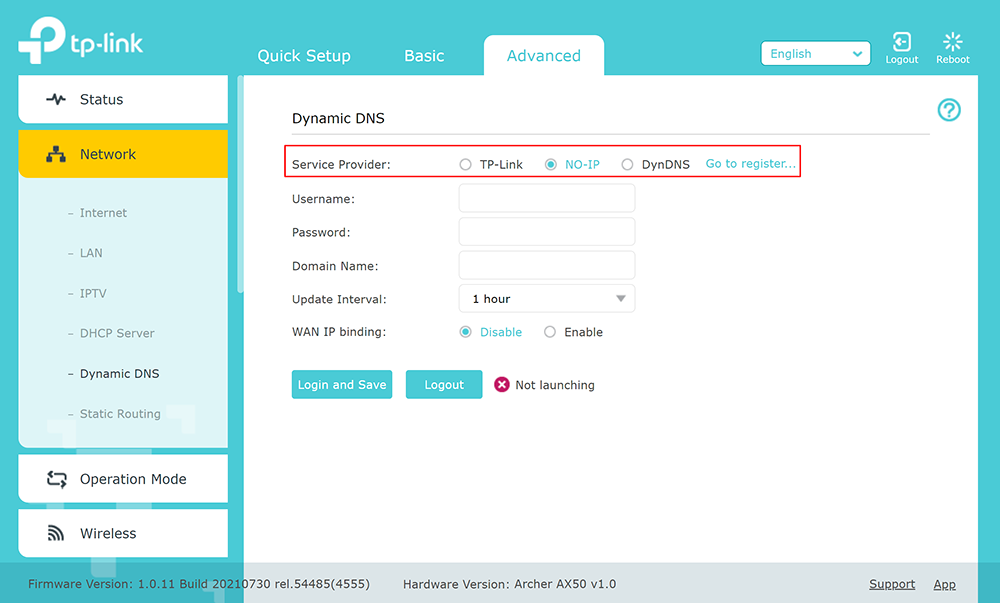
2. Check the DynDNS service available for your router. If available, we recommend using the No IP DynDNS service provider.
3. Go to the website noip.com and sign up.
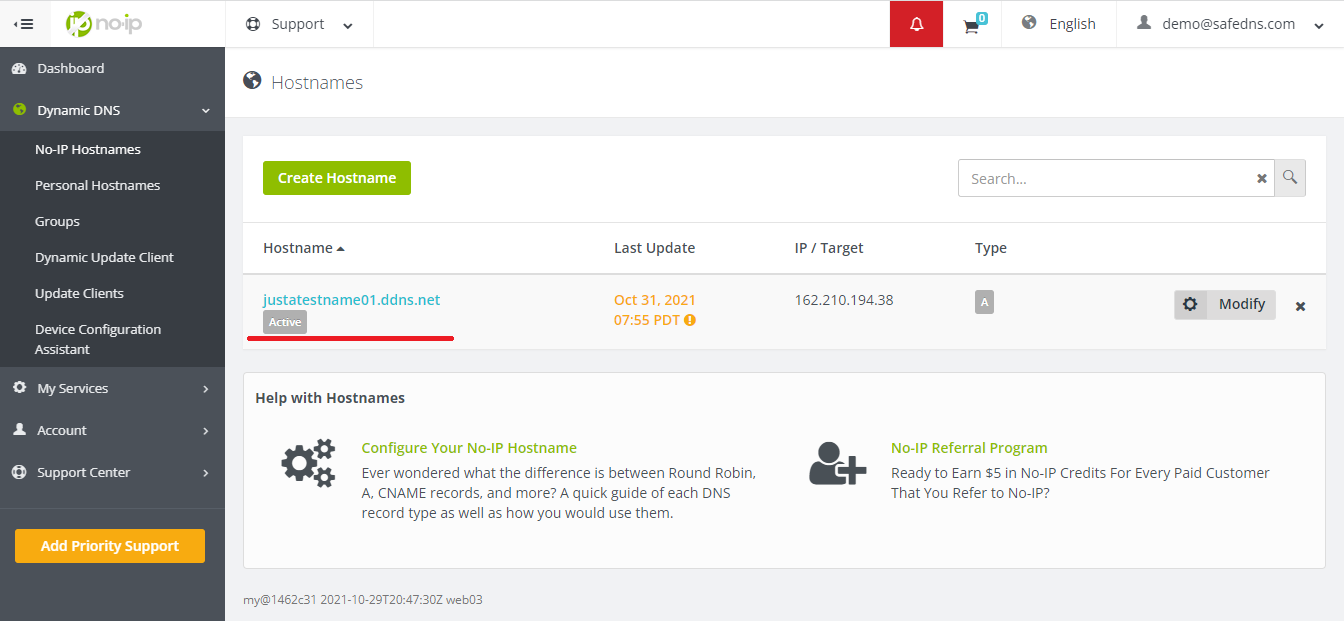
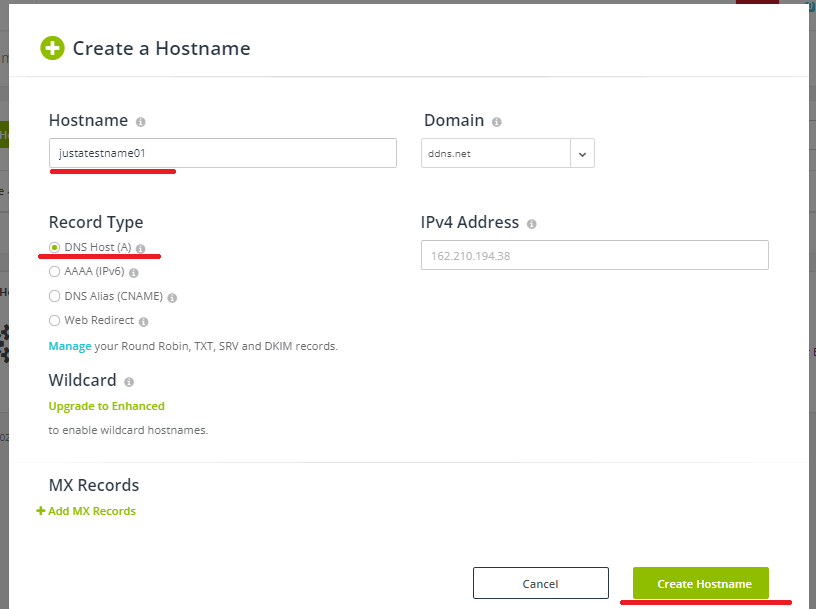
4. In your No-IP account, create a hostname (any name you can think of).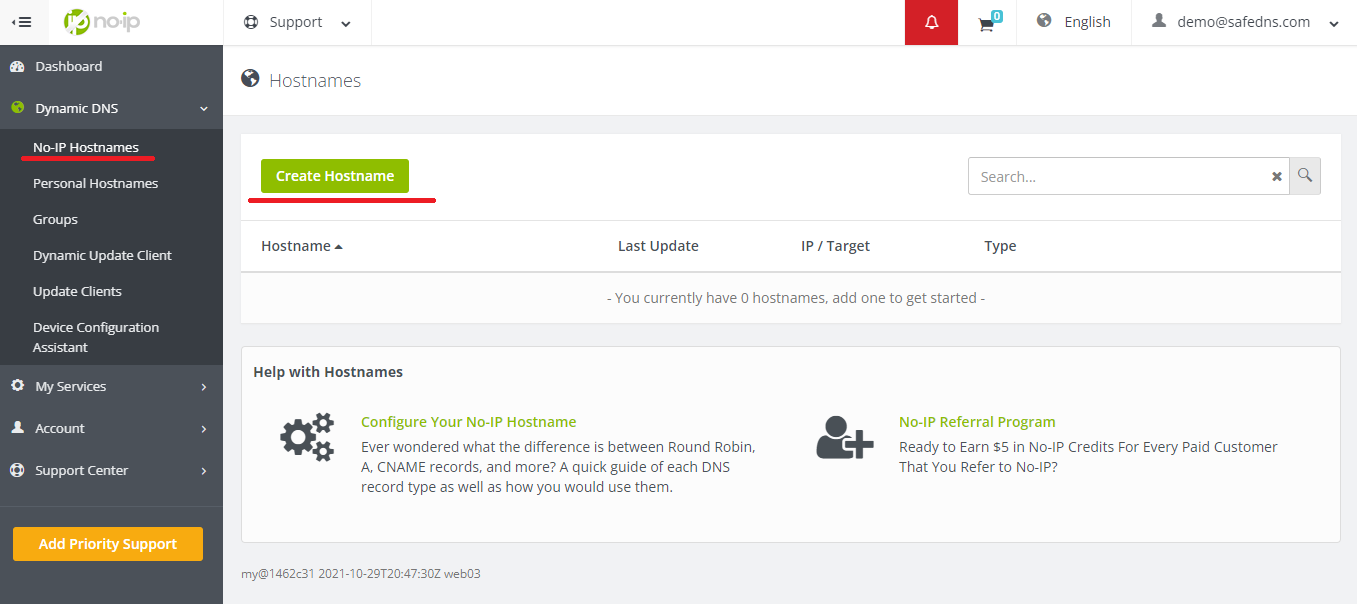
5. Go back to your router and configure DDNS/DynDNS.
- Select No-IP as "Service provider".
- Type in the created hostname in the "Hostname" field.
- Type in your No-IP account credentials as "Username" and "Password", and click "Save".
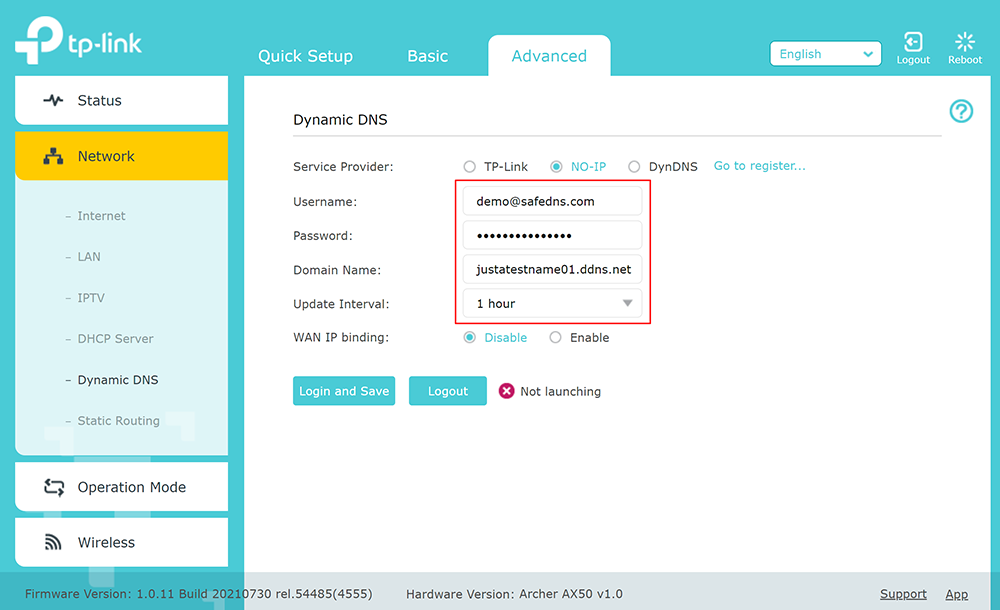
If everything is correct, DynDNS/DDNS settings will apply.
6. Go to SafeDNS Dashboard > Settings > Devices and copy your DynDNS hostname to the "IP addresses / DynDNS" box, choose a policy, and click "Add".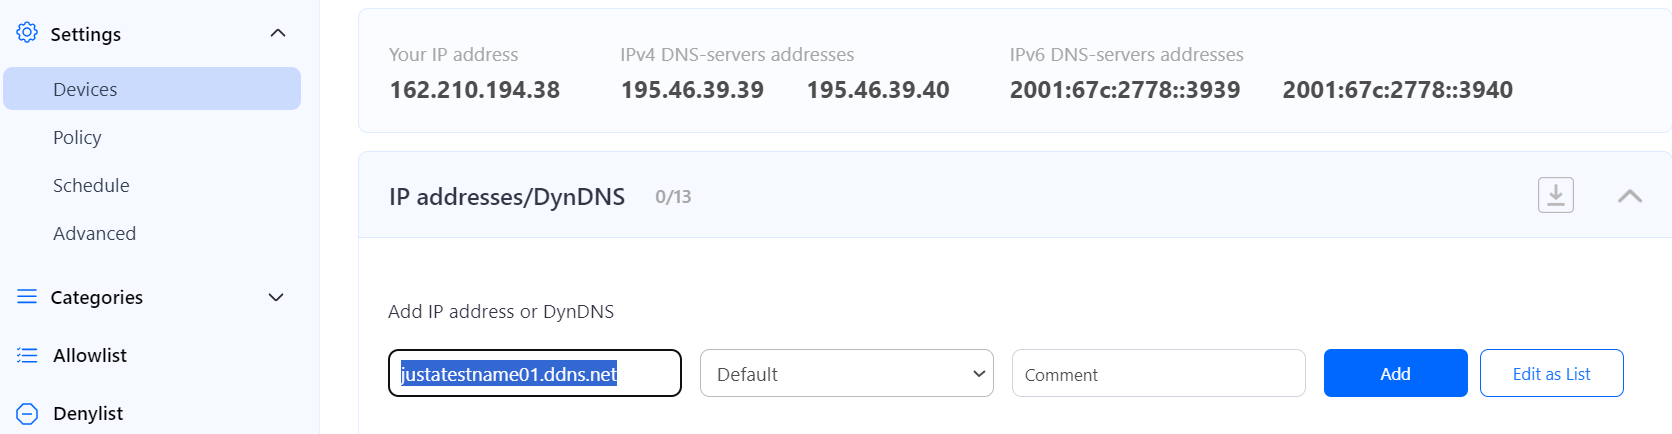
Once added, you will see it in the DynDNS section of the Dashboard.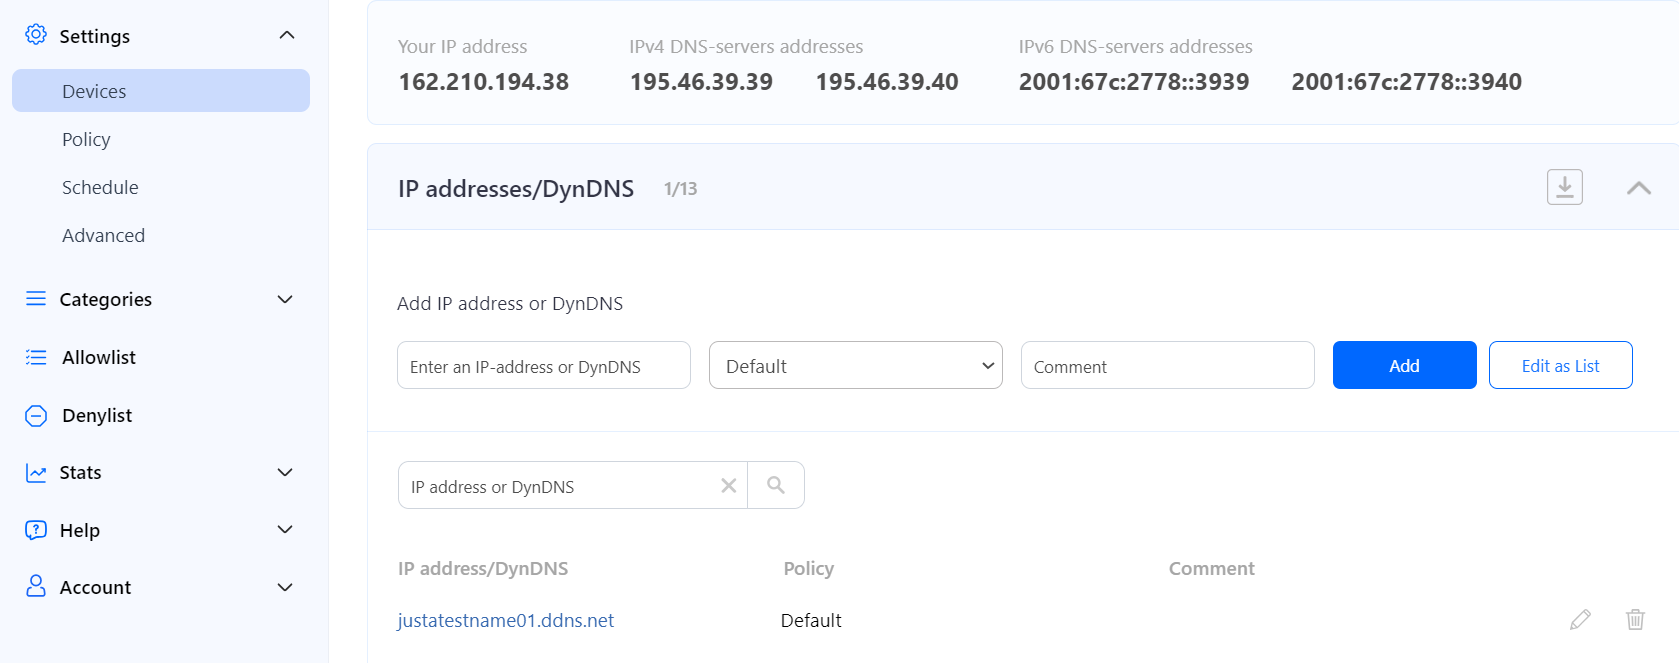
7. Start the Unifi Controller Application and wait for the load. Once it is loaded, start the browser.
8. Open the Settings menu from the Dashboard:
9. Browse the Networks menu and select the option either Create New Network or Edit. It depends on the requirements, if you are creating a new setup, there might be no networks created – then you need to create a new network. If you are starting to use SafeDNS on the existing network – then select the Edit option:
The following configuration can be used as an example of your Local Network setup.
10. Set the following DHCP Name Server addresses: 195.46.39.39 and 195.46.39.40
11. After adding SafeDNS Name Servers, Press the Save button and wait for the provisioning process of the Unifi access points – it may take a while.
You have successfully configured your router.
Please note that settings take 5-7 minutes to apply.
Stats and filtering status update every 10 minutes.
Configuring the filter using the DDclient.
In rare cases when your router does not have a DynDNS/DDNS setting and your IP is Dynamic, you need to use third-party software - DDclient - on the PC connected to the network:
1. Install DDclient on a PC connected to the network. Once DDclient is installed, all devices connected to the same network will be filtered by the same rules.
2. Set up DNS servers in your router: