SafeDNS Agent for macOS Setup
Installation requirements: macOS 14 (Sonoma) or newer.
The Agent is available on the following billing plans: Safe Family, Pro, Pro Plus, and archived Safe@Home, Safe@Office.
Getting started
- Log in to your SafeDNS account with your registration email and password.
- Navigate to the Getting Started widget on the main page of the Dashboard and select the macOS button.
- Click on the download link below and wait for the Agent to download.
Alternatively, you can use the direct link to download the Agent from the SafeDNS website - SafeDNS macOS Agent.

Installation
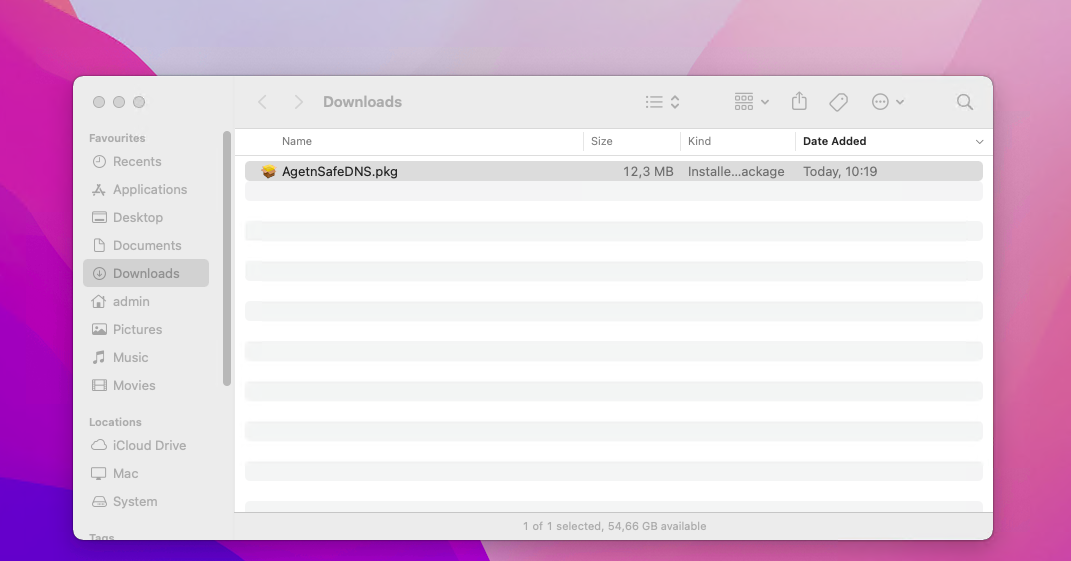
1. After downloading, open the Downloads directory and double-click on the downloaded package to start the installation process.
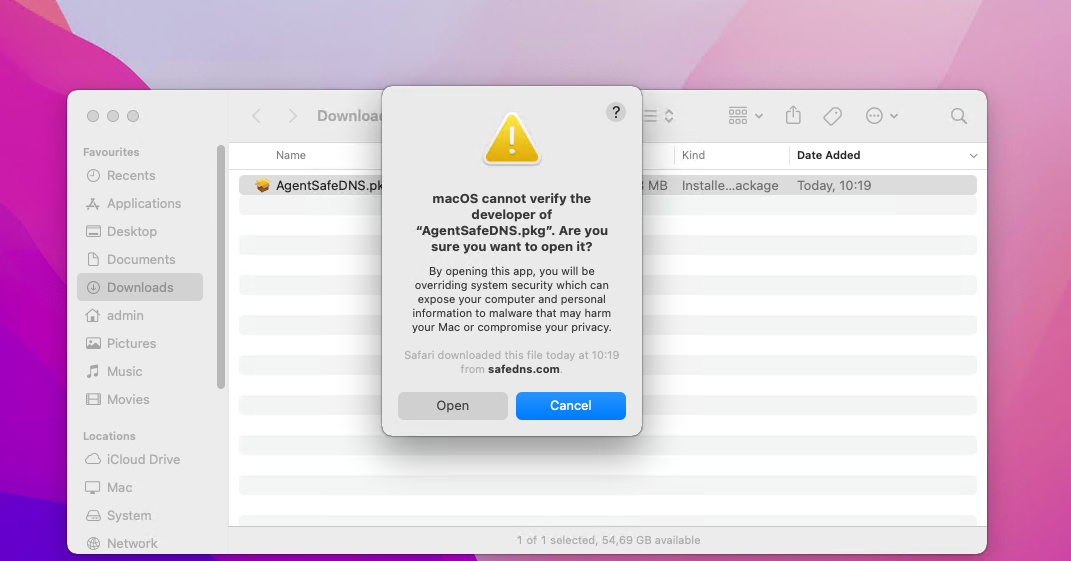
2. If you see a message before installing that says “macOS can’t verify the developer of AgentSafeDNS.pkg…”, please hold the Control button, right-click on AgentSafeDNS.pkg, and click Open in the opened context menu.
3. In the appeared dialogue, click Open and follow the instructions of the installer. During the installation process you will be asked to enter the administrator password.
First launch
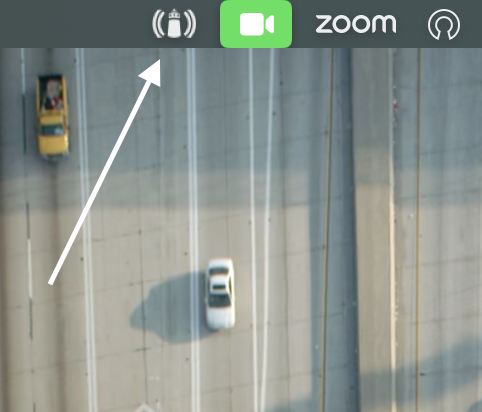
1. After installation, launch the SafeDNS Agent from the Launchpad.
The Agent will be accessible by clicking on the icon in the system tray after the launch.
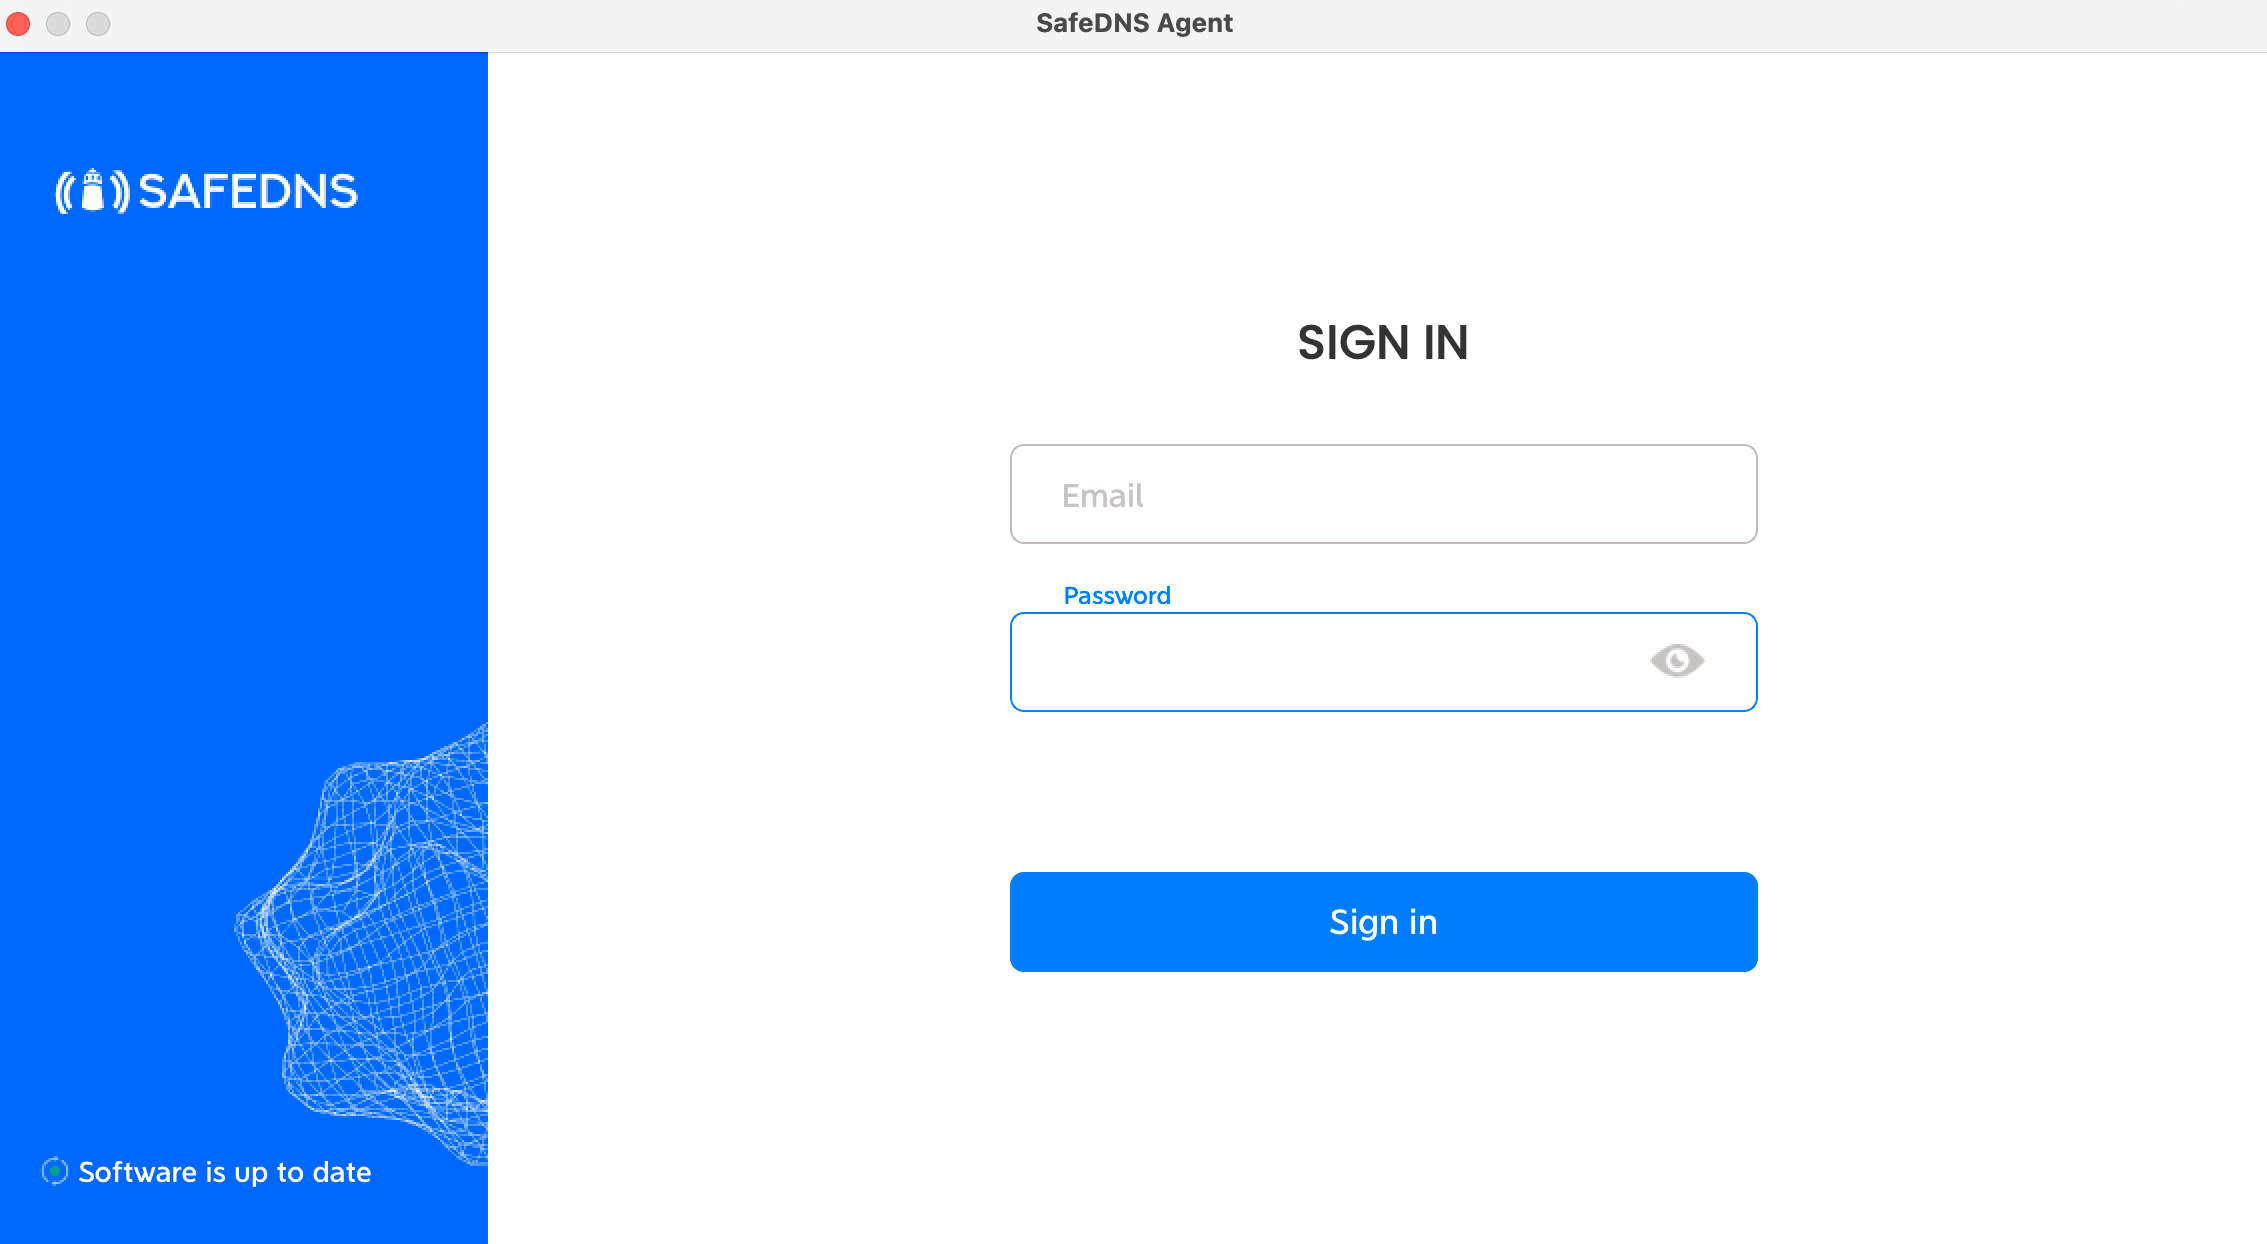
2. Enter your SafeDNS account credentials in the opened window. If you don’t have an account yet, please choose a suitable plan and register using the registration page.
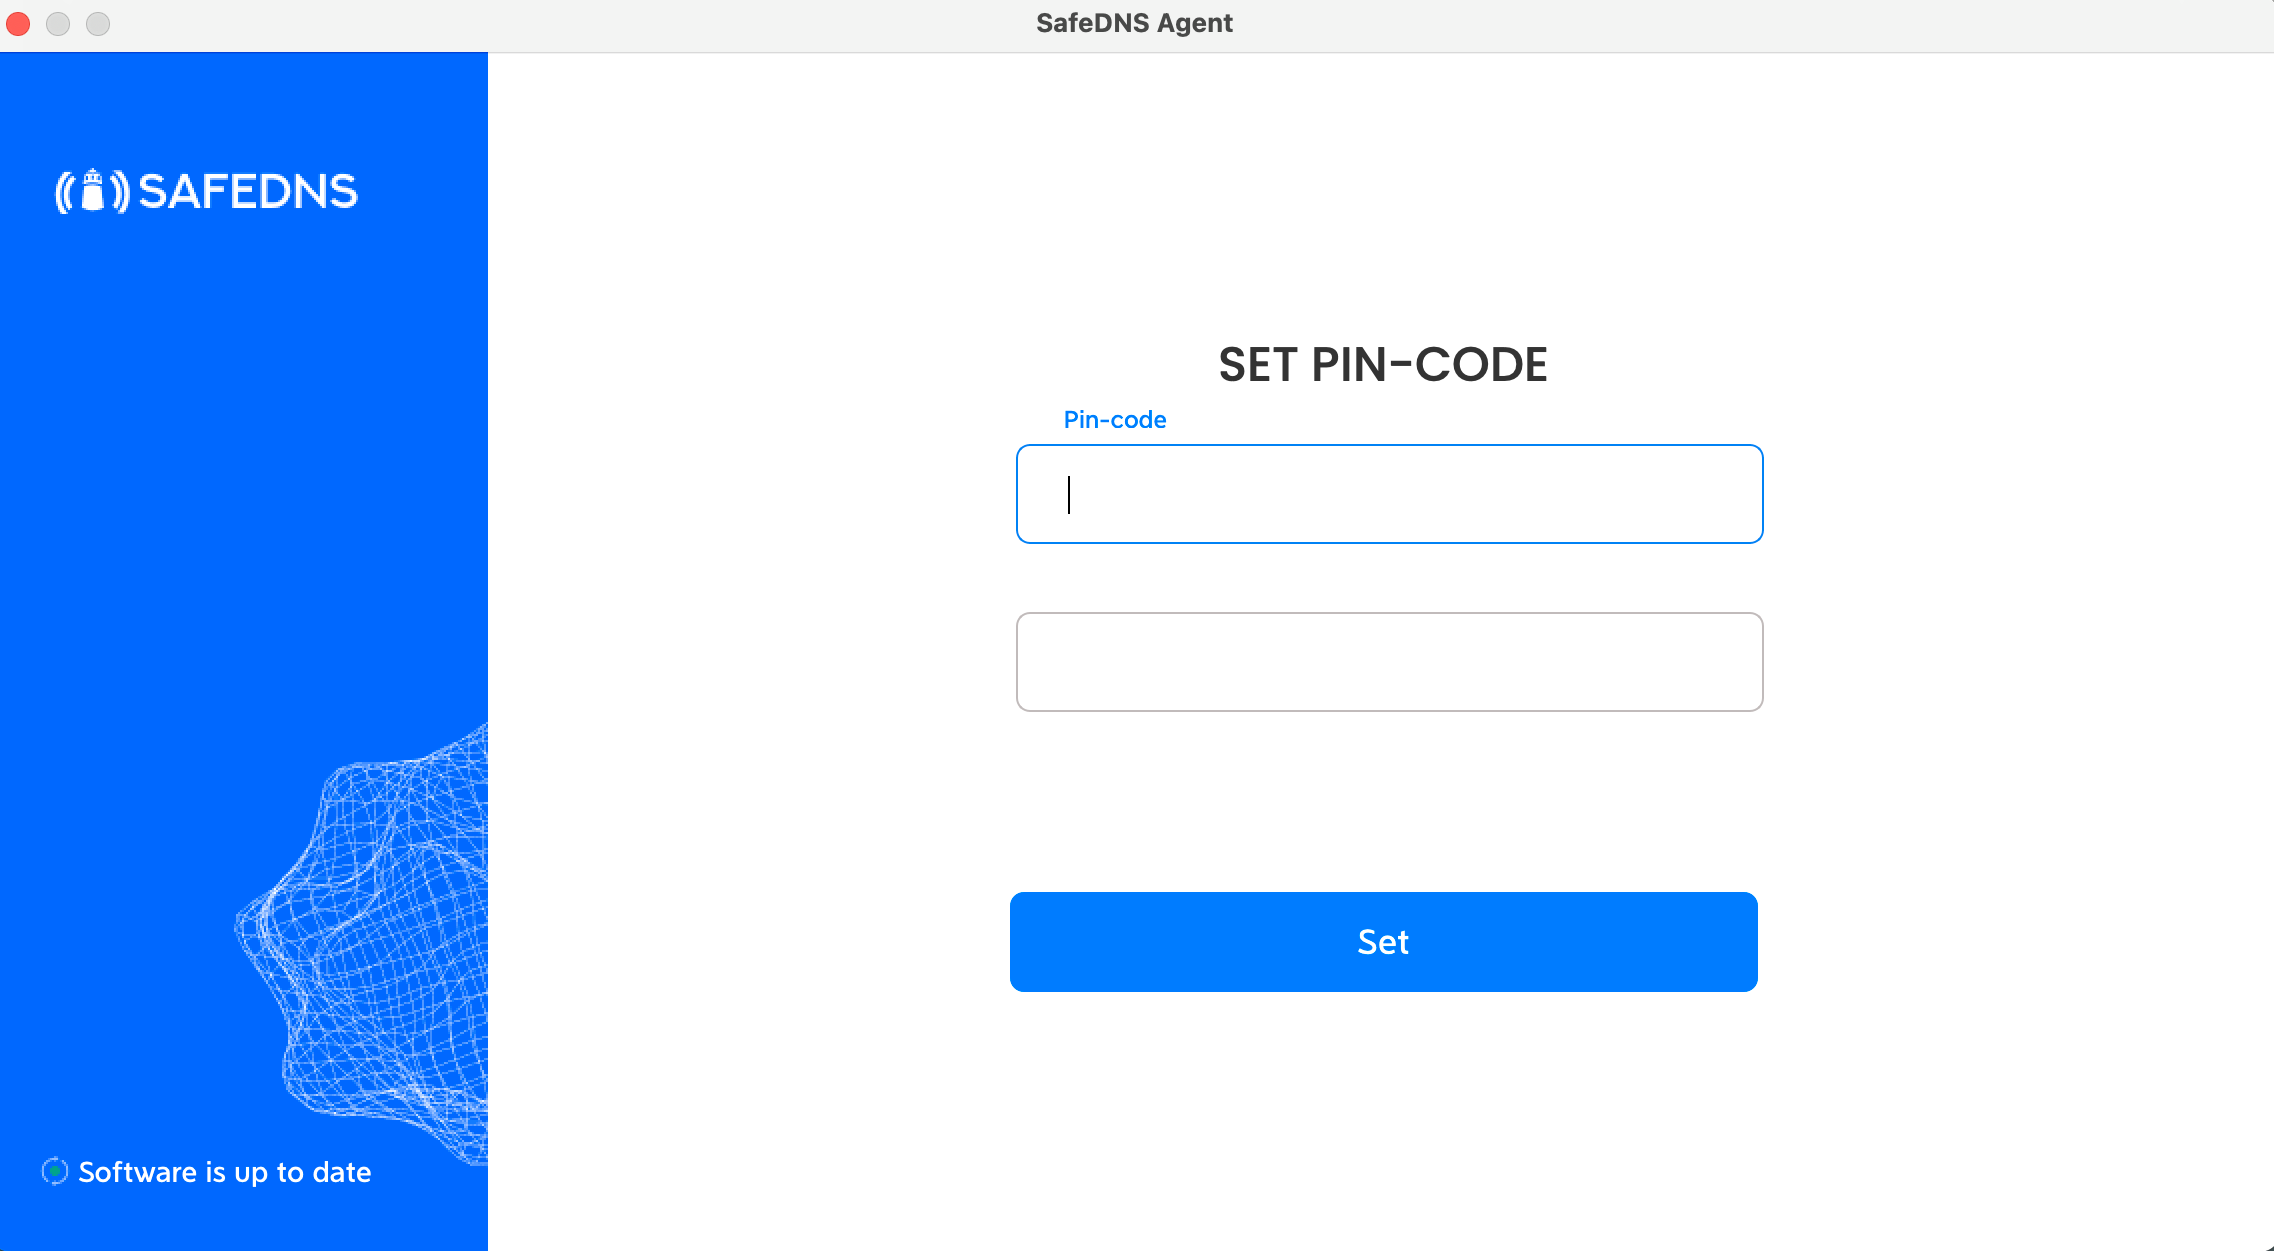
3. Set up the security PIN that will be used later to restrict access to the Agent.
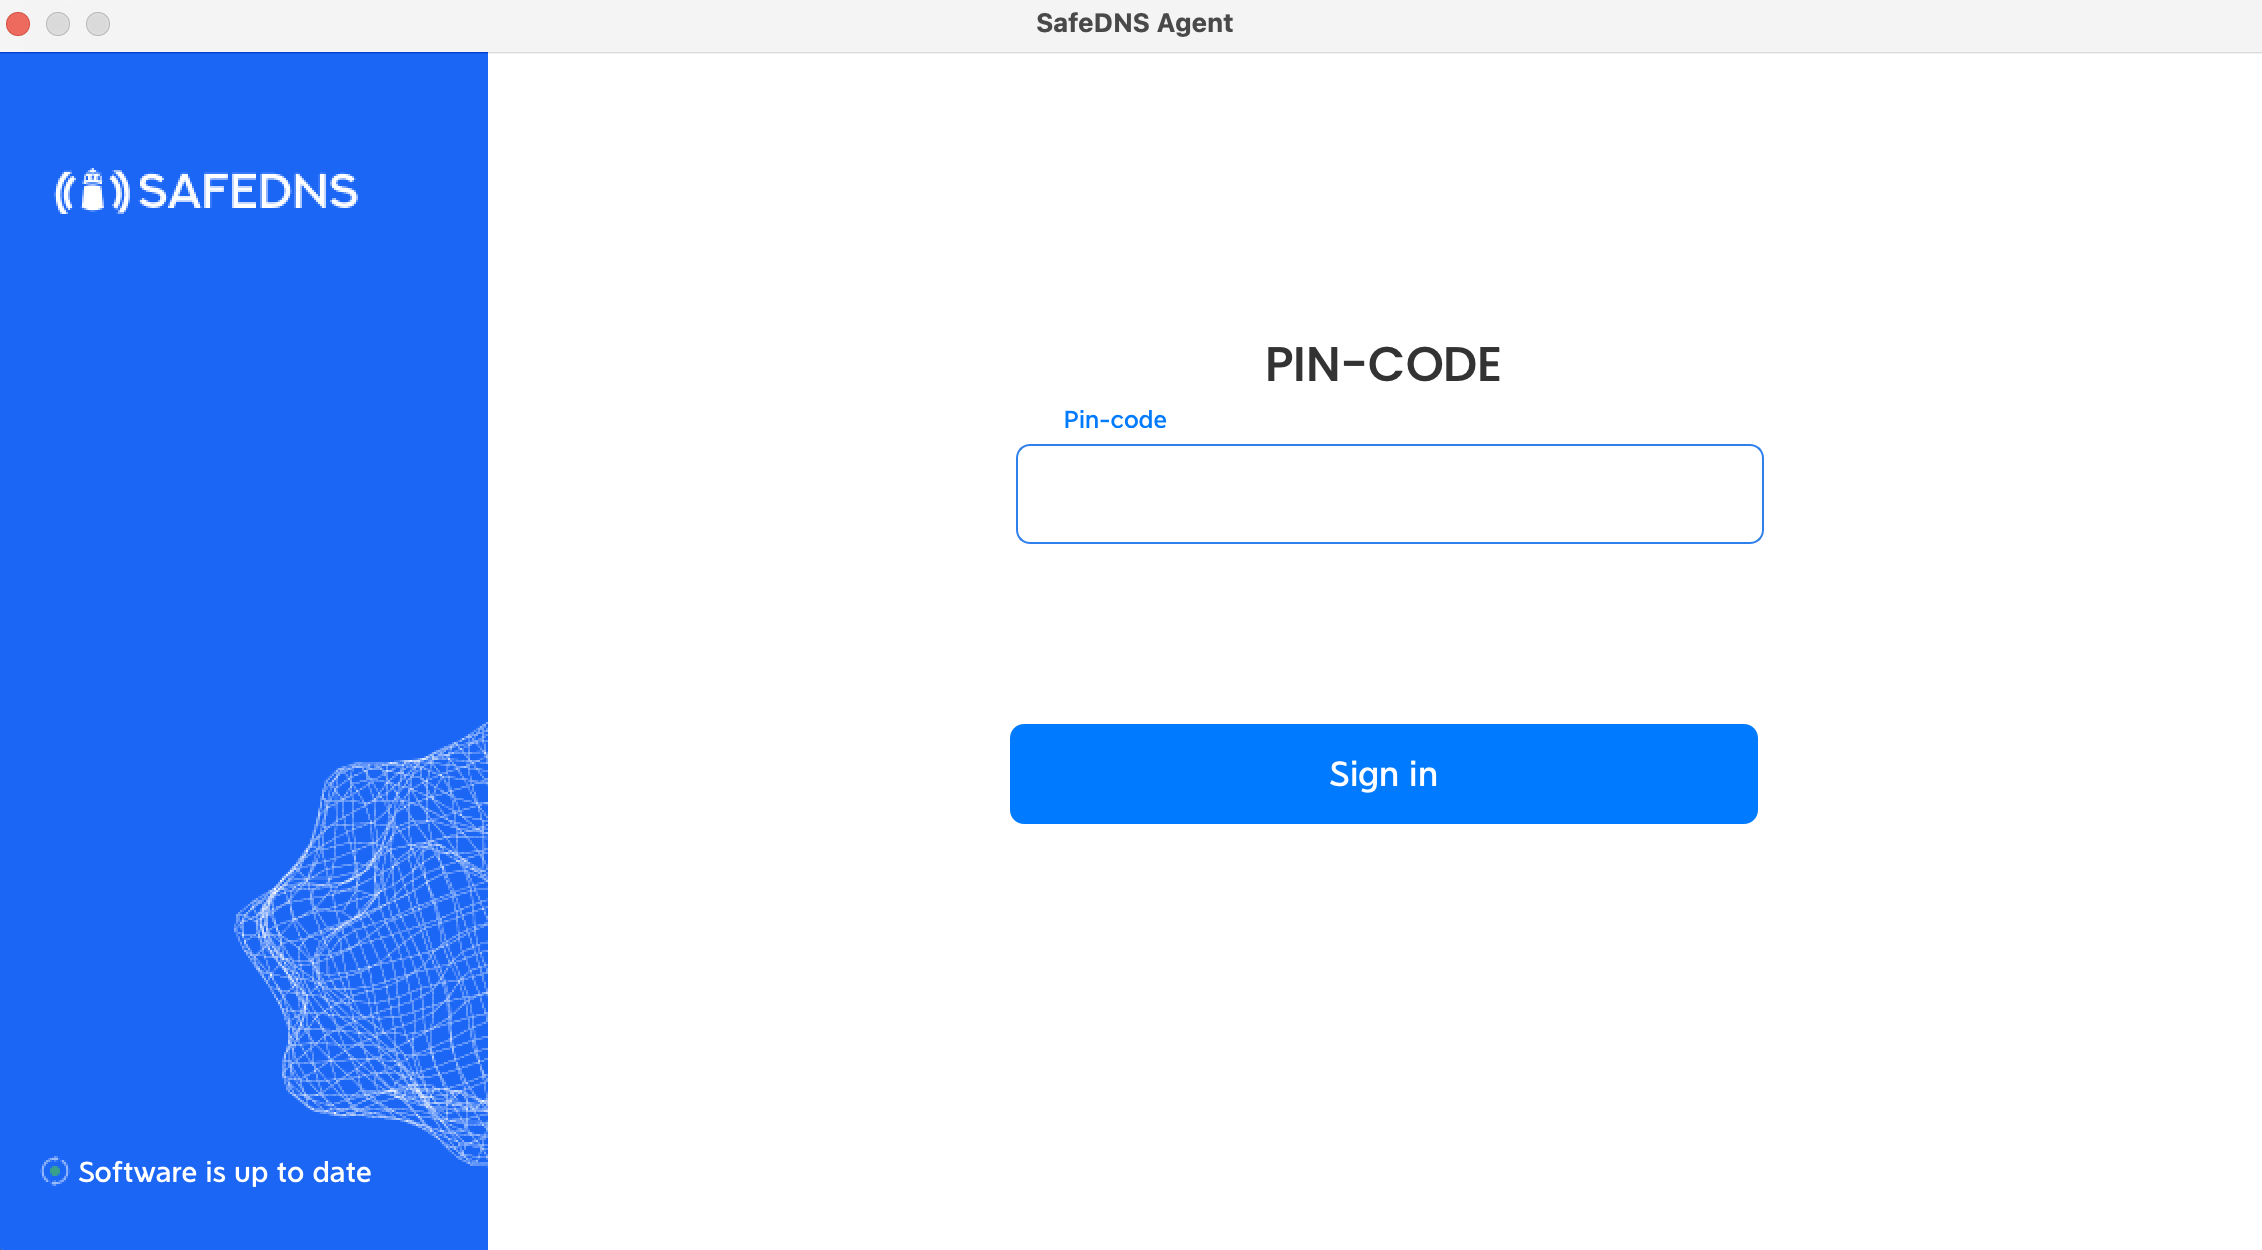
4. Enter the PIN once again to sign in to the Agent.
Agent overview
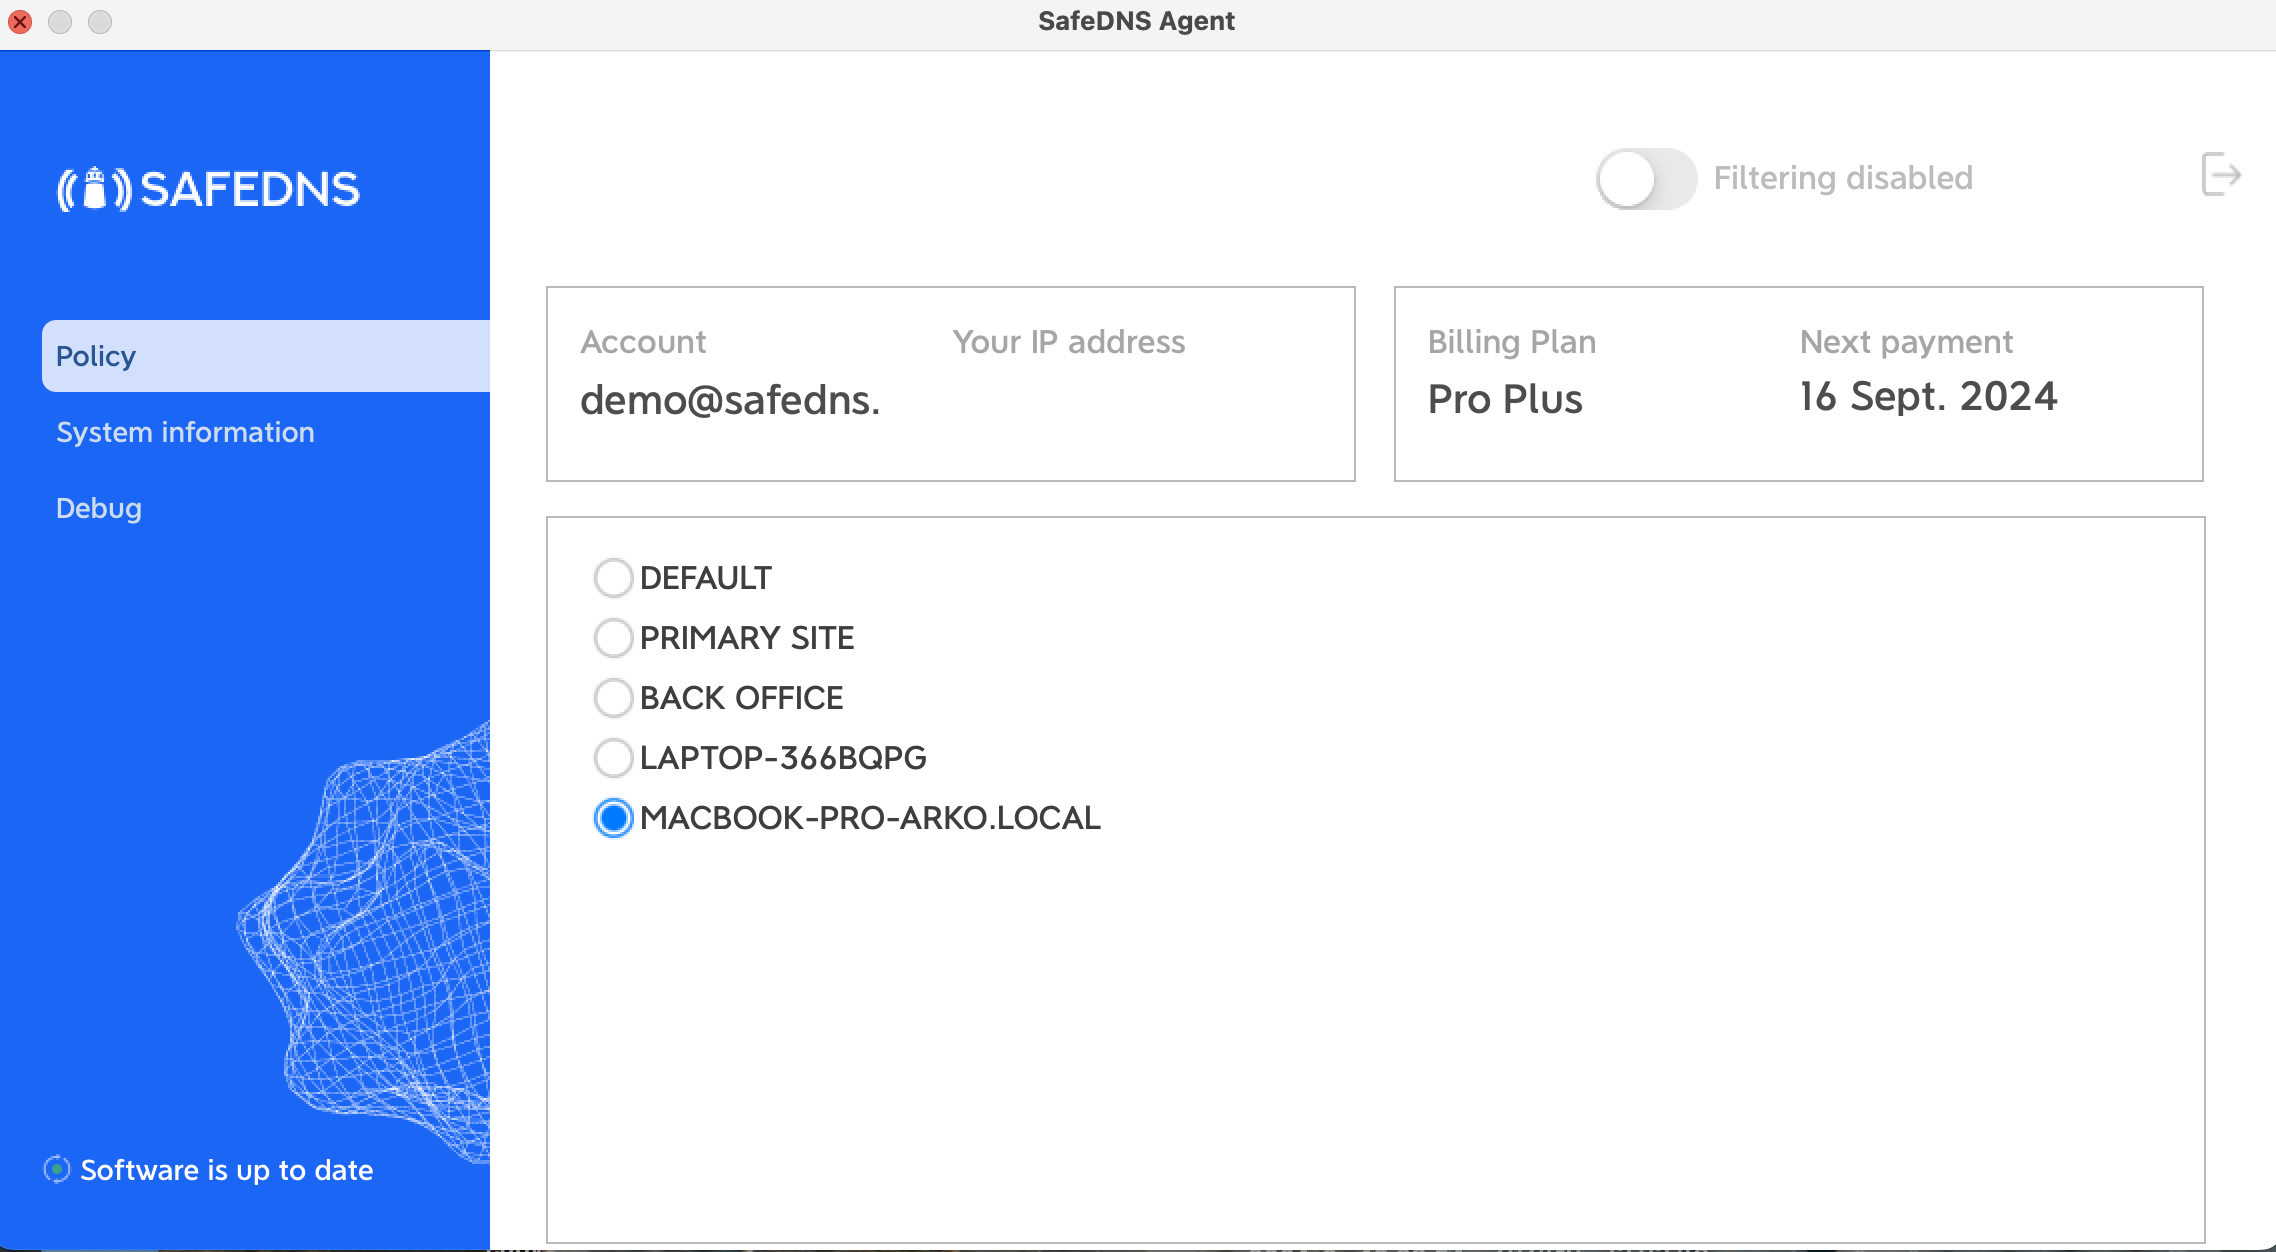
1. In the main window of the Agent, you can view your account information, current IP address, your Billing Plan, and the Subscription expiration date.
All filtering rules changes can be made in the SafeDNS Dashboard.
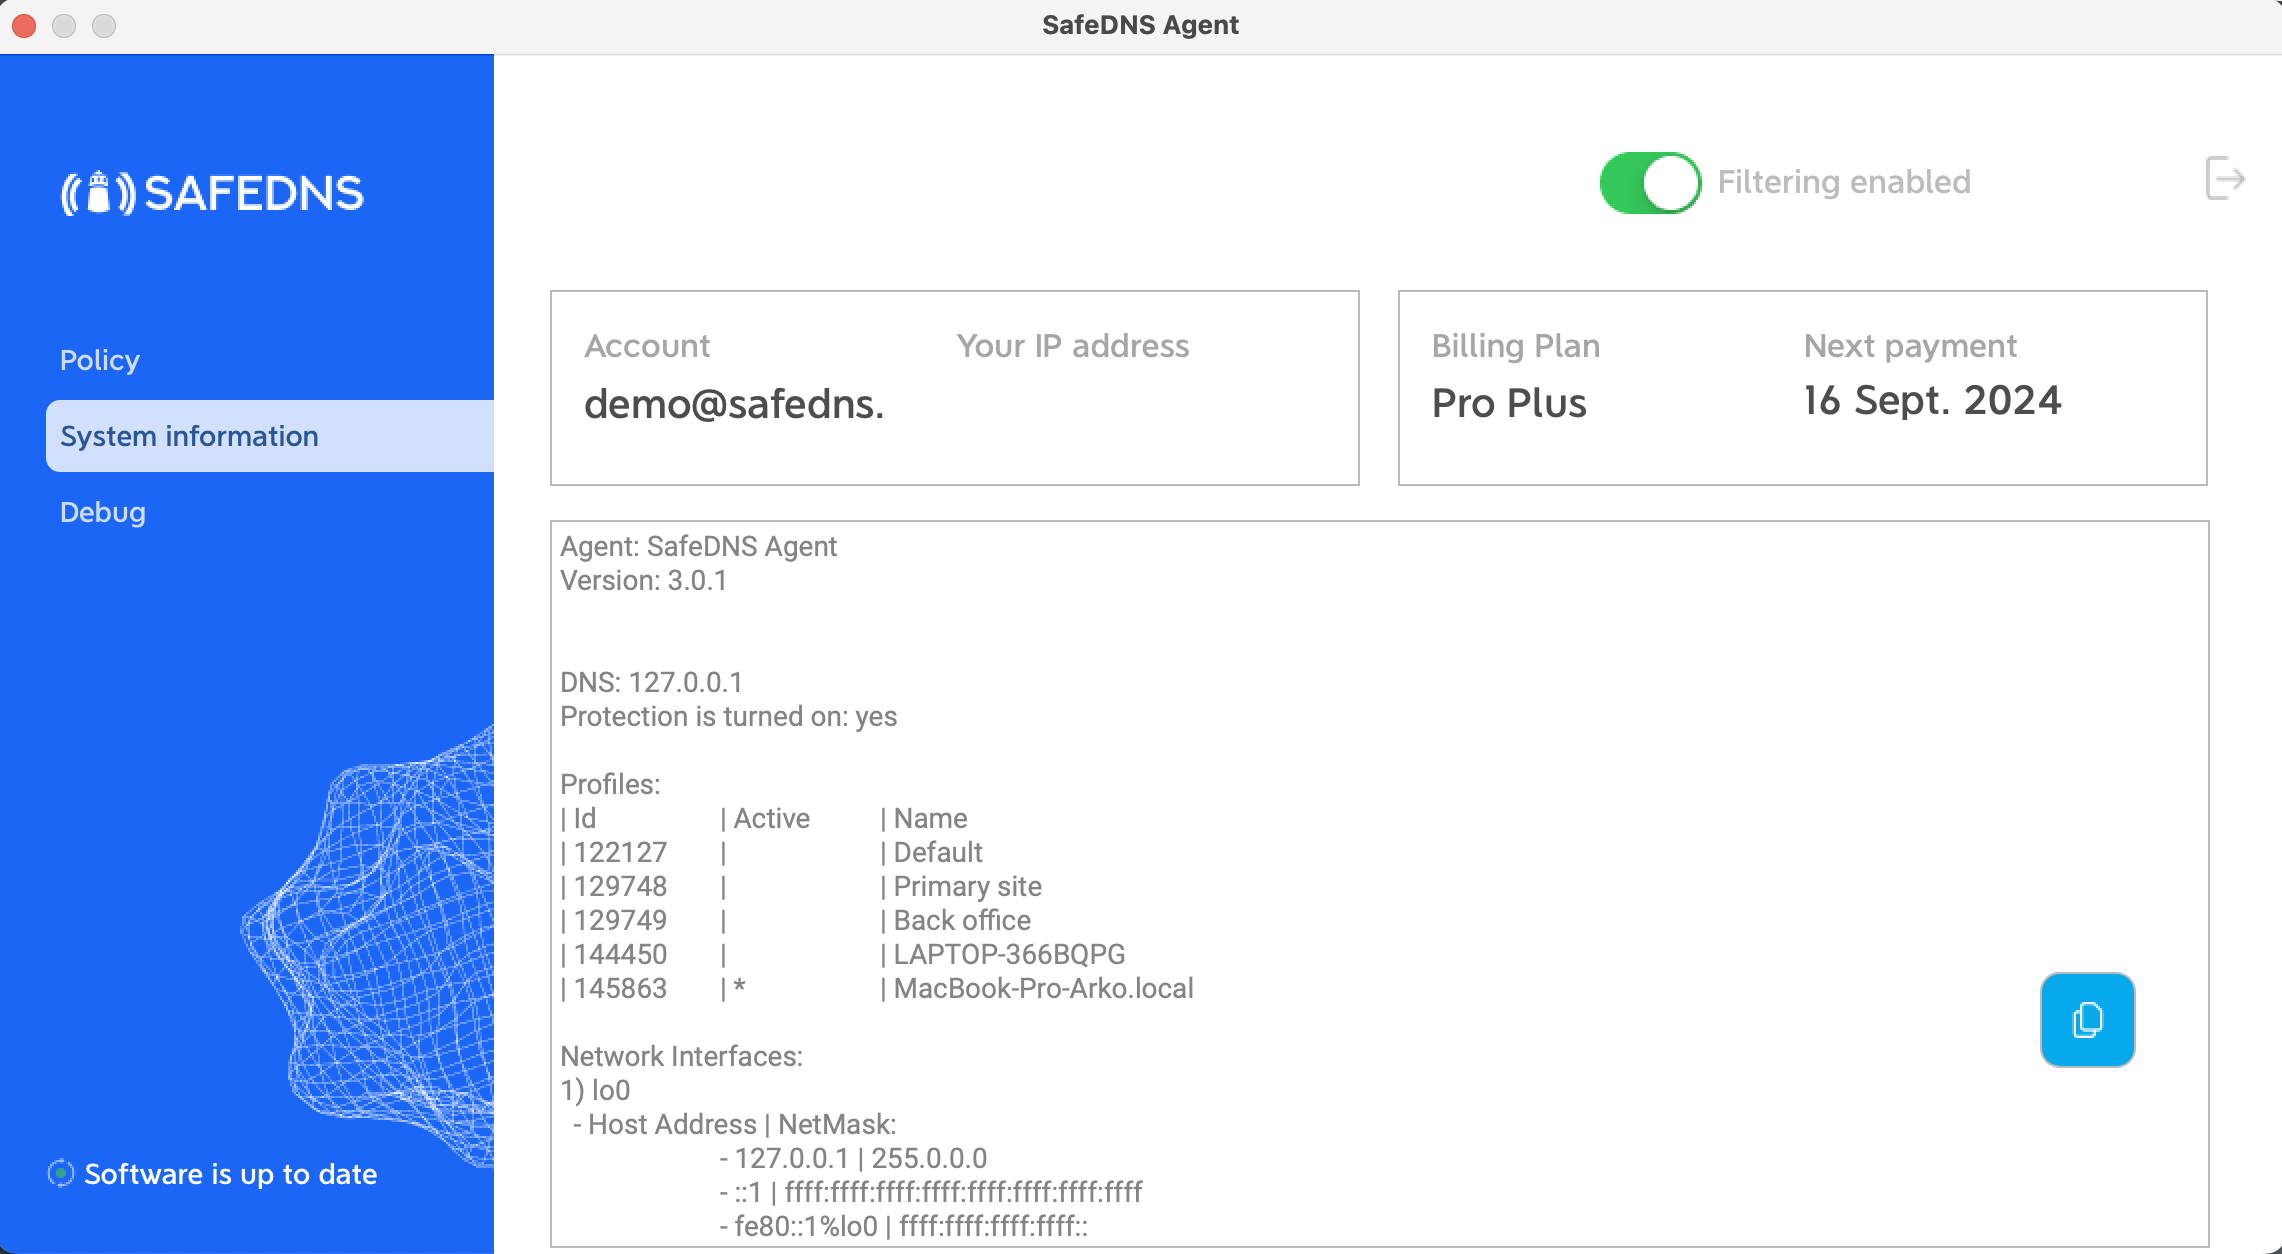
2. The system information menu shows brief information about the Agent, current filtering policies, and network interfaces. The information in this menu can be copied to the clipboard by clicking the "Copy to clipboard" button.

Additional settings
To make sure the Agent was installed correctly, please navigate to the "Settings" tab in the SafeDNS Dashboard and scroll to the bottom.
If you see the record with the Device name and your IP address, it means that the filtering is working.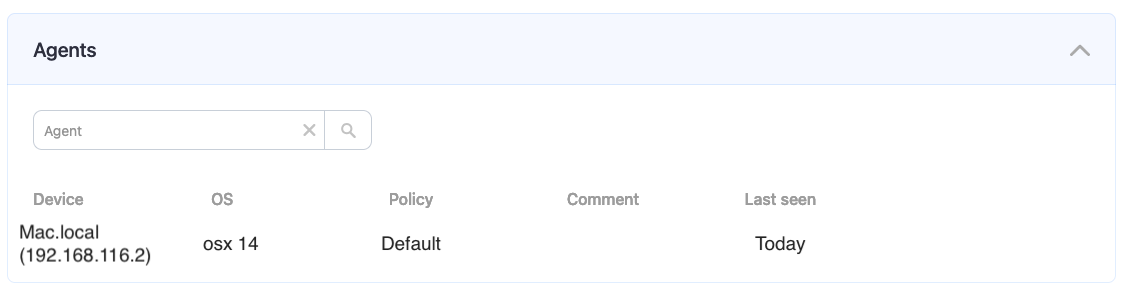
After that, you can adjust the filtering Policy according to your needs. You can select categories to block in the SafeDNS Dashboard under the Categories tab.
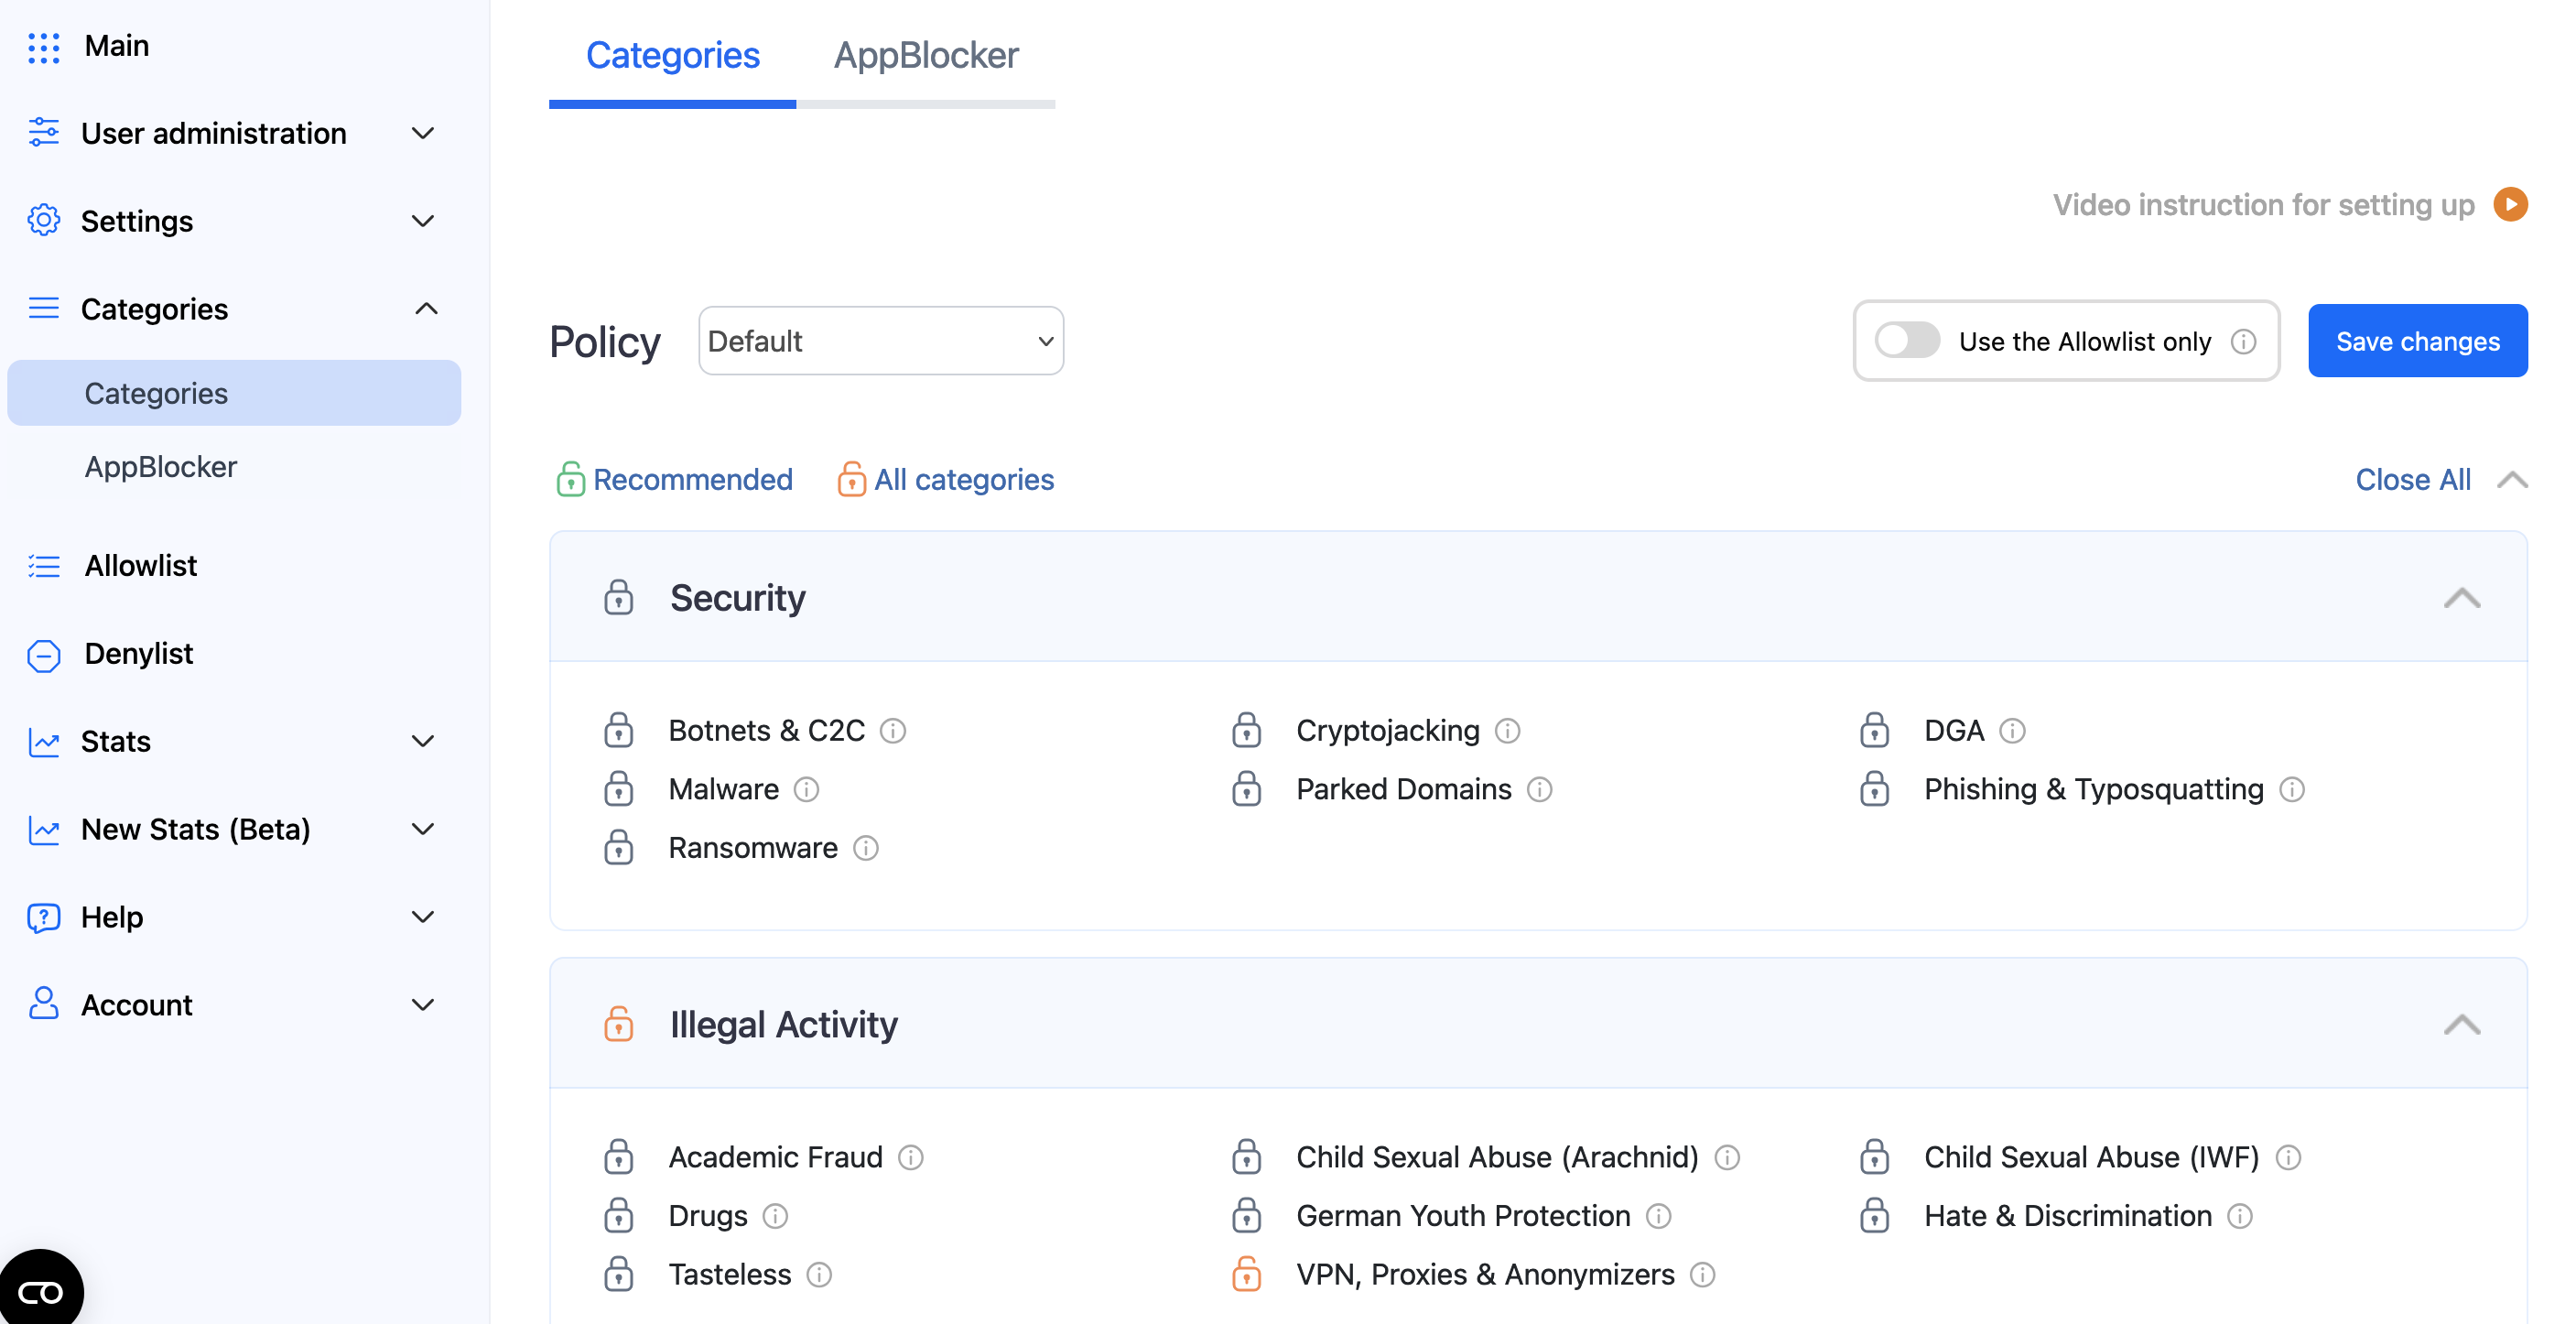
Don't forget to click the "Save changes" button.
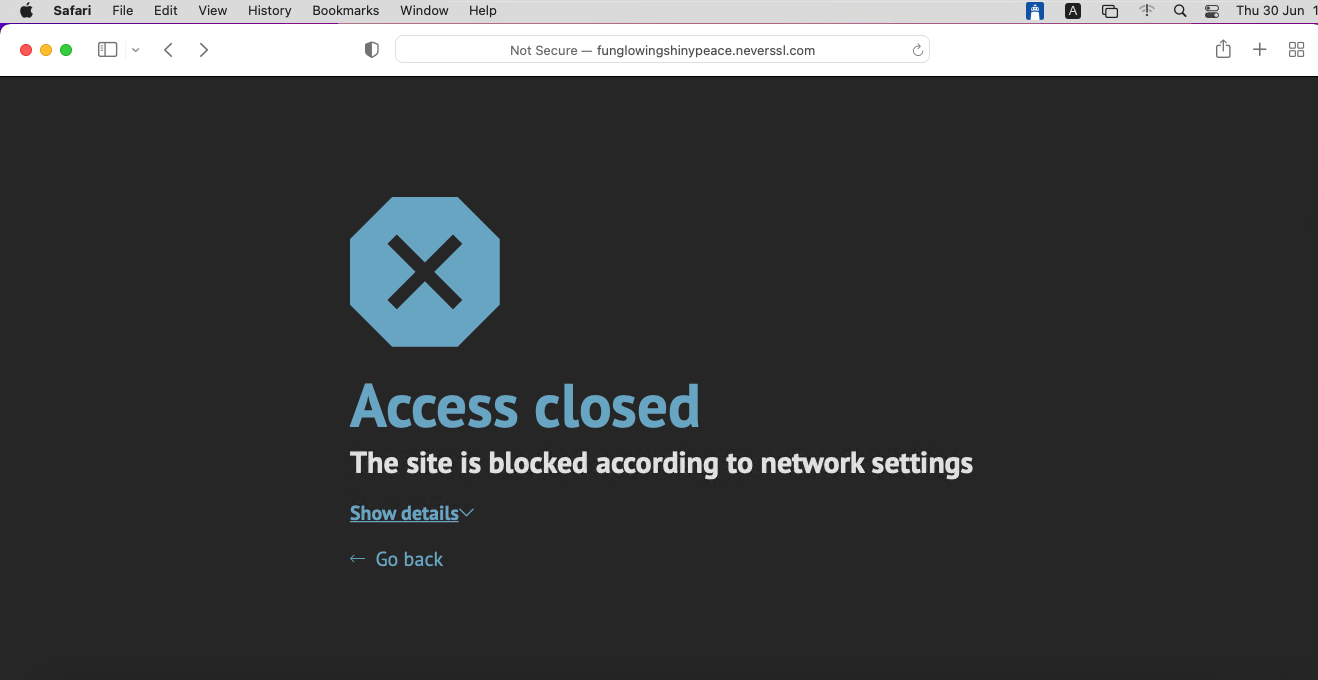
The setup is finished!
A blocked website will display an error message that the Access is closed.
If the filtering doesn't work according to your policy settings, clear the cache of your browser using this guide.
!Please note, that settings take 5-7 minutes to apply.
!Stats and filtering status update hourly.
Uninstallation
To uninstall the Agent from the Mac device, do the following:
- Download the uninstallation script: uninstall.sh
- Run this file.
For MDM users:
- Download the uninstallation script: uninstall.sh
- Navigate to the Scripts tab
- Create a new script and insert the contents of
uninstall.sh - Run the script on target devices