Application deployment using MDM Integrators With File Addition
This guide covers the deployment of the application with the addition of a .mobileConfig, .xml, or .plist files.
Installation example
We are using HexNode Integrator as an example.
1. Obtain a personal authKey (also known as AD authKey) from SafeDNS support. The authKey should be provided as a string (Base64 encoding is done on our side).
Here's an example of such key: MGCjbnYyYWItMTQxNy00MjVlqTkzNjEtMDMzY2I2MTU4YzVi.
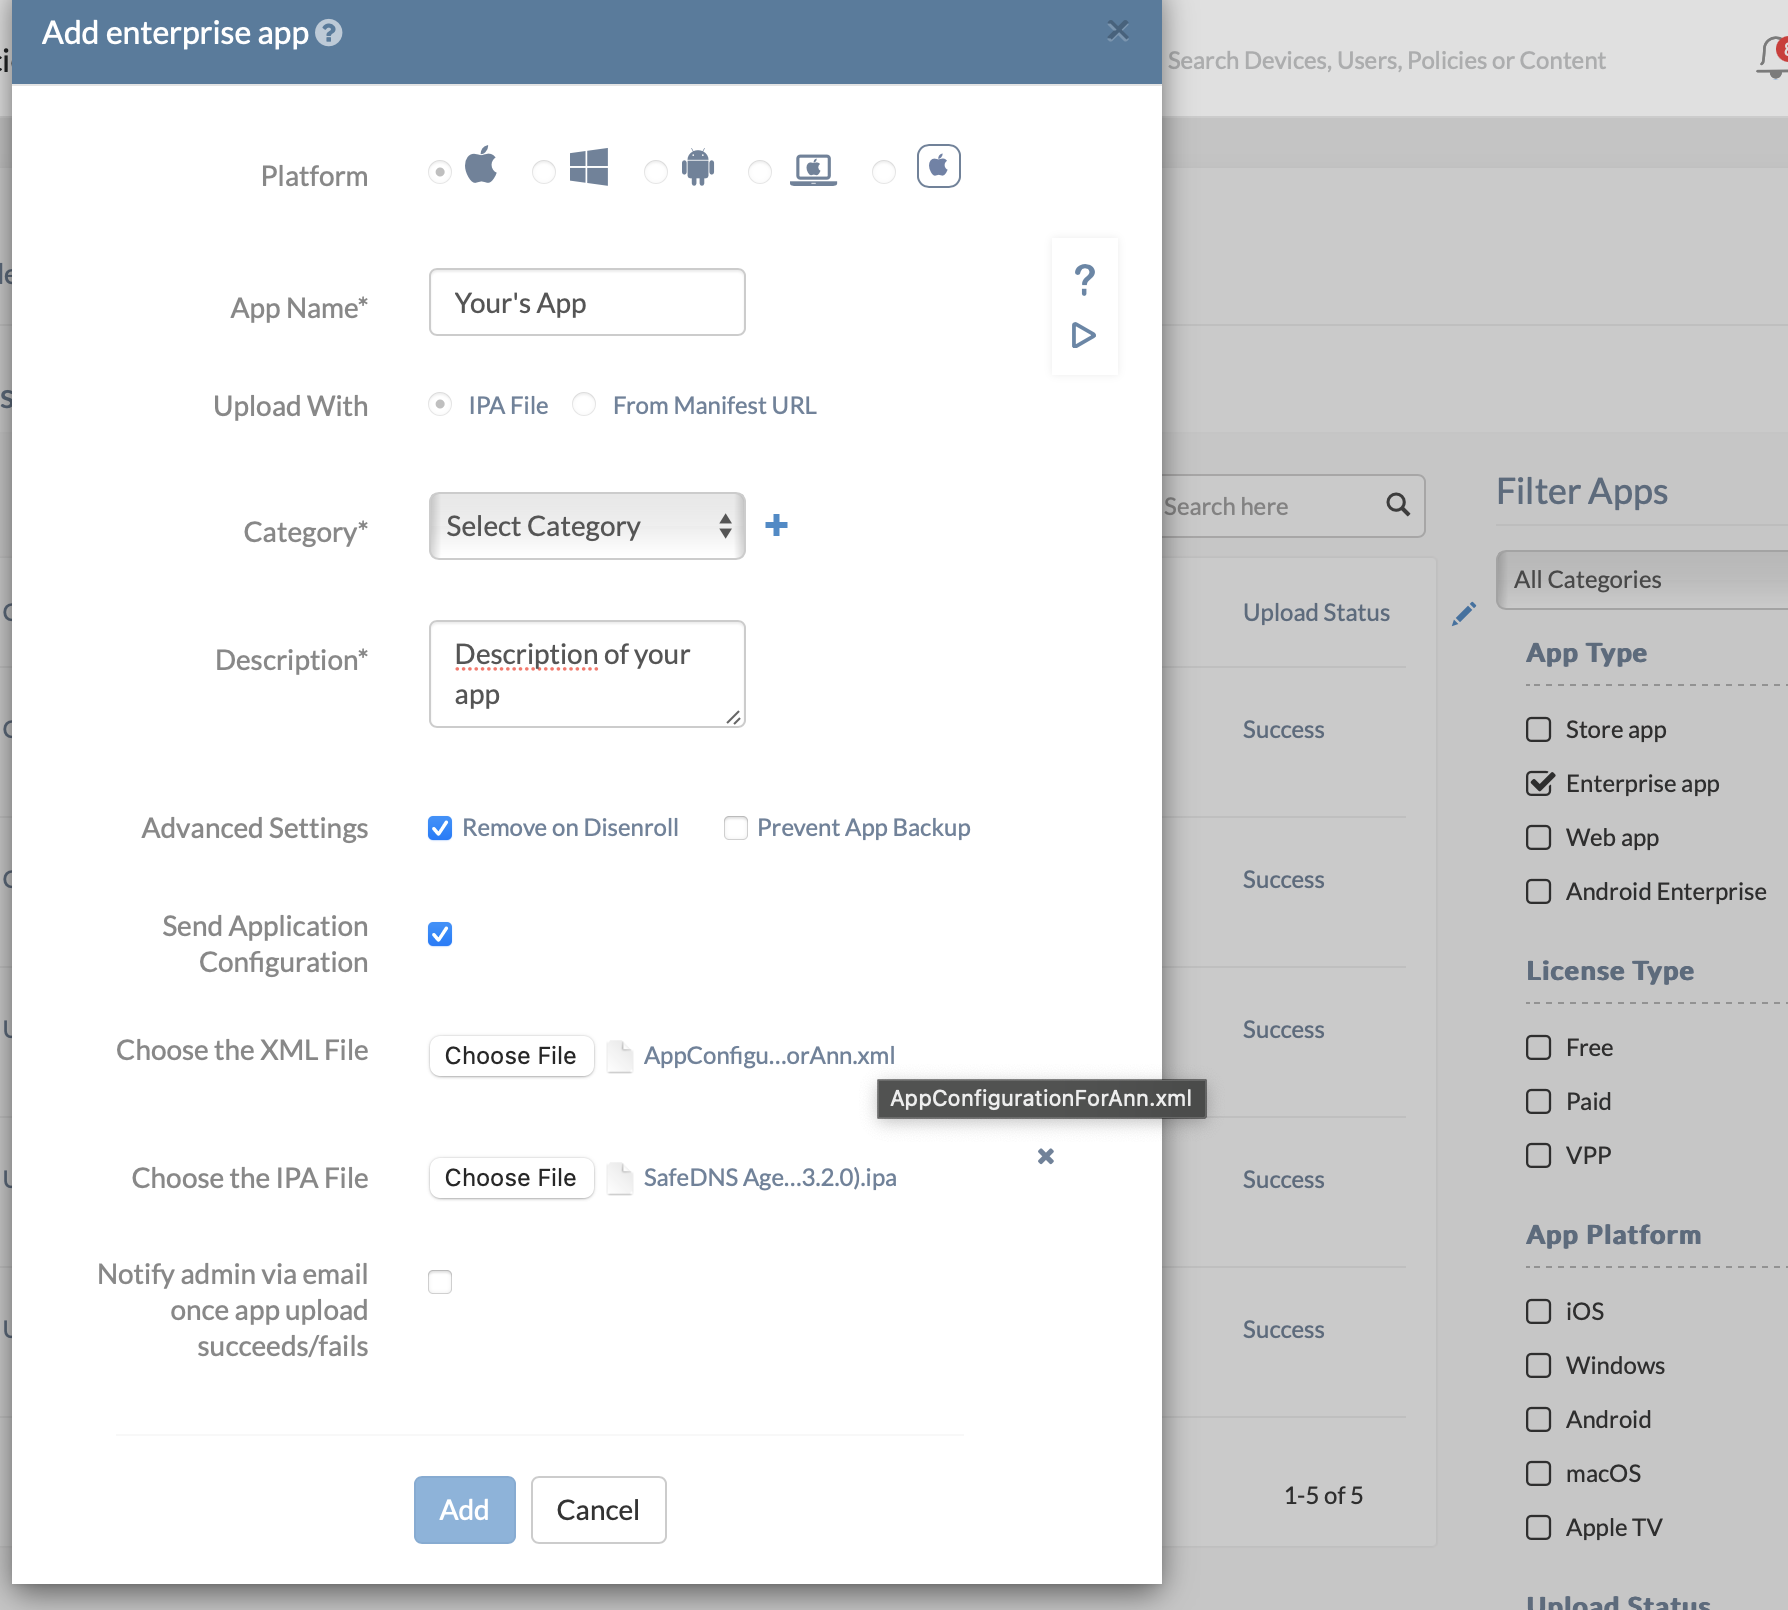
2. Install the SafeDNS Agent Enterprise application in the Integrator's Personal Account by adding the .ipa file to the app catalog as an application for the Enterprise segment.
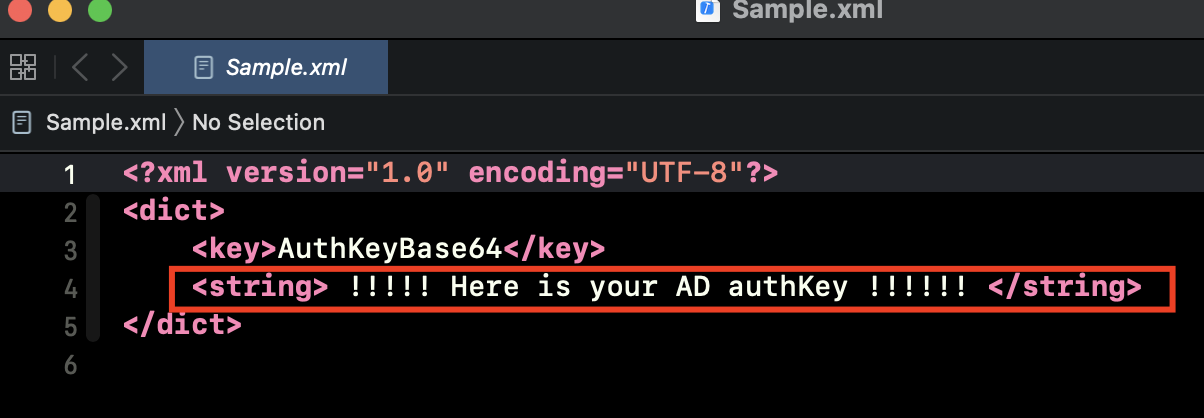
3. Create a configuration file with the key. When creating a configuration file in .xml format, use the Sample.xml template.
In the Sample.xml file, change only one line: replace the highlighted fragment with your AD key.
4. Upload the previously downloaded SafeDNS Agent Enterprise application from the SafeDNS Personal Account in .ipa format. During the application installation, select the option to add the .ipa file and Send Application Configuration. Choose the previously created configuration file with your key, "Sample.xml", and click Add.
After uploading, the application will appear in the Integrator's application catalog in the Enterprise app section.
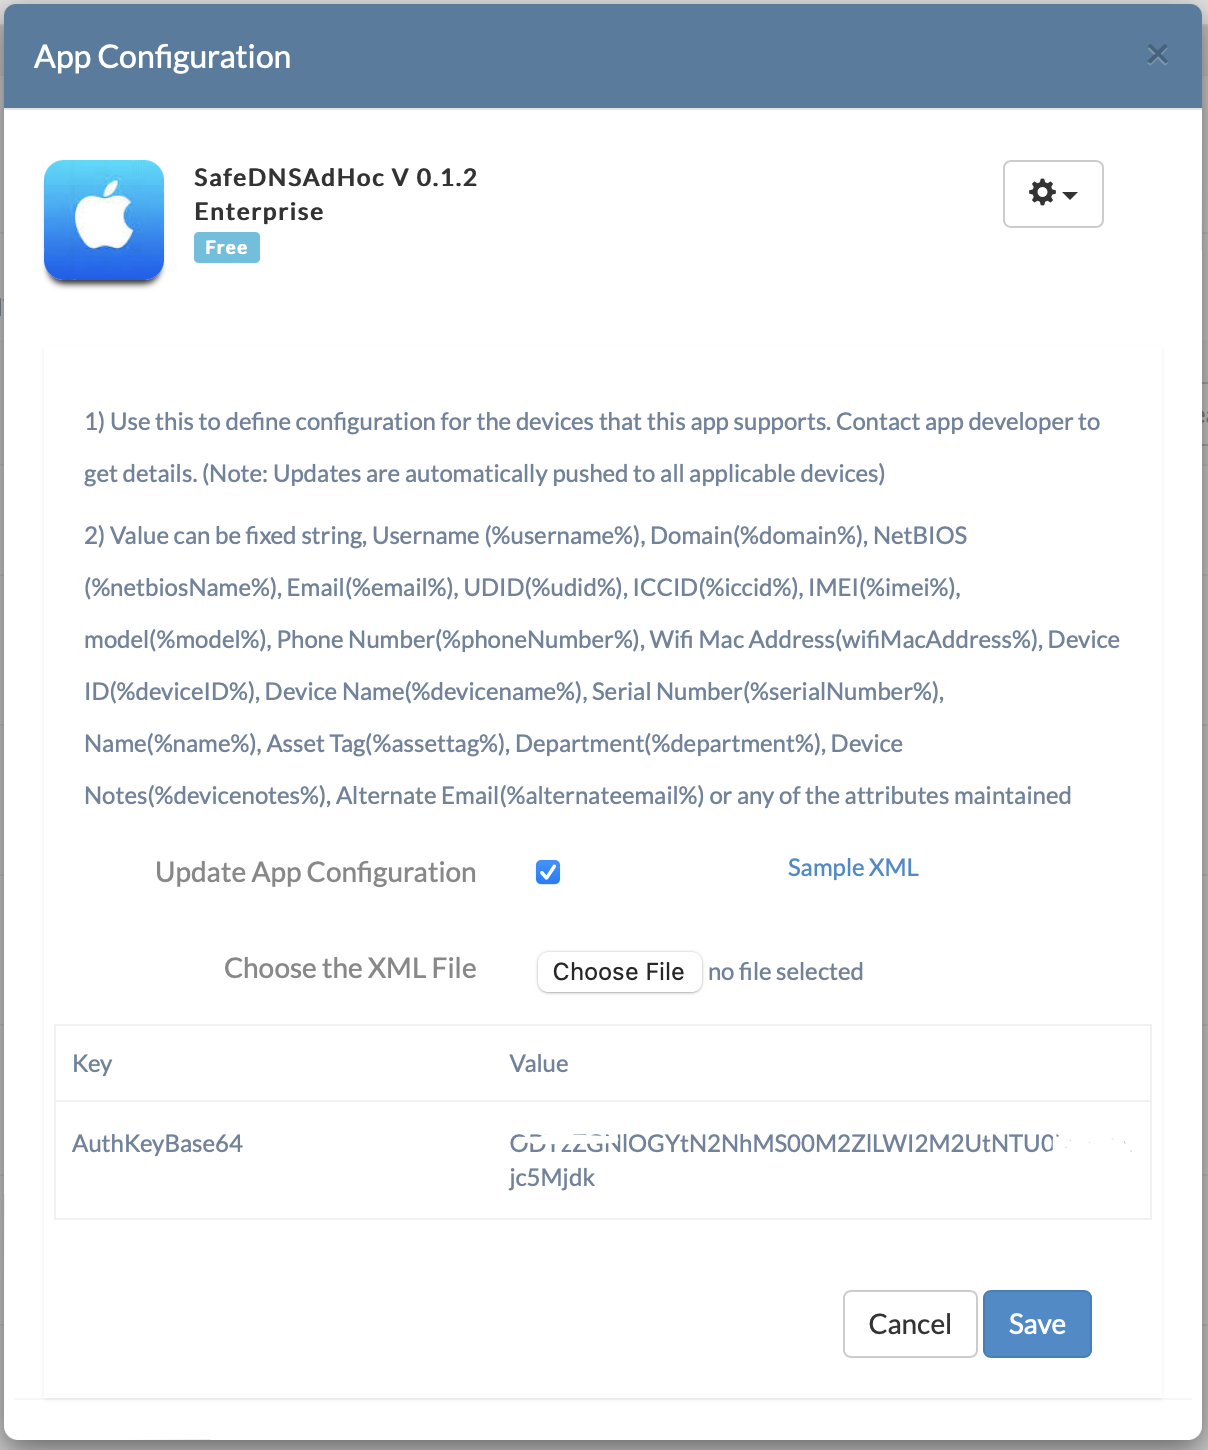
To view the AD key, select the application in the catalog, then navigate to Settings cogwheel > App Configuration.
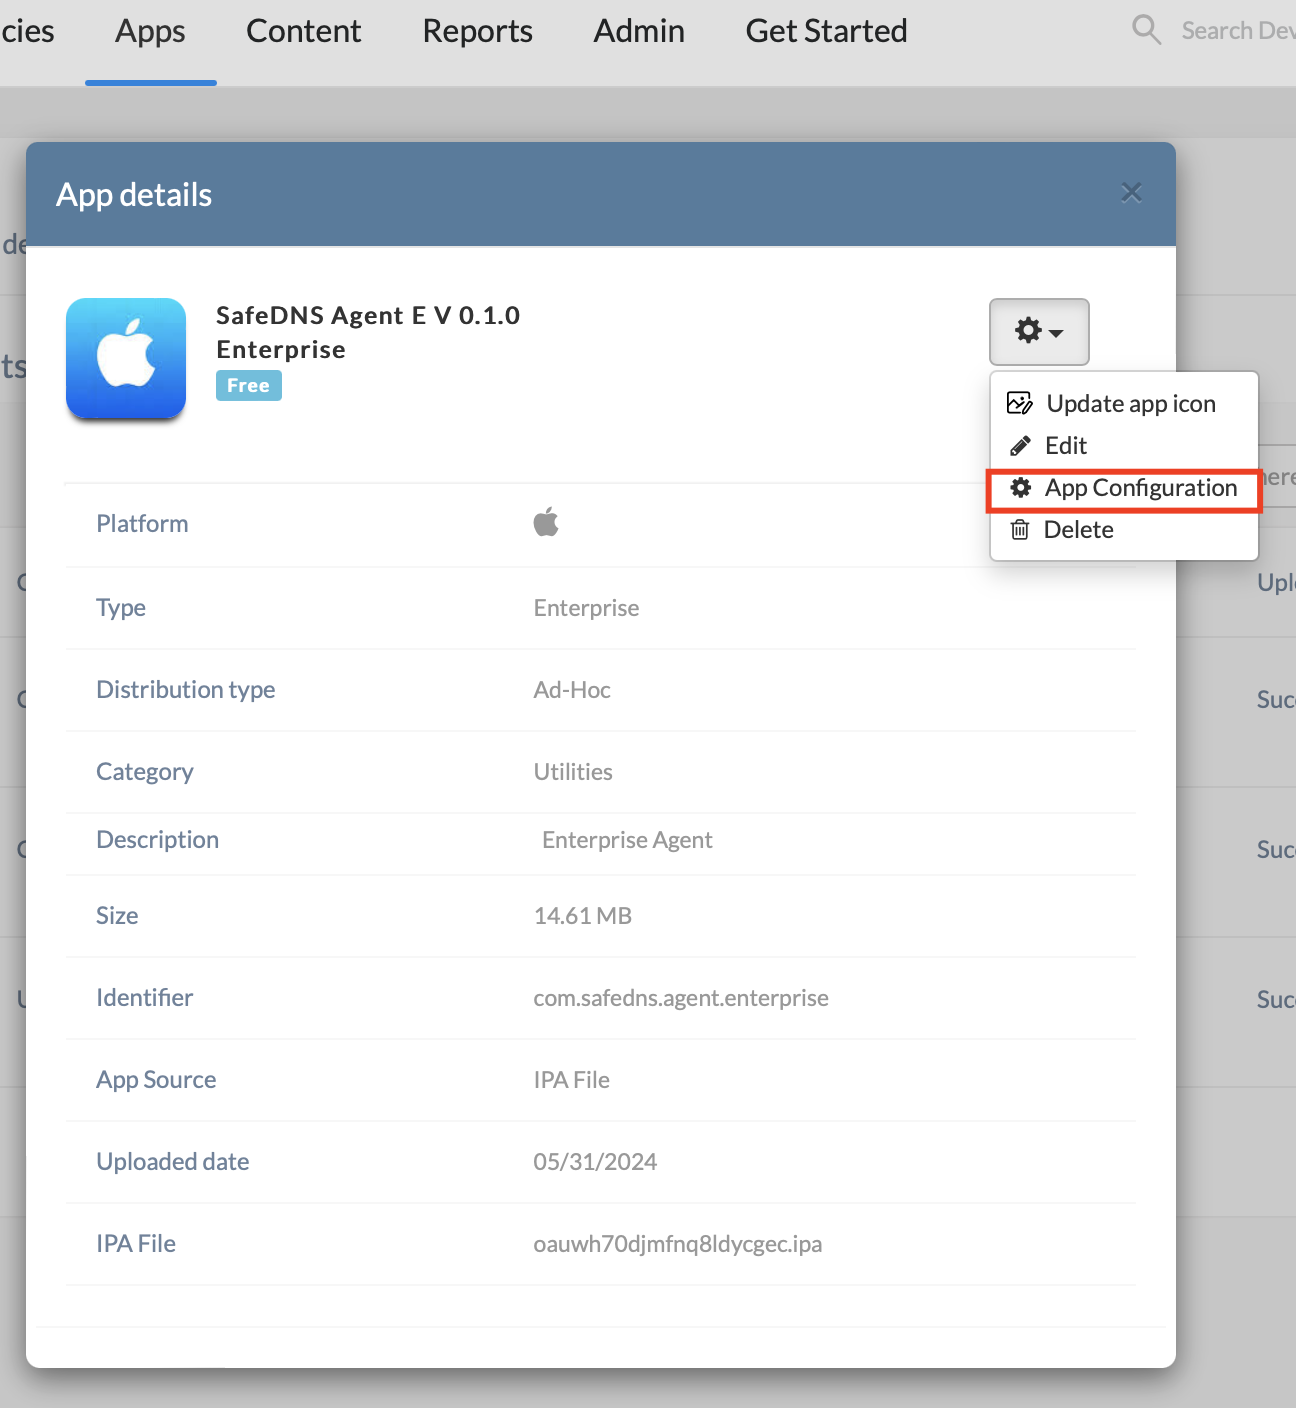
You can also verify the presence of the added configuration file and, if necessary, re-upload it.
5. Continue the application installation for all devices.
- To do that, select all devices in the Management section, then open Settings > Install Application.
- In the drop-down list, find the application using the search and install it.
- After sending the command for mass deployment of the application to the devices, you will need to configure the application after about 1-2 minutes. To do this, simply launch the application and go through all the setup steps until you reach the main screen.
- During the installation, a notification will appear indicating that the authKey has been detected and applied.
- After that, just enter the email of the registered device and proceed to the main screen. The installation is complete.
DNS-Proxy
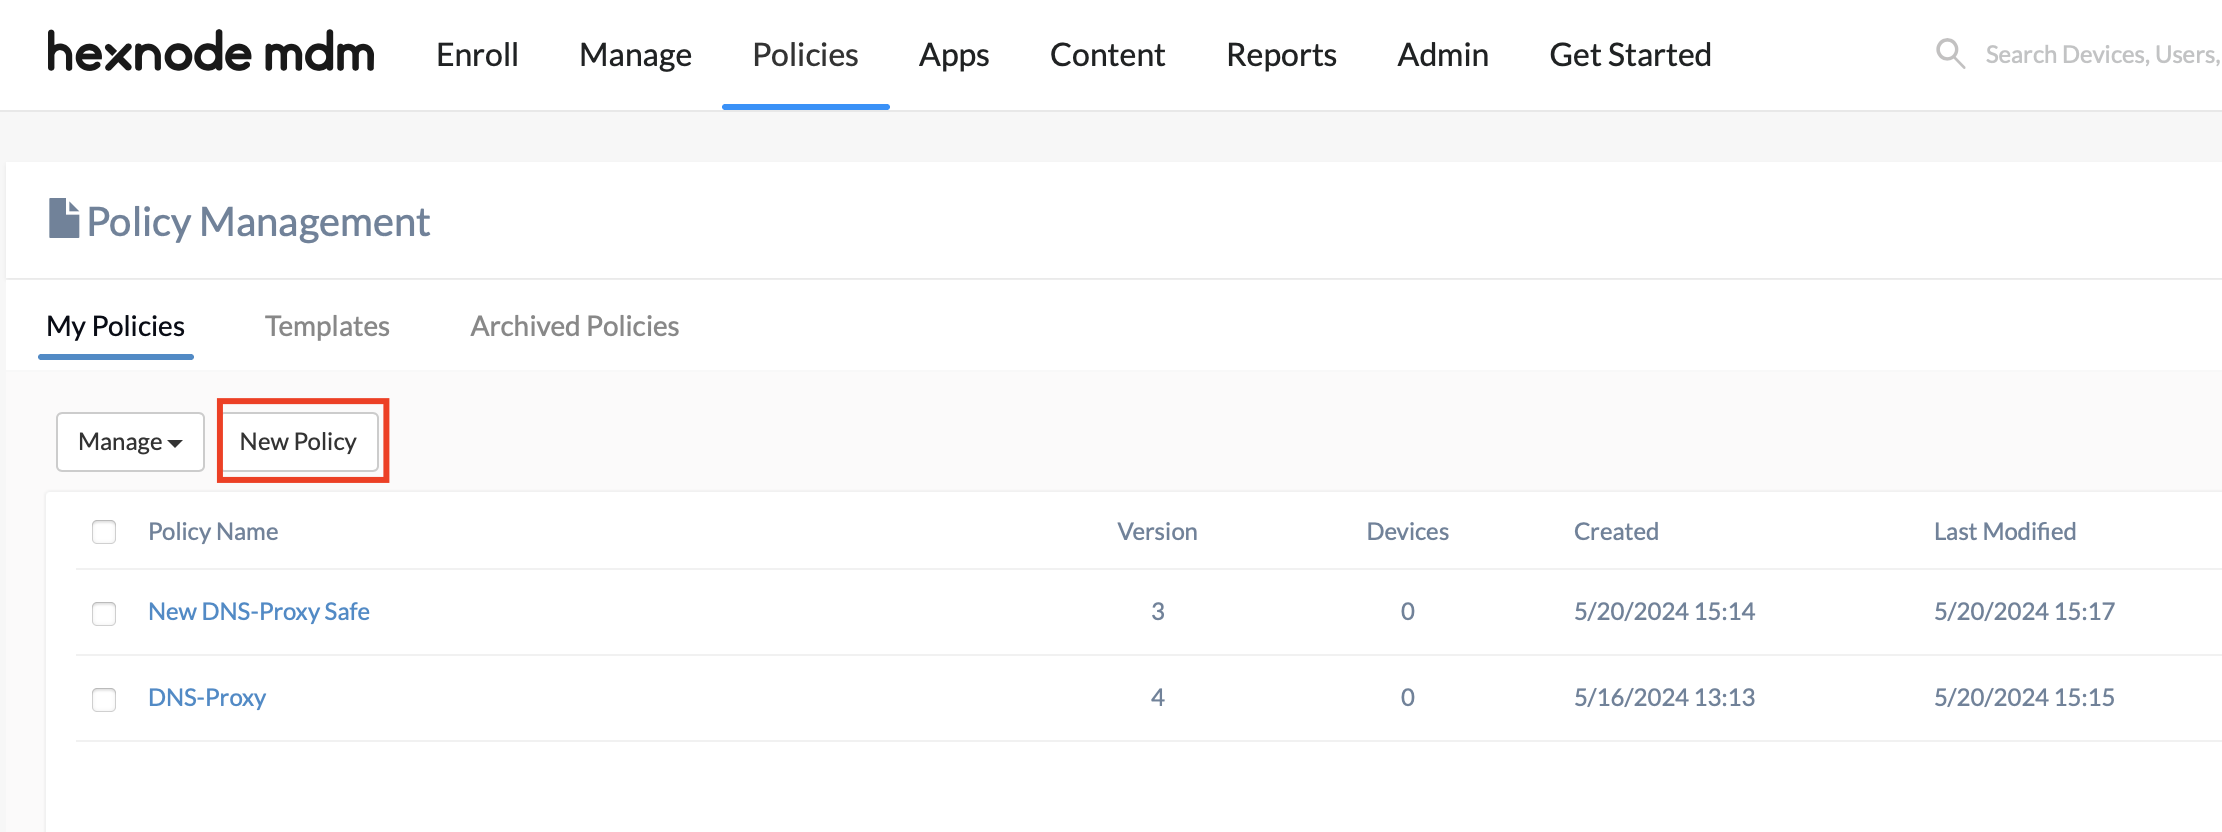
After the application is installed, the DNS-Proxy will not be present on the device; it needs to be added via a Custom Mobile Profile. Navigate to the Policies section on the Integrator's website and select New Policy.
Choose New Blank Policy when selecting a template.

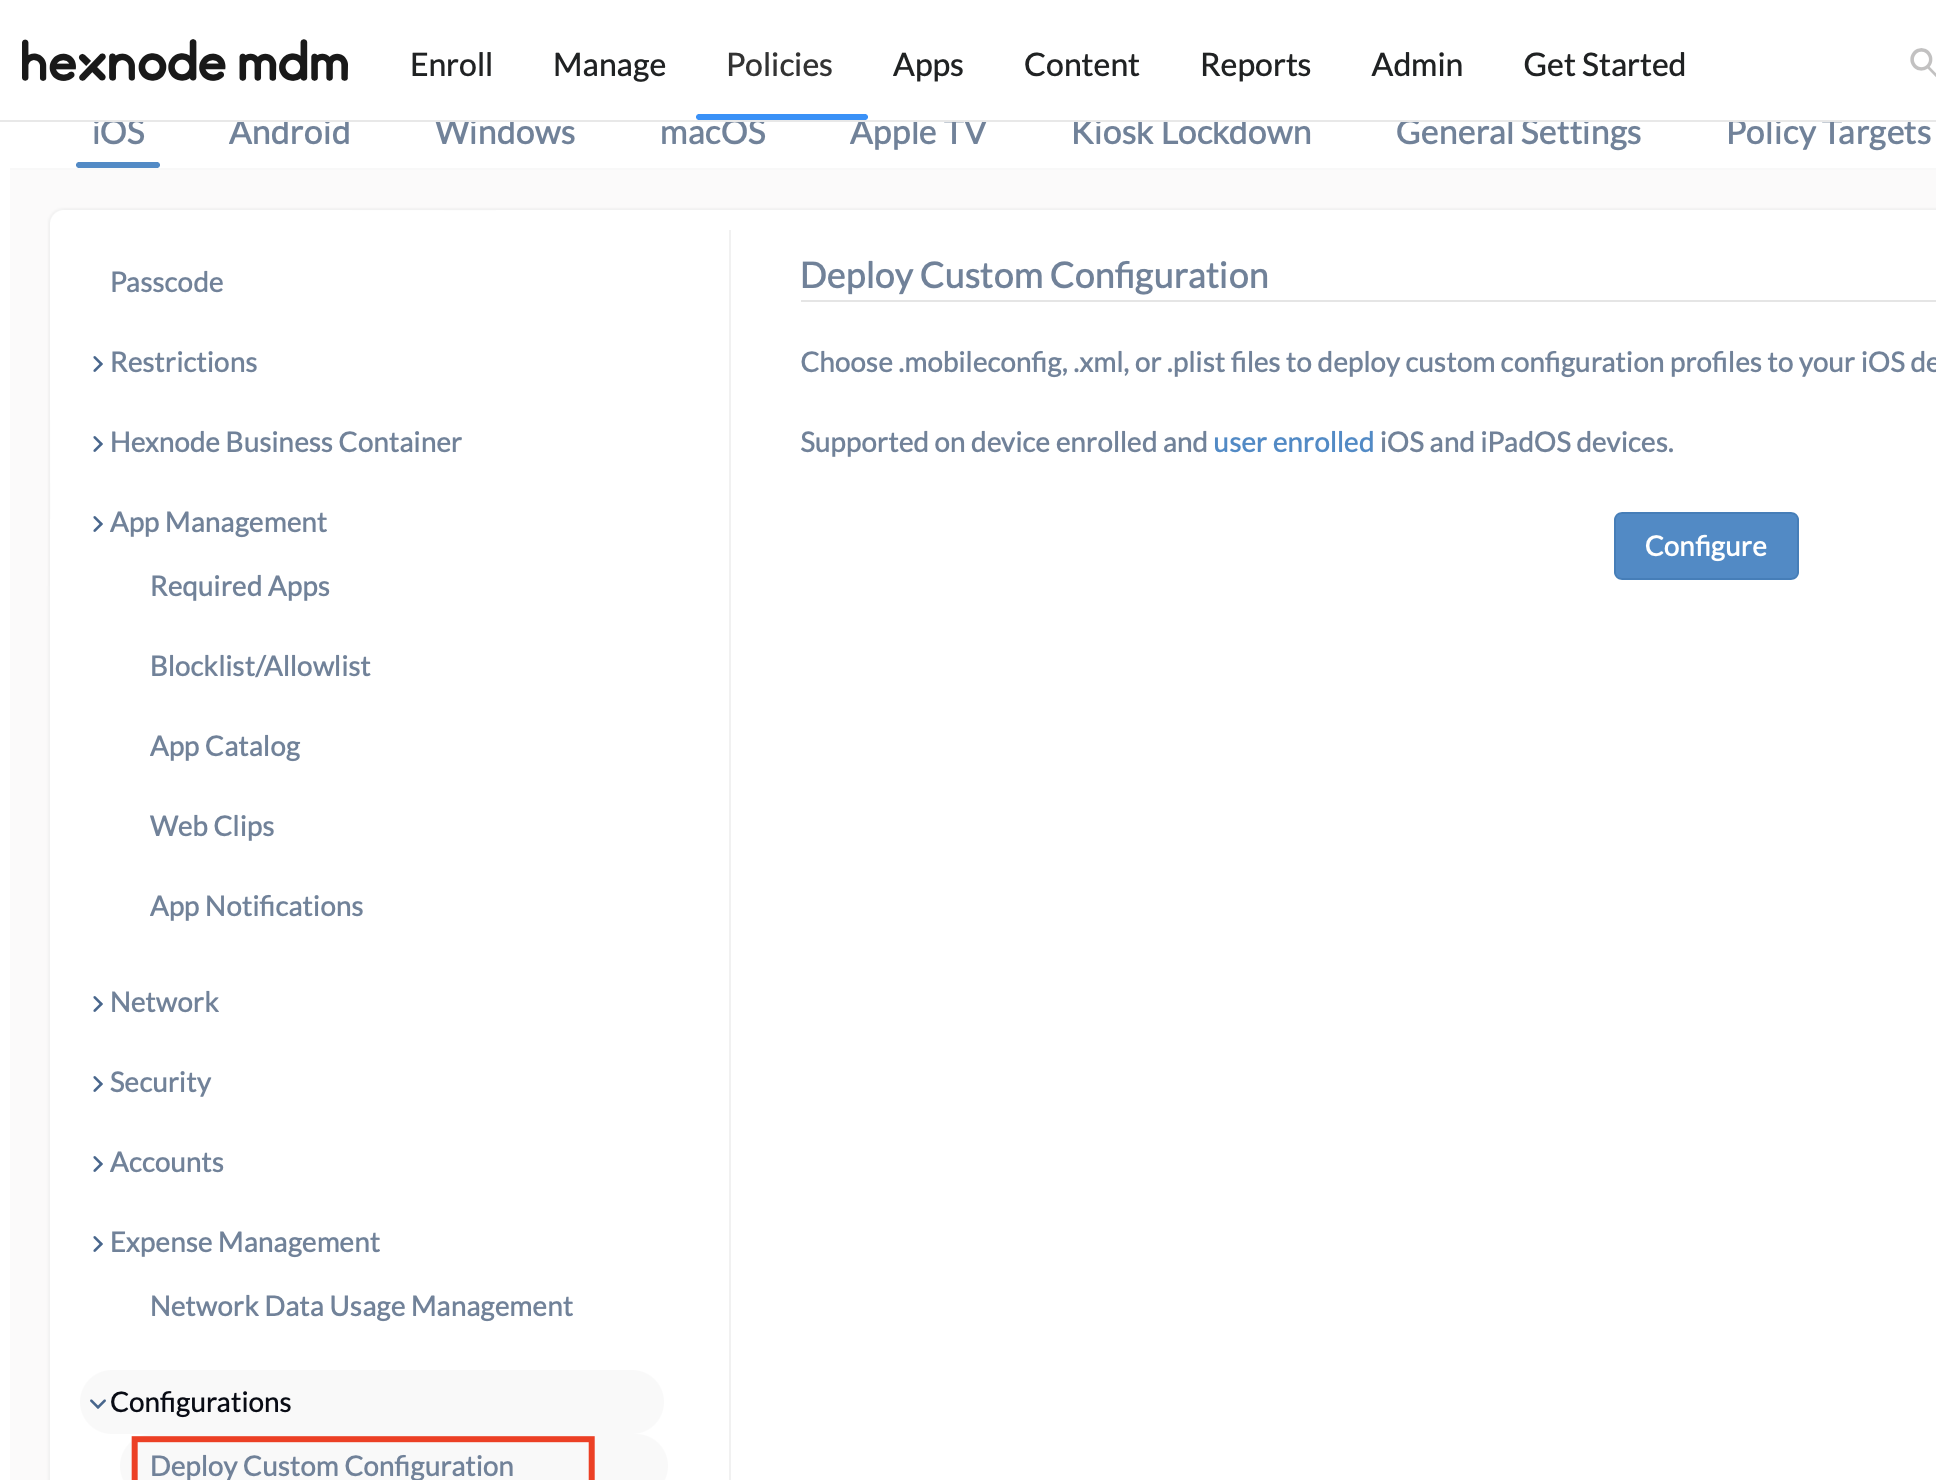
Enter any name and description. On the left side, select Configuration > Deploy Custom Configuration and click Configure.
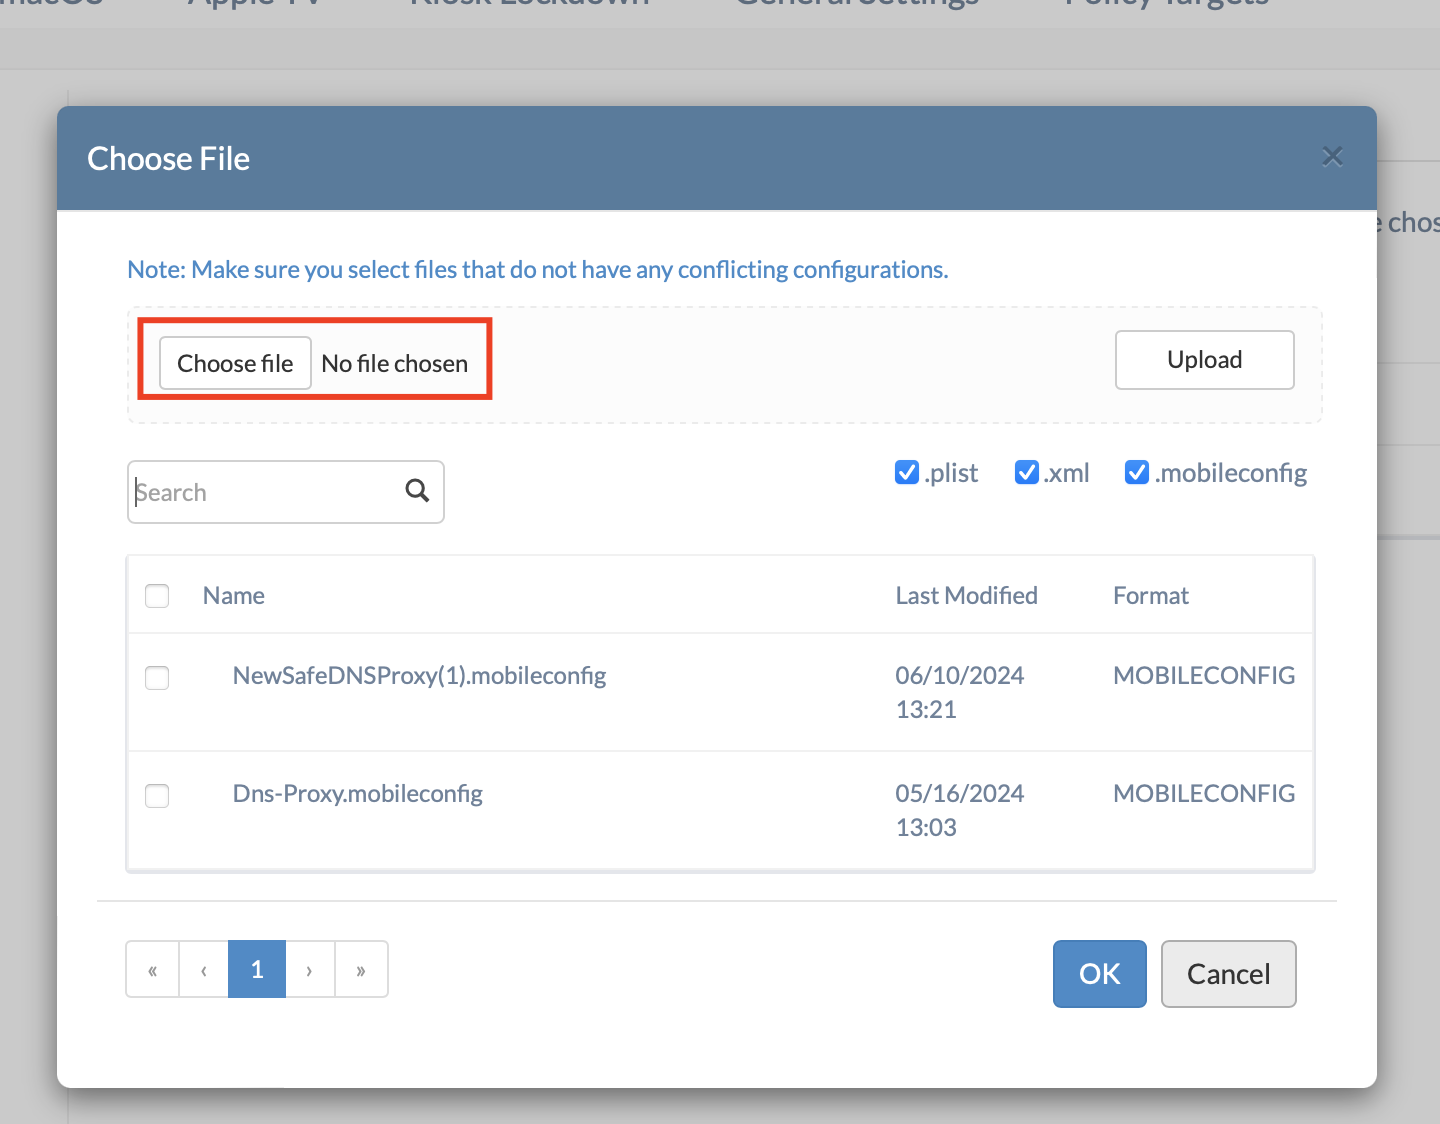
Select Choose File in the opened window, and pick the SafeDNSProxy Enterprise.mobileconfig file.
Please find below the link to the file: SafeDNSProxy_Enterprise.mobileconfig
Do not change anything in the file. It contains configuration settings for the DNS-Proxy.
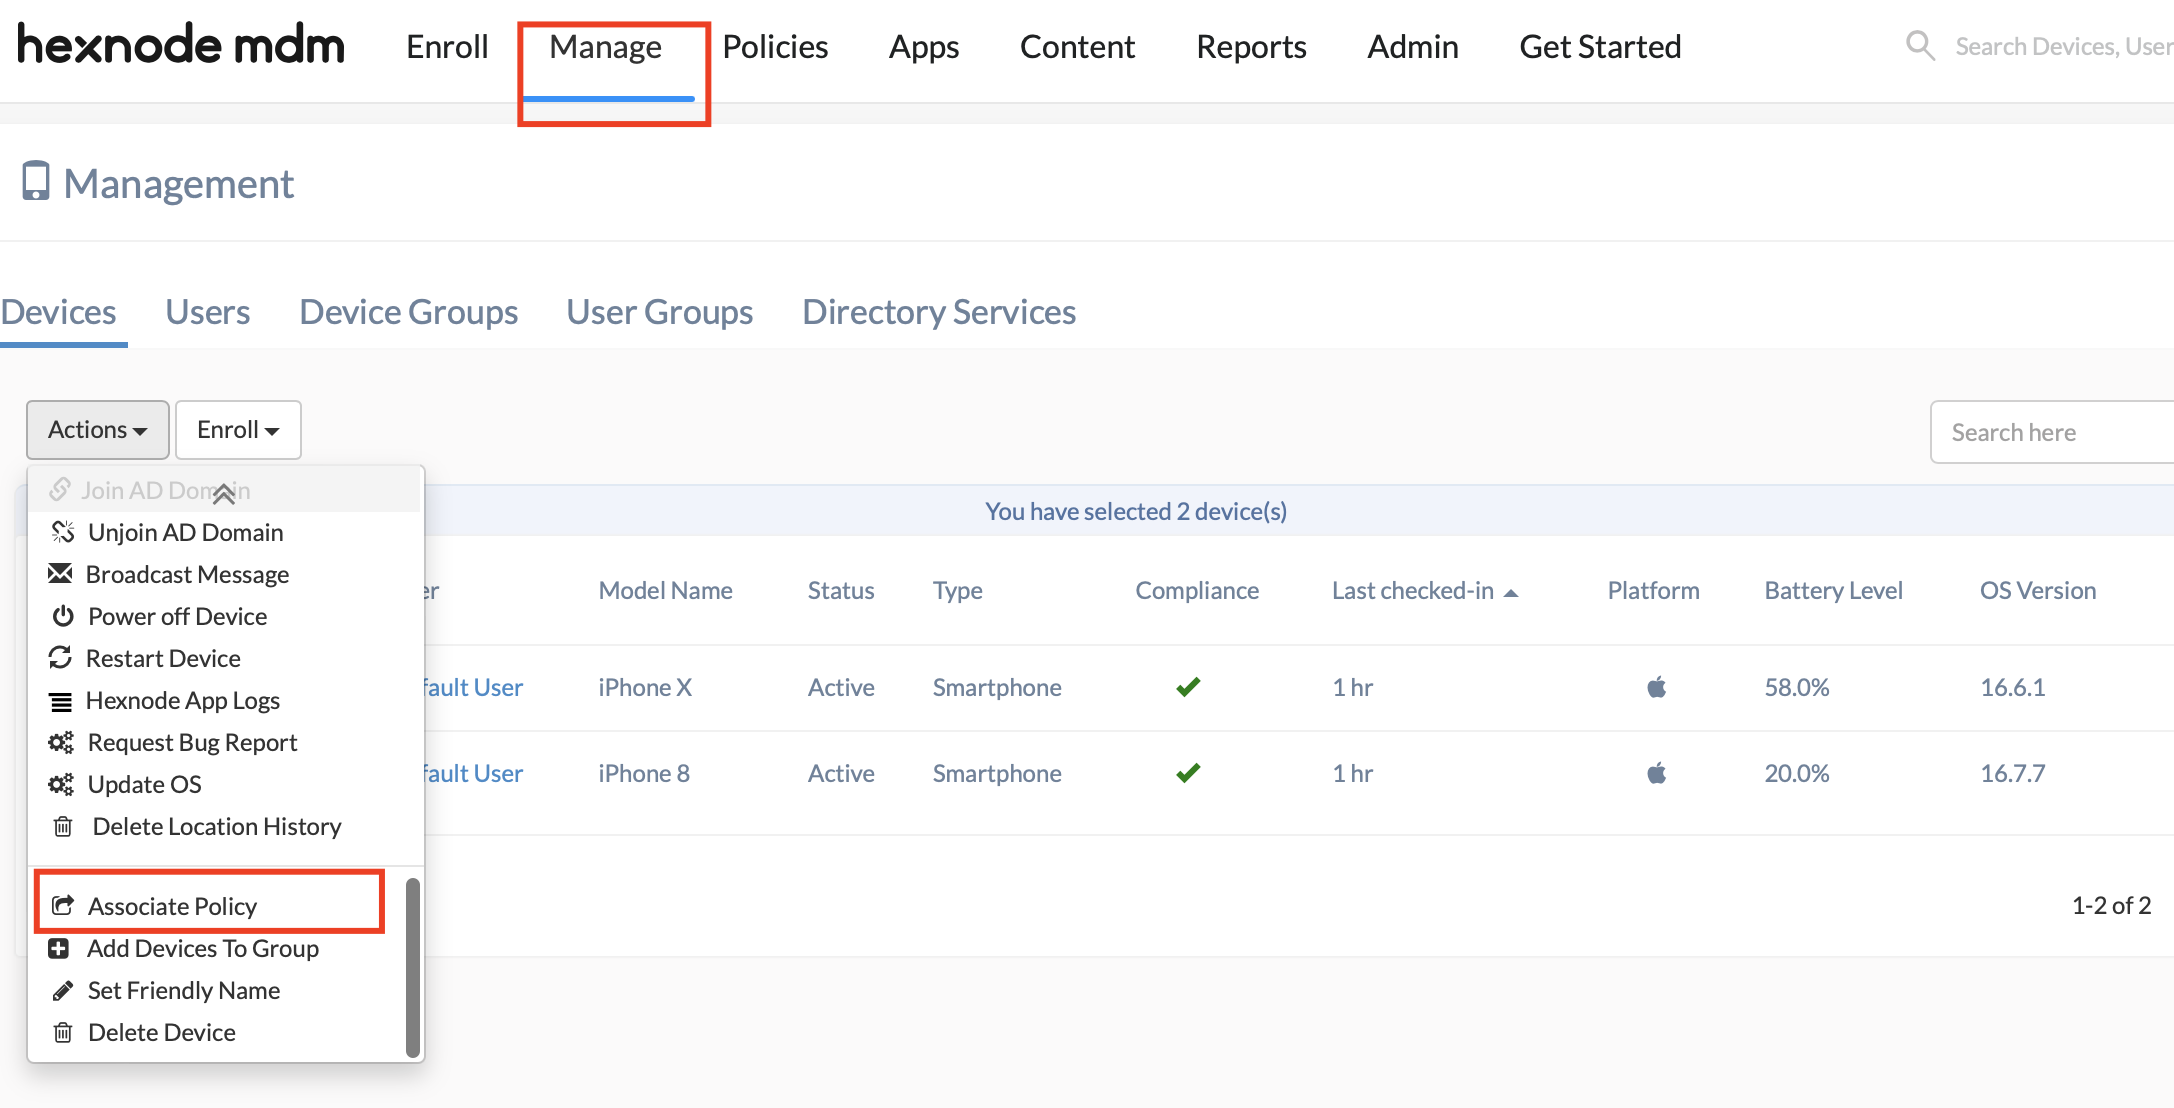
Adding Policy
The application installation and its setup must be completed before proceeding to the next step.
Add the policy to the the devices by associating it through the Associate Policy tab.
Within 1-3 minutes, the policy will be propagated and automatically installed on the devices.
You can check this in Settings > General > VPN and Management > DNS as well as in the Integrator's profile on the devices, where a DNS-Proxy section will appear.
With this, the installation is complete. Filtering will typically start within 10 minutes. The filtering policy and status are automatically updated in the application.