Starlink router setup
DNS configuration with a static IP address
Starlink routers only support static IP addresses. If you have a dynamic IP address you need to update it manually in the dashboard every time it changes.
1. Go to SafeDNS Dashboard > Settings > Devices and copy your IP address to the "IP addresses / DynDNS" box, choose a policy, and click "Add".
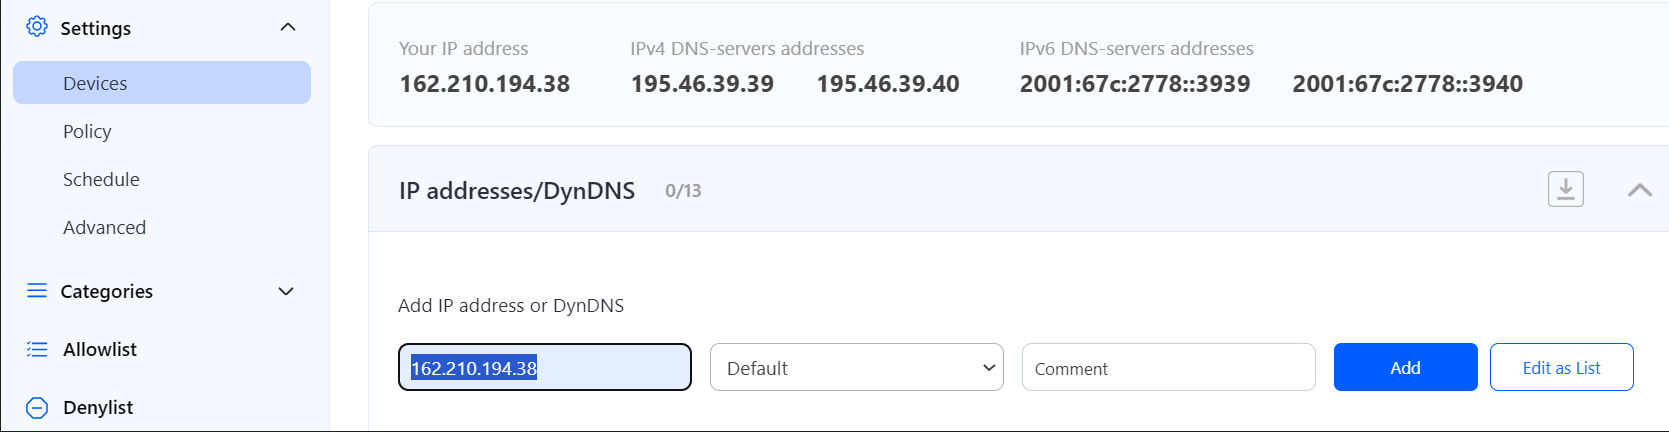
2. Change your router’s DNS servers to SafeDNS addresses - 195.46.39.39 and 195.46.39.40
To change the DNS settings on a Starlink router, follow these steps:
-
Connect to the Starlink Network.
-
Access the Starlink App: Open the Starlink app on your smartphone or tablet. If you don’t have the app, you can download it from the App Store (iOS) or Google Play Store (Android).
-
Log In: Log in to your Starlink account.
-
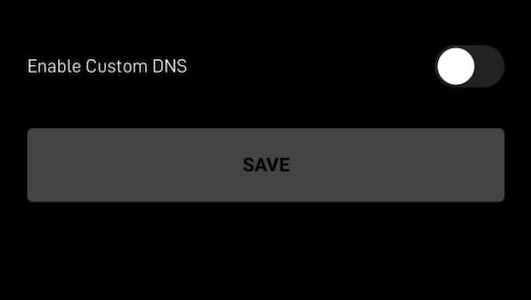
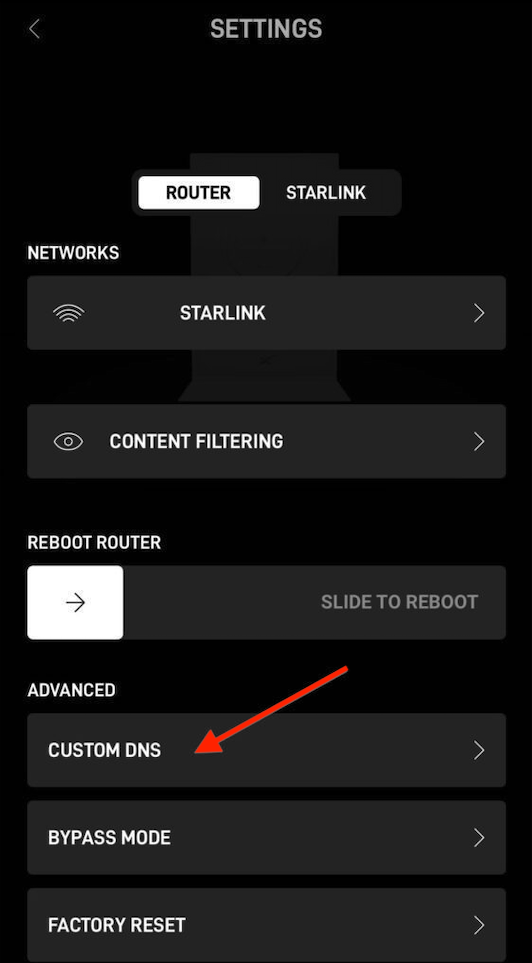
Navigate to SETTINGS > Select CUSTOM DNS.

- Enable Custom DNS. Toggle 'Enable Custom DNS' to On.
-
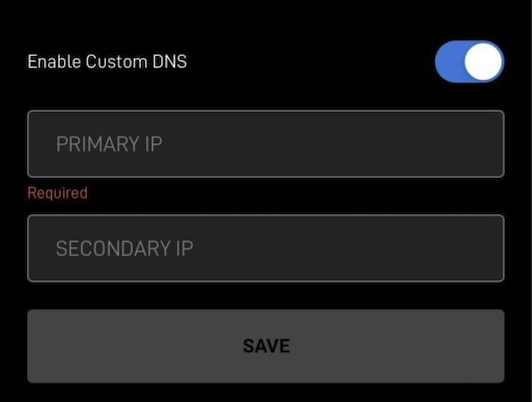
Enter Custom DNS: Indicate 195.46.39.39 as primary and 195.46.39.40 as secondary IP addresses.
-
Save Changes.


Please note that settings take 5-7 minutes to apply.
Stats and filtering status update every 10 minutes.